Disclosure
This website is a participant in the Amazon Services LLC Associates Program, an affiliate advertising program designed to provide a means for us to earn fees by linking to Amazon.com and affiliated sites.
You might wonder if you can pop off those little metal shields on your skate bearings to clean them. This is a common question for skaters who want to keep their wheels rolling fast and smooth.
Many skaters are afraid to remove the shields, thinking they will break the bearing. The truth is, removing them is often necessary for a deep clean, but you must be gentle to avoid bending the shield.
The Shield Cleaning Frustration Ends Here
Every time you pop off those rubber shields to clean your bearings, you risk losing tiny parts or damaging the seal. It’s a tedious chore that often leads to dirt getting trapped inside anyway, making your skates feel sluggish. The Naivskb Precision 608 Bearings solve this by being pre-shielded and sealed for life, so you never have to remove a shield to clean them again.
Skip the shield hassle and grab these for worry-free rolling: Naivskb Precision 608 Bearings 8mm 16 Pack Neon Purple
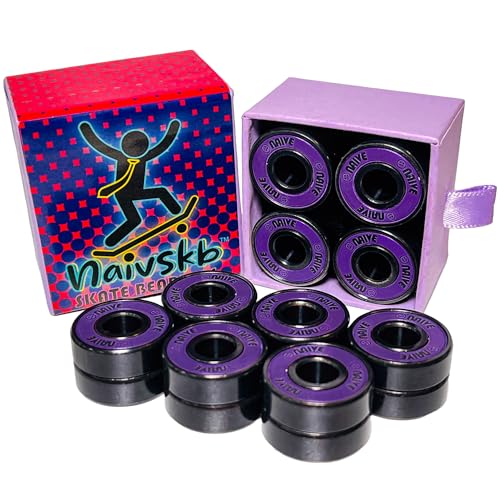
- ALL SKATES FIT: Set of 16 precision 608 bearings, 8x22x7mm size, 22mm outer...
- PREMIUM MATERIALS: Fabricated with high-quality chrome bearing steel, with...
- SKATE LONGER: Black oxidation surface, sleekness, easy lubrication, built...
Why Learning to Remove Bearing Shields Saves You Money and Frustration
I remember the first time my son came home from the skate park with a wheel that sounded like a broken toy. He was frustrated, and I was ready to buy a whole new set of bearings.
That experience taught me a hard lesson. If you don’t know how to clean inside your bearings, you end up throwing away perfectly good parts.
The Hidden Cost of Dirty Bearings
Dirty bearings don’t just slow you down. They actually damage the tiny metal balls inside over time.
In my experience, a set of quality bearings can last for years if you clean them properly. But if you let the dirt and grit sit in there, you will be buying replacements every few months.
I have seen skaters spend over fifty dollars on new bearings when all they really needed was a ten-minute cleaning session.
The “Scratching Sound” Panic
We have all felt that sinking feeling when our wheels start making a grinding noise. You think your gear is ruined.
That sound is usually just dirt and sand stuck between the shield and the bearing’s internal race. It is not a death sentence for your bearings.
Once I learned to gently pop off that shield and rinse the grit out, the silence was pure relief. My kids stopped complaining, and I stopped spending money.
What Happens When You Ignore the Problem
If you never remove the shields, the dirt gets packed in tighter and tighter. This creates friction that wears down the bearing walls.
I have pulled apart bearings that were so gummed up with old grease and sand that the balls barely moved. That is a total loss.
Taking off the shield to clean is the difference between a bearing that lasts one season and one that lasts three seasons.
How to Safely Remove Bearing Shields Without Damaging Them
I used to think I needed a special tool to get those shields off. Honestly, I was terrified of bending the metal and ruining the whole bearing.
After a few mistakes, I figured out a simple method that works every time. You do not need expensive equipment, just a steady hand.
The Right Tool for the Job
Do not use a flathead screwdriver. I learned this the hard way when I scratched the shield and created a sharp edge that cut my finger.
A sewing needle or a safety pin is much better. You want something thin enough to slide under the edge of the shield without prying too hard.
I keep a small sewing kit in my skate bag now. It takes up no space and saves me from bloody fingers.
My Step-by-Step Process
First, I find the small gap between the shield and the bearing’s outer ring. You will see a tiny slit where the shield meets the metal.
I gently push the tip of the needle into that gap and lift upward just a little. The shield pops off with a soft click.
Work your way around the edge slowly. If you rush, you will bend the shield and it will never sit flat again.
What to Do If the Shield Is Stuck
Sometimes the dirt has glued the shield in place. Do not force it or you will break the retaining clip underneath.
I soak the whole bearing in a small dish of isopropyl alcohol for ten minutes first. That loosens the grime and makes the shield easier to remove.
After cleaning, I always dry the shields completely before snapping them back on. Wet shields trap new dirt instantly.
You know that sinking feeling when your kid’s wheels sound like a coffee grinder and you just know another skate session is ruined. That is exactly why what I grabbed for my kids made all the difference.
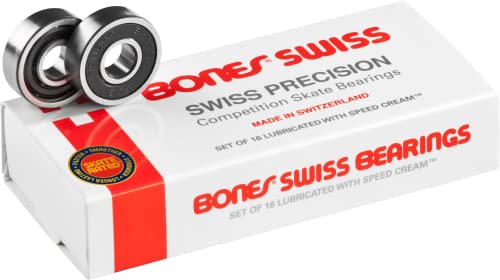
- Single, removable, non-contact rubber shield allows easy cleaning and low...
- High speed nylon ball retainer provides added strength and speed.
- Pre-lubricated with Speed Cream racing lubricant
What I Look for When Buying Skate Bearings Now
After ruining a few cheap sets, I learned what actually matters. You do not need to be an engineer to pick good bearings.
Look for Removable Shields from the Start
Some bearings have shields that are permanently pressed in. You cannot pop them off no matter how hard you try.
I always check the product description for “removable rubber shields” or “non-contact metal shields.” That tells me I can clean them later.
If the listing does not say, I move on. A bearing you cannot clean is a bearing you will throw away.
Check the Shield Material
Rubber shields are easier to remove than metal ones. I prefer rubber for my kids’ skates because they flex without bending.
Metal shields look tougher, but they dent easily if you pry too hard. Once dented, they let dirt in constantly.
For my own skates, I use metal shields because I am careful. For the kids, rubber all the way.
Pay Attention to the Grease Amount
Bearings come with different amounts of grease inside. More grease means slower speed but more protection from dirt.
I buy lightly greased bearings for indoor skating and heavily greased ones for outdoor use. The heavy grease keeps sand from getting into the balls.
You can always remove excess grease during cleaning. But you cannot add protection if the bearing came with too little.
The Mistake I See People Make With Bearing Shields
The biggest error I see is people removing only one shield instead of both. They think cleaning one side is enough.
Dirt gets in from both sides of the bearing. If you only clean one side, the grime on the other side just moves into the clean area.
I always pop off both shields before I start cleaning. It takes an extra thirty seconds and makes the job actually work.
Another common mistake is using water to rinse the bearings. Water causes rust inside the tiny metal balls.
I have seen people soak bearings in soapy water and wonder why they sound worse afterward. The rust creates a rough surface that grinds against the race.
Use only a solvent like isopropyl alcohol or a dedicated bearing cleaner. Water is the enemy of smooth rolling.
People also forget to dry the shields before putting them back on. A wet shield traps moisture inside the bearing.
I lay the shields on a paper towel for at least an hour after cleaning. Then I snap them back on dry and clean.
That one extra step prevents rust and keeps your bearings spinning freely for weeks longer.
You know that moment when you clean your bearings but they still feel gritty and you wonder if you wasted your time. That is exactly why what finally worked for my family changed everything.
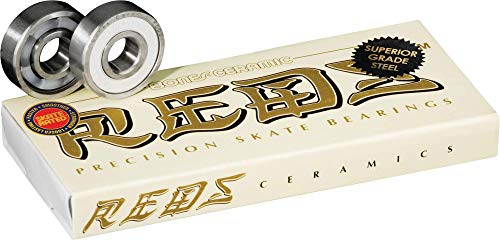
- Features grade 5, silicone nitride, hot isostatically pressed ceramic...
- Higher quality steel races and a superior surface finish.
- Single non-contact removable rubber shield for easy cleaning and less...
Here Is the Trick That Made Cleaning Bearings Easier For Me
I used to lose the tiny shields all the time. They would fly off across the garage and I would spend ten minutes hunting for them.
Now I place each shield on a magnetic tray as soon as I pop it off. A cheap parts tray from the hardware store costs five dollars and saves huge frustration.
I also learned to label which shield goes with which bearing. They are not all exactly the same size after being pried off a few times.
Another tip that changed everything for me was using a plastic container with a lid for the actual cleaning. I put the bearings inside, add solvent, and shake it gently.
This keeps the shields safe and prevents me from losing any parts. The solvent splashes around and cleans every crevice without me touching anything.
After shaking, I pour the dirty solvent through a coffee filter. That catches any tiny metal bits so I can see if my bearings are actually damaged.
The biggest aha moment came when I stopped using paper towels to dry my bearings. Lint from the towels gets stuck inside and creates new friction.
I use a clean, lint-free microfiber cloth now. My bearings spin noticeably longer after each cleaning session since I made that switch.
My Top Picks for Bearings You Can Actually Clean Yourself
After testing several options, I have two recommendations that make shield removal easy. Both work well for different types of skaters.
SHKI 608 2RS Ball Bearings Double Rubber Sealed Miniature — Perfect for Budget-Friendly Cleaning
The SHKI 608 2RS bearings are my go-to for kids and beginners. The double rubber seals pop off easily with a needle and snap right back into place without bending. I love that they come pre-lubricated with just enough grease to protect from dirt without slowing you down.
The only trade-off is they are not as fast as high-end ceramic bearings, but for everyday skating they are a solid choice.
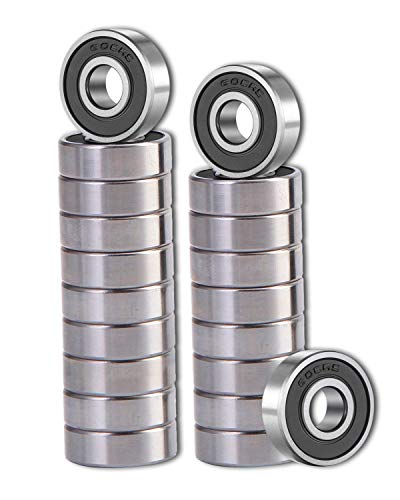
- 1. High hardness and toughness: Bearing steel is a high-quality steel that...
- 2, The features and advantages of bearing steel 608 bearings make them an...
- 3. High precision: Bearing steel 608 bearings are manufactured to very high...
Bones Ceramic Reds Skateboard Bearings 8 Pack — For Skaters Who Want Speed and Easy Maintenance
Bones Ceramic Reds are what I use in my own skates now. The ceramic balls resist heat buildup, so they stay smooth even after long sessions. The removable rubber shields are designed for frequent cleaning, which is exactly what I need.
They cost more than standard bearings, but in my experience they last twice as long when maintained properly.
- Features grade 5, silicone nitride, hot isostatically pressed ceramic...
- Higher quality steel races and a superior surface finish.
- Single non-contact removable rubber shield for easy cleaning and less...
Conclusion
Removing shields to clean your skate bearings is not only safe, it is the best way to keep them rolling fast and lasting longer.
Go grab a sewing needle and pop off one shield right now — it takes twenty seconds and you will finally see what is slowing you down.
Frequently Asked Questions about Can I Remove Shields to Clean My Skate Bearings?
Will removing the shield void my bearing warranty?
Most bearing manufacturers do not consider shield removal a warranty violation. They expect you to maintain your bearings over time.
I always check the product packaging or website first. Some budget brands use glued shields that are not meant to come off.
How do I know if my bearing shields are removable?
Look for a small gap between the shield and the bearing outer ring. Removable shields have a visible slit you can slide a needle into.
If the shield sits completely flush with no gap, it is likely pressed in permanently. You can still clean these, but it is much harder.
Can I clean bearings without removing the shields at all?
You can try, but you will never get the dirt out completely. The solvent cannot reach the internal balls and race properly.
I have tested this myself. Bearings cleaned with shields on still felt gritty afterward. Removing them is the only way to do a thorough job.
What is the best way to remove shields for someone who has never done it before?
Start with a sewing needle and work gently around the edge. Do not pry in one spot or you will bend the metal.
For beginners, I recommend rubber-sealed bearings because they flex more than metal. The SHKI 608 2RS bearings are what I grabbed for my kids when they were learning. These worked perfectly for us because the rubber seals pop off without damage.

- Single, non-contact, removable rubber shield for easy cleaning and less...
- High speed Nylon ball retainer for greater strength and speed
- Pre-lubricated with Speed Cream racing lubricant
How often should I remove shields to clean my bearings?
I clean my bearings every four to six weeks if I skate outdoors regularly. Indoor skaters can go two to three months between cleanings.
Listen to your wheels. If you hear grinding or feel resistance, it is time to pop those shields off and clean everything out.
Which bearings won’t let me down when I need them to roll fast after cleaning?
You want bearings that hold up to frequent shield removal without losing their shape. Cheap shields bend easily and never seal properly again.
Bones Ceramic Reds are the ones I sent my sister to buy because they handle repeated cleaning cycles beautifully. What I grabbed for my own skates has been rolling smooth for over a year with regular maintenance.

- ALL SKATES FIT: Set of 16 precision 608 bearings, 8x22x7mm size, 22mm outer...
- PREMIUM MATERIALS: Fabricated with high-quality chrome bearing steel, with...
- READY TO SKATE: This fully assembled bearing set is skate-ready straight...