Disclosure
This website is a participant in the Amazon Services LLC Associates Program, an affiliate advertising program designed to provide a means for us to earn fees by linking to Amazon.com and affiliated sites.
New figure skates cause blisters because they are stiff and haven’t molded to your foot’s unique shape. This friction creates painful hot spots. It’s a common but preventable issue for every skater.
Breaking in your skates properly is the ultimate solution for comfort and performance. This guide provides expert, proven methods to avoid the pain. You can enjoy a blister-free break-in period.
You will learn why blisters form, step-by-step break-in techniques, and how to choose the right protective gear. We cover everything from initial lacing to long-term skate care. Get ready to skate in comfort.
The Science Behind the Sting: Why New Skates Rub You Wrong
New figure skates are engineered for support, not immediate comfort. The materials are rigid and haven’t conformed to your foot’s unique contours. This creates friction points at common pressure areas.
Your foot moves slightly inside the boot with each push and glide. The stiff interior lining then rubs against your skin repeatedly. This friction generates heat and fluid, resulting in the painful blisters you’re experiencing.
It’s a mechanical issue, not a sign of poor skating. The key is to manage this friction during the critical break-in period. Proper preparation can transform this painful phase into a smooth transition.
Your First Line of Defense: Quality Protective Gear
While breaking in your skates, using the right protective products is essential. They create a protective barrier to reduce friction instantly. This allows you to skate longer while your boots gradually mold to your feet.
A highly effective and affordable solution is using gel blister pads. These act as a second skin, cushioning hot spots before they become full blisters.
Recommended Product: Compeed Blister Cushions
These hydrocolloid pads are a skater’s secret weapon. They stay in place for days, provide excellent cushioning, and even promote healing.
- Hydrocolloid technology cushions and protects
- Water-resistant and stay on securely
- Promote faster healing if a blister has already formed
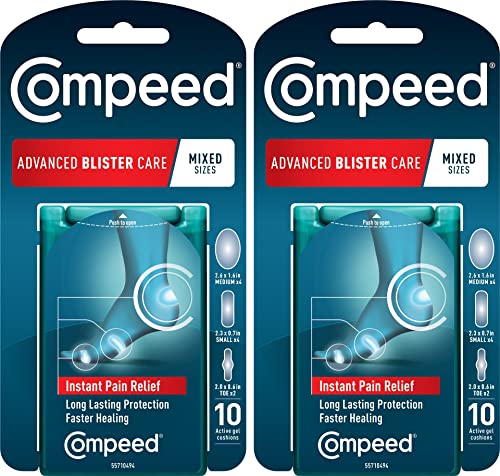
- Instant pain relief: Provides twice the instant pain relief than regular…
- Long-lasting protection: Features over 4x longer adhesion (up to 7 days)…
- Speeds healing: Provides 2 times more instant pain relief than ordinary…
Check current price on Amazon →
When Prevention Isn’t Enough: Assessing Your Skate Fit
If blisters persist despite using protective gear, the issue may be deeper. Chronic blistering often indicates a poor fundamental fit. Your skates might be the wrong size, width, or model for your foot shape.
No amount of padding can fix a skate that doesn’t match your anatomy. It’s crucial to evaluate your skate choice for proper support and fit. Sometimes, starting with a better-suited boot is the real solution.
For example, brands like Jackson and Riedell offer different fits. Our Riedell Soar review highlights a popular model for intermediate skaters. Alternatively, the Jackson Ultima Classic series is renowned for its comfortable break-in for beginners.
How to Break In New Figure Skates Without Blisters
Properly breaking in your skates is the most effective blister prevention strategy. This process gradually molds the stiff materials to your foot’s shape. A methodical approach minimizes pain and maximizes skate longevity.
Rushing this stage is the number one cause of severe blisters. Instead, follow a phased plan that increases intensity slowly. Your patience will be rewarded with a custom-fit boot and blister-free skating.
Key Takeaway: Never wear new skates for a full practice session immediately. Break them in over 2-3 weeks using short, incremental wear periods, both on and off the ice.
Phase 1: The Off-Ice Conditioning Period
Start the molding process at home, long before you hit the ice. Wear your skates indoors with the blade guards on for short periods. This allows the boot to warm and soften from your body heat.
Follow a strict schedule to avoid overdoing it:
- Days 1-3: Wear for 15-20 minutes while sitting or doing light walking.
- Days 4-7: Increase to 30-45 minutes, incorporating knee bends and ankle flexes.
- Week 2: Aim for 60-minute sessions, simulating skating motions off-ice.
Always wear the exact same socks you plan to skate in during this process. Consistency is key for an accurate mold.
Phase 2: Gradual On-Ice Introduction
When you first skate, treat it like a test session, not a workout. Limit your initial on-ice time to just 15-20 minutes. Focus on basic edges and stroking, avoiding intense jumps or spins.
Immediately after skating, check your feet for red pressure points. These “hot spots” indicate where blisters will form. Apply protective padding to these areas before your next session.
Increase your ice time gradually over the next several practices:
- Session 2: 25-30 minutes of light skating
- Session 3: 35-40 minutes, introducing simple footwork
- Session 4+: Add 5-10 minutes each time as comfort allows
Essential Lacing Techniques for Pressure Relief
How you lace your skates dramatically impacts pressure distribution. Strategic skipping of eyelets can relieve friction at common blister points like the ankle bone or instep.
For a pressure-relieving lacing pattern, try this method:
| Foot Area | Lacing Technique | Benefit |
|---|---|---|
| Toe Box | Lace snugly but not tight | Prevents toe cramping and rubbing |
| Instep/Arch | Skip one eyelet or lace loosely | Relieves pressure on top of foot |
| Ankle Bone | Create a “window” by crossing laces behind the ankle | Eliminates direct pressure on bony prominences |
Re-lace your skates during sessions if you feel new pressure points forming. This simple adjustment can prevent a hot spot from becoming a full blister.
Choosing the Right Socks and Protective Accessories
Your choice of skating socks is a critical defense against blisters. The wrong fabric can create friction and trap moisture. This combination is a perfect recipe for skin irritation and painful blisters.
Specialized skating socks manage moisture and reduce shear forces. They work in tandem with other protective accessories. Together, they create a comprehensive blister prevention system.
Pro Tip: Avoid cotton socks at all costs. Cotton absorbs sweat, stays damp, and creates high friction. Always opt for moisture-wicking synthetic blends or thin wool.
Skating Sock Materials Compared
Not all performance fabrics are equal for blister prevention. The material’s thickness, weave, and moisture management properties matter greatly. Choose based on your specific needs and skate fit.
| Material | Best For | Blisters Prevention Benefit |
|---|---|---|
| Merino Wool (Thin) | All skaters, cold rinks | Wicks moisture, regulates temperature, naturally anti-microbial |
| Synthetic Blend (Nylon/Polyester) | Budget-conscious, wide feet | Excellent moisture-wicking, dries quickly, minimal seam construction |
| Double-Layer Technical | Severe blister sufferers | Inner layer moves with foot, outer layer moves with boot, eliminating friction |
The sock should fit snugly without wrinkles. Excess material will bunch and create immediate pressure points inside your boot.
Essential Protective Accessories for Hot Spots
Even with perfect socks, some foot areas need extra protection. Strategic use of accessories targets common blister zones. These items are inexpensive but invaluable during break-in.
Build a blister prevention kit with these key items:
- Gel Pads or Sleeves: Place these over ankles, heels, or insteps. They cushion and distribute pressure away from bony areas.
- Moleskin or Felt Pads: Cut to size and apply directly to the skate’s interior lining. This creates a buffer at specific friction points.
- Anti-Friction Balm or Stick: Apply to feet before putting on socks. Products like Body Glide create a protective, lubricating barrier on the skin.
Apply protection before you feel pain, not after. Redness is a warning sign that a blister is forming. Address it immediately with the appropriate accessory.
The Importance of Proper Drying and Rotation
Moisture breaks down skin and increases friction dramatically. Always allow your skates to dry completely between uses. Never store them in a closed bag while damp.
Remove the liners if possible and use boot dryers or newspaper. For severe perspiration, consider using moisture-wicking insoles. Rotating between two pairs of socks during long sessions can also help.
This simple maintenance routine keeps the boot interior dry. It also prevents bacterial growth that can weaken skin. Dry skates and feet are far more blister-resistant.
Advanced Solutions: When to Consider Professional Fitting or Adjustment
Persistent blistering often signals a deeper fit problem. No amount of padding can correct a fundamentally ill-fitting skate. Recognizing when to seek professional help saves time and prevents injury.
A professional skate fitter assesses your foot’s unique shape, arch, and pressure points. They can recommend specific models or modifications. This expertise is invaluable for serious skaters.
Warning Sign: If you experience blisters in the exact same spots after the break-in period (4-6 weeks), the skate fit is likely incorrect. Seek a professional assessment.
Common Skate Modifications for Problem Areas
Skate technicians can perform precise alterations to relieve pressure. These modifications target the boot’s structure itself. They provide a permanent solution where accessories offer only temporary relief.
Here are the most effective professional adjustments for blister prevention:
- Punching Out: Using specialized tools to stretch the boot’s leather or synthetic material at a specific pressure point, like a bony ankle or bunion.
- Heat Molding: A controlled process where the entire boot is warmed and formed to your foot’s exact contours using a specialized oven. This is often done for higher-end skates with thermoformable materials.
- Adding or Modifying Insoles: Replacing the stock insole with a custom or over-the-counter orthotic to better support your arch and redistribute weight, reducing friction on the sides of your foot.
These services are typically available at pro shops in ice rinks. The cost is minimal compared to the value of a pain-free skate.
Signs You Need a Different Skate Model or Brand
Sometimes, adjustment isn’t enough. Each skate brand has a distinct last—the foot-shaped form around which the boot is built. You may need a brand that better matches your foot’s volume and shape.
Consider exploring different models if you experience:
| Your Foot Type | Potential Brand Match | Reason |
|---|---|---|
| Narrow heel, wide forefoot | Riedell (many models) | Often offers split-width sizing (e.g., narrow heel, wide toe box) |
| Wide, high-volume foot | Jackson (Classic/Elite lines) | Generally built on a wider, roomier last |
| Very narrow, low-volume foot | Edea (certain models) | Known for a sleeker, narrower anatomical fit |
Research is key. Reading detailed skate reviews that focus on fit can guide your decision before purchasing a new pair.
The Role of Proper Liner and Tongue Positioning
Incorrectly positioned liners or bunched tongues are hidden culprits. They create ridges and seams that rub relentlessly. Ensuring everything lies flat is a simple but crucial step.
Before lacing, run your hand inside the boot to smooth the liner. Pull the tongue all the way up and forward to eliminate wrinkles. This creates a uniform surface against your foot and shin.
Consistently perfect positioning reduces micro-movements. It is a zero-cost habit with a major impact on comfort and blister prevention during every skate.
Immediate Care: How to Treat Skating Blisters If They Form
Even with perfect prevention, blisters can sometimes occur. Knowing how to treat them properly prevents infection and speeds healing. The wrong approach can turn a minor issue into a serious setback.
Your treatment strategy depends on the blister’s size and severity. The primary goal is to protect the area from further friction. This allows the skin to regenerate underneath the protective fluid cushion.
First Rule: Do not pop a blister if you can avoid it. The intact skin is a sterile barrier against infection. Only drain it if it’s large, very painful, or likely to burst on its own.
Step-by-Step Guide for Safe Blister Drainage
If drainage is necessary, a sterile procedure is critical. Follow these steps to minimize infection risk and promote clean healing.
- Clean the Area: Wash the blister and surrounding skin with soap and water. Then, swab the blister with rubbing alcohol or iodine.
- Sterilize a Needle: Use a sharp sewing needle or pin. Sterilize it by holding the tip in a flame for a few seconds, then letting it cool, or wipe it thoroughly with an alcohol swab.
- Puncture Gently: Pierce the blister at its edge in 2-3 spots. Gently press with clean gauze to drain the fluid. Leave the overlying skin intact.
- Apply Antibiotic Ointment: Cover the drained blister with a thin layer of antibiotic ointment to prevent infection.
- Protect with a Dressing: Cover with a specialized blister bandage or a non-stick gauze pad secured with medical tape. Change daily.
Choosing the Right Wound Dressing for Skaters
A standard bandage often won’t withstand the moisture and friction inside a skate. You need a dressing designed for high-movement areas. The right choice keeps the wound protected so you can resume skating sooner.
| Dressing Type | Best For | Key Feature |
|---|---|---|
| Hydrocolloid Bandages (e.g., Compeed, Band-Aid Hydro Seal) | Intact or drained blisters | Forms a gel cushion, waterproof, can stay on for days |
| Moleskin with Donut Hole | Large, painful blisters | Creates a raised ring around the blister to offload all direct pressure |
| Non-Adherent Pads + Tape (e.g., Telfa pads) | Open or torn blisters | Won’t stick to the raw wound, allows for daily cleaning and ointment application |
When to Take a Break from Skating
Listening to your body is essential for long-term foot health. Some blisters require you to stay off the ice entirely. Skating on a severe blister can deepen the injury and lead to infection.
Take a complete rest day if the blister is:
- Significantly painful with any pressure.
- Showing signs of infection (increased redness, warmth, pus, or red streaks).
- Open and raw, with the skin layer fully torn away.
Use rest days for active recovery. Soak your foot in warm Epsom salt water to soothe the area. Keep the blister clean, dry, and elevated when possible to reduce swelling.
Long-Term Foot Care and Prevention Habits for Skaters
Preventing blisters extends beyond your skates. It requires consistent foot care and strengthening routines. Healthy, resilient skin and strong feet are your best natural defense.
Incorporate these habits into your regular training schedule. They build durability and improve your overall skating foundation. This proactive approach minimizes future friction issues.
Core Principle: Think of your feet as athletes themselves. They require conditioning, recovery, and proper maintenance just like any other part of your body used in sport.
Building Skin Resilience and Callus Management
Controlled friction can help your skin develop protective toughness. The goal is to build functional calluses, not painful blisters. This is achieved through gradual, consistent exposure.
Follow this off-ice conditioning routine for your feet:
- Barefoot Exercises: Spend 10-15 minutes daily walking on different surfaces (carpet, grass, yoga mat) to gently toughen the skin.
- Moisturize Strategically: Apply a thick, urea-based foot cream at night. This keeps skin pliable and less prone to cracking, but avoid applying it right before skating.
- File, Don’t Remove: Gently file down thick calluses with a pumice stone or foot file. Never cut them off, as this can lead to raw, sensitive skin.
Well-managed calluses act as natural padding. They distribute pressure evenly across high-friction areas of your foot.
Foot Strengthening Exercises to Reduce Friction
Stronger foot muscles improve stability inside the boot. This reduces the sliding and micro-movements that cause blisters. Focus on exercises that enhance intrinsic muscle control.
Incorporate these simple exercises 3-4 times per week:
- Toe Spreads & Grips: Sit barefoot and practice spreading your toes apart as wide as possible, then gripping the floor. Hold each for 5 seconds. Repeat 10-15 times.
- Arch Lifts: Keep your toes and heels on the ground while lifting the arches of your feet. This strengthens the muscles that support your foot’s structure.
- Ankle Alphabet: Lift one foot and use your big toe to “write” each letter of the alphabet in the air. This builds ankle stability and control.
Stronger feet maintain better alignment. This decreases the erratic internal movement that grates against your skate’s lining.
Regular Skate Maintenance for Lasting Comfort
Your skates’ interior condition directly impacts friction. A worn-down, rough, or salty liner is abrasive. Simple maintenance keeps the contact surface smooth.
Establish a weekly skate care routine:
| Task | Frequency | Benefit for Blisters |
|---|---|---|
| Wipe out interior with a dry cloth | After every use | Removes moisture and salt from sweat that can chafe skin |
| Use a boot dryer or air dry fully | After every use | Prevents liner breakdown and bacterial growth |
| Lightly sand rough interior seams | Monthly or as needed | Eliminates abrasive edges that cause hot spots |
Consistent care extends the life of your skates. More importantly, it ensures the interior remains a smooth, consistent surface against your skin.
Choosing Your Next Pair: Blister-Prevention Features to Look For
Your next skate purchase should prioritize features that prevent friction from the start. Modern skates incorporate design elements specifically for comfort. Knowing what to look for can make your next break-in period much smoother.
Focus on the boot’s interior construction, lining materials, and fit technology. These factors have a greater impact on initial comfort than blade quality or external aesthetics. An informed choice is your first step toward blister-free skating.
Shopping Smart: Prioritize skates with heat-moldable liners or shells. This technology allows for a custom fit that dramatically reduces break-in time and friction points.
Critical Boot Construction and Lining Materials
The materials touching your foot are paramount. Look for advanced synthetics and thoughtful design that minimize abrasive contact. Avoid boots with rough internal seams or stiff, non-breathable liners.
Seek out these blister-preventing features:
- Seamless or Flat-Locked Liners: The interior should feel smooth to the touch. Raised seams are common blister creators along the ankle and heel.
- Moisture-Wicking Fabric: Liners made from CoolMax®, Dri-FIT, or similar technical fabrics pull sweat away from your skin, keeping feet drier and reducing friction.
- Ankle Collar & Tongue Padding: Ample, plush padding in the cuff and tongue distributes pressure evenly. It prevents hard edges from digging into your skin.
Remember, a higher price often correlates with better interior finishing and materials. It’s an investment in comfort.
Skate Fit Technology: Heat Molding & Adjustability
Customization is the ultimate blister prevention. Technologies that adapt the boot to your unique foot shape eliminate guesswork. They bridge the gap between a stock boot and a fully custom one.
| Technology | How It Prevents Blisters | Ideal For |
|---|---|---|
| Heat-Moldable Shell (e.g., in some Jackson, Riedell models) | The outer boot material softens with heat to conform precisely to your foot’s contours, eliminating large air gaps and pressure points. | Skateers with unusual bone structures or persistent hot spots. |
| Heat-Moldable Liner (a removable inner boot) | Molds independently to provide cushioning and a personalized fit, often with less overall stiffness than a molded shell. | Those seeking comfort-focused customization without altering the boot’s structural integrity. |
| Adjustable Fit Systems (e.g., lace-up liners, adjustable forefoot) | Allows you to fine-tune volume and tightness in specific zones (like the instep) to secure the foot and prevent sliding. | Growing kids or adults whose foot volume may change, or those who need a precise instep fit. |
Where to Find Reliable Skate Reviews and Fitting Advice
Independent reviews are invaluable before purchasing. Look for detailed assessments that discuss the break-in experience and fit characteristics, not just performance. Our detailed guides, like our review of the Riedell Soar, analyze comfort from a skater’s perspective.
For beginners, starting with a well-reviewed, supportive model is key. Explore our guide to the best figure skates for beginners to find forgiving options. If warmth and immediate comfort are priorities, our list of the best ice skates for warmth and comfort highlights models with superior linings.
Always, if possible, get professionally fitted at a reputable skate shop. Their expertise is the single best way to ensure a proper match and avoid a painful, blister-inducing break-in.
Best Products for Preventing Figure Skate Blisters
Equipping yourself with the right gear is half the battle against blisters. These three products are highly recommended by skaters and fitters for their effectiveness. Each targets a different aspect of blister prevention, from immediate cushioning to long-term moisture management.
Compeed Blister Cushions – Best Overall Protection
These hydrocolloid cushions are a skater’s secret weapon. They adhere securely, provide excellent shock absorption, and create a protective second skin over hot spots. Their water-resistant technology means they stay put through sweaty sessions, promoting healing if a blister has already formed.
- Instant pain relief: Provides twice the instant pain relief than regular…
- Long-lasting protection: Features over 4x longer adhesion (up to 7 days)…
- Speeds healing: Provides 2 times more instant pain relief than ordinary…
Thorlos Unisex Thin Ski & Skate Socks – Best Moisture-Wicking Socks
Thorlos socks are specifically engineered for skating. Made with a blend of acrylic, nylon, and spandex, they offer superior moisture-wicking without bulk. The seamless toe and strategic padding at the heel and ball of the foot provide comfort exactly where skaters need it most.
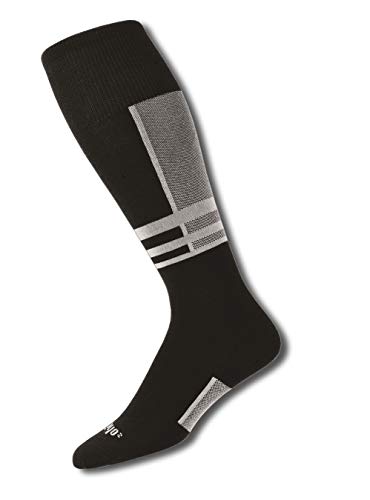
- Engineered to provide a precise fit while wearing technically advanced…
- Constructed with exclusive moisture wicking Thor-Wick WARM fibers to keep…
- Reinforced flat knit areas in the heel and toe areas for increased…
Body Glide Original Anti-Chafe Balm – Best Friction Barrier
This invisible, non-greasy balm is ideal for preventing friction on large areas. Apply it to heels, ankles, and insteps before putting on your socks. It creates a smooth, protective layer that reduces shear forces dramatically, and it won’t stain your skates or socks.

- Prevents and relieves hot spots on feet, and chafed, chapped and cracked…
- Suitable for fitness, big and plus sizes, work, military, law enforcement,…
- No petroleum, no oil, no mess
Conclusion: Mastering Blister-Free Figure Skating
Preventing blisters from new figure skates is a manageable process. It requires a blend of proper break-in techniques, smart gear choices, and attentive foot care. By understanding the causes, you can implement effective solutions.
The key takeaway is to prioritize gradual conditioning and listen to your feet. Address hot spots immediately with protective products. Never ignore persistent pain, as it often signals a fit issue.
Start your next break-in period with the phased plan outlined in this guide. Invest in quality socks and targeted accessories like gel pads. Your comfort on the ice is worth the upfront effort.
With patience and the right approach, you can enjoy the support of new skates without the pain. Here’s to many comfortable, confident, and blister-free performances ahead.
Frequently Asked Questions about Figure Skate Blisters
What is the fastest way to break in new figure skates?
The fastest safe method involves a combination of off-ice wear and gradual on-ice sessions. Wear your skates with blade guards at home for increasing periods over 1-2 weeks. Perform ankle flexes and knee bends to soften key areas before attempting long skating sessions.
Never use methods like soaking boots or extreme heat, as they damage materials. Speed comes from consistent, short-duration wear that allows the materials to mold without causing injury. Rushing always leads to blisters.
How tight should new figure skates be to avoid blisters?
New skates should feel snug but not painfully tight. Your heel should be locked in place with zero lift, and your toes should lightly brush the front when standing straight. You should be able to wiggle your toes slightly but not slide forward when bending your knees.
Over-tightening cuts off circulation and creates intense pressure points, leading to blisters and numbness. A proper fit secures the foot to minimize internal movement, which is the primary cause of friction.
Are synthetic or leather skates better for preventing blisters?
Modern synthetic skates often have advantages for initial blister prevention. They typically feature seamless, moisture-wicking liners and may offer heat-moldable technology for a more precise fit from the start. The interior surfaces are often smoother than traditional leather.
High-quality leather skates are durable and mold beautifully over time but may have a stiffer, longer break-in period. The best choice depends more on the specific model’s interior construction than the outer material alone.
What should I do if I get a blister right before a competition or test?
First, assess if the blister is intact or open. For an intact blister, protect it immediately with a hydrocolloid cushion bandage. This will pad the area and allow you to skate with minimal pain. Do not pop it, as the fluid provides natural padding.
For an open blister, clean it gently, apply antibiotic ointment, and cover it with a non-stick sterile pad. Use a moleskin “donut” around it to offload direct pressure. This is a temporary fix; proper treatment should resume immediately after the event.
Why do I only get blisters on one foot?
This is extremely common and usually indicates a slight difference in foot size or shape. Most people have one foot that is slightly longer, wider, or has a higher arch. The skate fits the larger or differently shaped foot less perfectly, creating friction points.
Solutions include using different lacing tension on each skate, adding a thin insole to the smaller foot’s boot, or using targeted padding only on the affected foot. A professional can also “punch out” the skate on the specific pressure point.
Can I wear my regular athletic socks for figure skating?
It is not recommended. Regular cotton athletic socks are a primary cause of blisters. Cotton absorbs moisture, loses its shape, and creates high friction against the skin. This wet, abrasive environment is perfect for blister formation.
Always wear thin, technical skating socks made from synthetic blends or merino wool. These materials wick sweat away, maintain their fit, and have minimal seams. The right socks are a fundamental and non-negotiable part of blister prevention.
How often should I replace my skate liners to prevent friction?
Replace liners when they become packed down, develop rough spots, or lose their moisture-wicking ability. For frequent skaters, this is typically every 1-2 years. Worn liners provide less cushioning and can develop abrasive textures that irritate the skin.
Signs include persistent hot spots in areas that didn’t previously bother you, a noticeable decrease in support, or an odor that won’t go away even after thorough drying. Fresh liners can rejuvenate an older boot’s comfort significantly.
Is it normal for children’s adjustable skates to cause more blisters?
They can, if not fitted and adjusted properly. The internal mechanism or extra interior seams in some adjustable skates can create unexpected pressure points. Ensuring the skate is adjusted to the exact correct size, not just “close enough,” is critical.
Use the same break-in and protection methods (proper socks, gel pads). Pay extra attention to the area around the adjustment mechanism. Choosing a well-reviewed adjustable model known for comfort, like those in our adjustable skate reviews, can help mitigate this issue.
How Long Should New Skates Hurt? The Normal Break-In Timeline
Some discomfort is normal, but sharp pain or blistering is not. A proper break-in involves manageable pressure that gradually eases. The timeline varies by skate stiffness and your foot type.
Here is a typical progression for a well-fitted skate:
- Weeks 1-2: You may feel general stiffness and pressure, but no acute pain. Off-ice conditioning is crucial during this phase.
- Weeks 3-4: The boot begins to flex more naturally at the ankle. Pressure points should start to diminish, not intensify.
- Week 5+: The skate should feel like a supportive extension of your foot. Any remaining discomfort should be minor and localized.
If pain increases or blisters form after two weeks, your break-in method or skate fit is likely incorrect.
Are Gel Socks or Two Pairs of Socks Better for Prevention?
This is a common debate with a clear winner. One pair of proper, thin, moisture-wicking socks is almost always superior. The goal is to minimize layers and bulk inside the boot.
Let’s compare the two approaches:
| Method | Pro | Con |
|---|---|---|
| Two Pairs of Socks | Adds extra cushioning. | Creates more friction between sock layers, traps heat, and can make skates too tight, creating new pressure points. |
| Gel Socks or Pads | Targets cushioning to specific high-friction areas (heel, ankle). | Can be expensive and may shift if not designed for athletic use. |
The best practice is one technical sock with strategic gel pads placed only where you need them. This combines a precise fit with targeted protection.
Can I Use Moleskin Directly on My Foot or Inside the Skate?
Yes, but placement changes its function. Where you apply moleskin changes its effectiveness and longevity. It’s a versatile tool when used correctly.
- On Your Foot: Apply to intact skin at the first sign of redness (a “hot spot”). It adds a protective layer but may peel off with sweat. It’s a good short-term fix.
- Inside the Skate: Cut to size and stick it directly to the boot’s interior lining at the friction point. This is a more permanent solution, as it smooths the abrasive surface itself and lasts through multiple wears.
For the inside of the skate, felt or foam padding often works better than moleskin. It provides more cushioning to truly offload pressure from a bony prominence.