Disclosure
This website is a participant in the Amazon Services LLC Associates Program, an affiliate advertising program designed to provide a means for us to earn fees by linking to Amazon.com and affiliated sites.
Your figure skate boots feel too stiff because they are designed for break-in. This common issue affects skaters at all levels, causing discomfort and hindering performance. Our complete guide explains the reasons and provides expert solutions.
Stiff boots can lead to blisters, pain, and limited ankle mobility. Learning to properly soften them is crucial for better control and a more comfortable skate. We cover the science behind boot stiffness and safe breaking-in techniques.
The Root Cause of Stiff Figure Skate Boots
New figure skate boots are intentionally stiff. Manufacturers design them this way to provide crucial ankle support for jumps and spins. The rigid structure protects your feet during high-impact landings.
However, this necessary stiffness often doesn’t align perfectly with your unique foot shape. Pressure points develop on your ankles, heels, and instep. This causes pain, blisters, and restricts the precise ankle flexion needed for proper skating technique.
A Quick Fix for Targeted Pressure Points
For isolated pain points, a boot punch or stretch from a professional skate technician is the fastest solution. They use specialized tools to expand the boot’s material in specific areas.
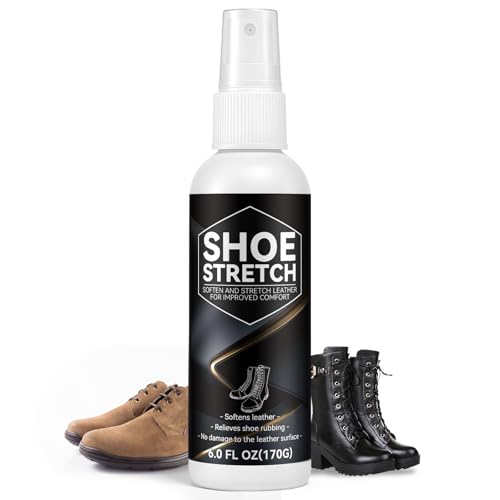
For a DIY approach, a quality boot stretcher can help. The Vereclue Shoe Stretcher Spray is a popular Amazon solution for skaters.
- Includes a 3-way adjustable wooden stretcher and conditioning spray.
- Targets specific tight spots like bunions or little toes.
- Helps stretch leather and synthetic materials without damage.
- 【Comfortable Fit, Relieves Tightness】: If your shoes feel tight, cause…
- 【Deep Softening, Restores Flexibility】: Our leather softener uses a…
- 【Color-Safe Formula】: Our leather shoe stretcher spray features a…
Check current price on Amazon →
If your boots are fundamentally the wrong stiffness level for your skill, consider softer boots for beginner and intermediate skaters. Models like the Riedell Soar offer more flexibility right out of the box.
When Softening Isn’t the Right Solution
Sometimes, the problem isn’t stiffness—it’s a poor fit. If you experience widespread pain or numbness, the boot may be the wrong size, width, or brand last for your foot.
In this case, breaking them in will never work. You may need a different model entirely. Explore our detailed comprehensive guide to the best ice skates to find a better match. Reviews of specific models, such as the Jackson Ultima Classic Softskate 380, can help you compare flexibility and fit.
Proven Methods to Soften Stiff Skate Boots Safely
Softening your figure skates requires patience and the right techniques. Rushing the process can damage the boot’s structural integrity. These proven methods work with the materials to create a custom, comfortable fit.
Always start with the least invasive method and progress as needed. The goal is to break in the boots, not break them down. Proper technique preserves support while eliminating pain.
Method 1: The Natural Break-In Process
This is the safest method for gradually molding boots to your feet. It relies on body heat, moisture, and repeated movement during short practice sessions.
Follow this step-by-step routine:
- Wear Them at Home: Lace up your skates and wear them while watching TV for 30-60 minutes. This applies gentle, consistent pressure.
- Short, Frequent Sessions: Skate for 15-20 minutes daily for the first week. Focus on basic edges and stroking to promote flex.
- Re-Lace Frequently: Stop and re-lace your skates every 20 minutes during practice. This helps the boot settle evenly as your feet swell slightly.
Method 2: Controlled Heat Application
Applying heat makes the boot’s materials more pliable. This must be done carefully to avoid damaging the glue, leather, or synthetic layers.
Professional heat molding by a skate shop is the gold standard. For at-home care, use a hairdryer on a medium setting.
- Targeted Warming: Wave the hairdryer 6-8 inches from the stiff area for 1-2 minutes. Never concentrate heat on one spot.
- Mold Immediately: While the material is warm (not hot), put the skate on and lace it firmly. Flex your ankle repeatedly for 5-10 minutes.
- Cool in Shape: Keep the skates on until they cool completely to room temperature. This sets the new, softer shape.
Boot Stiffness Ratings
Boots come with a stiffness rating, often on a scale. Choosing the correct rating from the start prevents major stiffness issues.
| Stiffness Rating | Recommended For | Flexibility |
|---|---|---|
| 20-40 | Beginner Skaters, Basic Skills | Very Flexible |
| 45-70 | Intermediate Skaters, Single Jumps | Moderately Stiff |
| 75-90 | Advanced Skaters, Double Jumps | Very Stiff |
| 90+ | Elite/Professional Skaters, Triples | Maximum Stiffness |
If your boots are drastically overrated for your skill level, softening may not be sufficient. You might need a boot better matched to your current technical demands.
Advanced Techniques and Professional Solutions
When basic methods aren’t enough, advanced techniques can solve persistent stiffness. These approaches often involve tools or professional services. They target deep structural resistance in the boot’s material.
Knowing when to DIY and when to seek a professional skate technician is crucial. Incorrect application can permanently compromise your skate’s support and safety.
Using a Boot Stretcher Effectively
A boot stretcher is a specialized tool that applies mechanical pressure to tight areas. It’s ideal for widening the forefoot or creating room for bunions.
For best results, follow this process:
- Identify the Pressure Point: Mark the exact spot on the boot’s exterior where you feel pain.
- Insert and Adjust: Place the stretcher inside the boot. Turn the knob to expand the tool until you feel firm resistance.
- Leave and Reassess: Leave the stretcher in place for 24-48 hours. Remove it, try the skate on, and repeat if necessary.
Always use a conditioning spray on leather boots before stretching. This prevents the material from cracking under stress.
When to Visit a Professional Skate Shop
Some problems require expert hands and specialized equipment. A pro shop can perform modifications that are impossible at home.
- Boot Punching: Using a hydraulic press, they can create a precise, permanent bulge in a hardened plastic shell for bone spurs or tailor’s bunions.
- Heat Molding with Ovens: Professional ovens evenly heat the entire boot for a perfect, all-over mold to your foot’s contours.
- Riveting and Hook Adjustment: They can relocate top hooks or rivets to change the lacing tension and improve ankle flex.
Maintaining Flexibility After Break-In
Once your boots are softened, maintain their pliability. Proper care prevents them from stiffening up again due to moisture and salt buildup.
After each use, wipe the inside with a dry cloth to remove sweat. Use a boot dryer or stuff them with newspaper to absorb moisture completely. Never store damp skates in a closed bag, as this promotes material breakdown in some spots and hardening in others.
Common Mistakes and How to Avoid Them
Many skaters accidentally damage their boots while trying to soften them. These mistakes can ruin the structural support and shorten the boot’s lifespan. Avoiding these pitfalls saves you money and ensures your safety on the ice.
Understanding what not to do is as important as knowing the correct techniques. Patience is the most critical tool in your break-in toolkit.
Destructive Methods That Ruin Boots
Some widely suggested “shortcuts” are highly destructive. They compromise the materials and bonding agents that hold your skate together.
- Soaking or Washing: Submerging boots in water degrades leather, delaminates layers, and rusts internal components. It can cause permanent warping.
- Using an Oven or Open Flame: Extreme, uneven heat melts glues and weakens plastic. This destroys the boot’s integrity and creates a major safety hazard.
- Excessive Force: Bending the boot violently by hand or hitting it can crack the stiffening materials. This creates a weak spot that will fail during a jump.
Signs You’re Breaking In vs. Breaking Down
It’s vital to distinguish between normal break-in and damaging breakdown. Monitor your boots closely during the softening process.
| Healthy Break-In Signs | Warning Signs of Damage |
|---|---|
| Boot creases naturally at the ankle flex point. | Deep, sharp creases or wrinkles in the ankle collar. |
| Pressure points gradually disappear. | The boot feels “sloppy” or loses lateral support. |
| Material softens but still feels supportive. | You hear cracking sounds or feel “give” in wrong places. |
Lacing Techniques for Better Flex
How you lace your skates significantly impacts stiffness perception. Strategic lacing can relieve pressure without modifying the boot.
Try the “Skip-a-Hook” method for improved ankle mobility:
- Lace normally from the toe up to the second or third hook from the top.
- Skip the next hook, crossing the lace directly to the top hook.
- This creates a slight gap, allowing for more forward flex during knee bends.
For pressure on the top of the foot, use a parallel lacing pattern over the sensitive area. This distributes tension more evenly across the instep.
Choosing the Right Boot Stiffness From the Start
The best way to avoid overly stiff boots is to select the correct stiffness rating initially. This requires honest assessment of your skill level and future goals. A proper match provides necessary support without excessive break-in struggles.
Manufacturers design boots with specific jump rotations in mind. Overbooting—choosing a boot for a higher skill level—is a common cause of unnecessary stiffness and pain.
Matching Boot Rating to Your Skill Level
Use your current and near-future skating elements as your guide. Your coach can provide valuable insight into the appropriate support level you need.
- Basic Skills & Beginners: Look for flexible boots (rating 20-50) that allow easy knee bending. These are often found in recreational or introductory figure skate models.
- Single Jumps (Axel, Single Salchow/Loop): A moderate stiffness (rating 55-75) is ideal. It offers support for take-offs and landings while remaining break-in friendly.
- Double Jumps & Advanced Skating: Stiff boots (rating 75-90+) are necessary. They provide the rigid platform required for multi-rotation jumps and secure landings.
Key Factors Beyond the Stiffness Number
The rating is a starting point. The boot’s construction materials and brand “last” (foot shape) also affect the feel.
| Material | Break-In Characteristic | Long-Term Feel |
|---|---|---|
| Full-Grain Leather | Longer, more gradual break-in | Molds perfectly, retains shape |
| Synthetic (Thermoformable) | Faster with professional heat | Can feel consistently stiff |
| Hybrid (Leather/Plastic) | Varies by component | Ankle may soften while heel stays rigid |
Always try on multiple brands. A boot that matches your foot’s width, arch, and heel shape will feel more comfortable faster, regardless of the stiffness rating.
Consulting a Professional Fitter
For a significant investment, a professional fitting is invaluable. A good fitter measures both feet, analyzes your arch and instep, and watches you stand and flex in the boot.
They can recommend brands known for a softer break-in within a given support category. This expert guidance is the most effective pre-purchase strategy to prevent stiffness problems.
Essential Care to Preserve Boot Flexibility
Proper maintenance keeps your broken-in boots comfortable and supportive. Neglect can cause materials to dry out, crack, or stiffen unevenly. A simple care routine extends your skate’s life and performance.
Think of maintenance as protecting your investment. Consistent care prevents the need for repeated, aggressive softening methods.
The Post-Skating Drying Ritual
Moisture from sweat is the enemy of leather and some synthetics. It causes materials to break down and then harden in a distorted shape.
Follow these steps after every session:
- Remove Liners & Insoles: Take out any removable footbeds or liners to dry separately.
- Stuff with Absorbent Material: Use newspaper or cedar boot trees. They absorb moisture and help maintain the boot’s shape.
- Air Dry Away from Heat: Place boots at room temperature, away from radiators or direct sunlight. Allow 24 hours for complete drying.
Conditioning Materials for Long-Term Softness
Leather boots require periodic conditioning to stay supple. This replenishes natural oils lost through use and drying.
- Choose the Right Product: Use a conditioner made for fine leather or specifically for skate boots. Avoid oily products that can degrade stitching.
- Apply Sparingly: Use a soft cloth to apply a thin coat to clean, dry leather. Focus on high-flex areas like the ankle collar.
- Frequency: Condition every 2-3 months during active skating seasons. Over-conditioning can oversoften the boot and reduce support.
Storage Solutions to Prevent Warping
How you store skates between uses impacts their shape and flexibility. Improper storage can introduce new pressure points.
Always store skates upright in a cool, dry place. Use a breathable skate bag, not a sealed plastic bag. Avoid leaving them in a hot car trunk, as extreme heat can reactivate and reset glues in an unwanted position.
For long-term off-season storage, clean and condition the boots thoroughly. Insert boot trees or crumpled paper to maintain form. Store them in their original box or a breathable cloth bag.
Troubleshooting Persistent Stiffness Problems
Sometimes, boots remain uncomfortably stiff despite your best efforts. This indicates a deeper issue with fit, structure, or material. Systematic troubleshooting helps you identify the exact cause and find a viable solution.
Persistent problems often require you to make a decision: modify, adapt, or replace. Knowing which path to take saves time, money, and frustration.
Diagnosing the Source of Discomfort
Pinpointing where and when the stiffness causes pain is the first step. The location of the problem reveals its likely cause.
| Pain Location | Likely Cause | Potential Solution |
|---|---|---|
| Top of Foot / Instep | Lacing too tight, low volume boot | Parallel lacing, professional stretch |
| Ankle Bones | Boot too narrow, stiff padding | Professional punching, wear thin socks |
| Front of Ankle / Shin | Excessive forward stiffness, improper flex | Skip-a-hook lacing, check stiffness rating |
| Entire Foot (Numbness) | Boot too small, poor circulation | Re-evaluate size, consider different brand |
Adaptive Gear and Accessories
Specialized accessories can bridge the gap between a stiff boot and a comfortable foot. They protect problem areas without altering the skate.
- Bunga Pads & Gel Sleeves: These protect ankle bones and tendons from direct pressure. They absorb shock and reduce friction.
- Custom Orthotics/Insoles: Can redistribute pressure and improve overall foot alignment, which can change how force is transferred to the boot.
- Thin, Technical Socks: Swap thick cotton socks for thin, moisture-wicking skating socks. This provides more room inside the boot without sacrificing warmth.
The Final Decision: Modify or Replace?
Use this simple flowchart to guide your final decision. Answer each question honestly about your specific boots.
Is the pain in one or two specific spots? If YES, professional modification (punch/stretch) is likely the solution. If NO, and the pain is general, does the boot feel too small, too narrow, or the wrong shape? If YES, replacement with a better-fitting model is the safest and most effective long-term solution.
Expert Insights and Pro Skater Tips
Learning from experienced skaters and technicians provides invaluable shortcuts. Their collective wisdom helps you avoid common pitfalls and achieve a perfect fit faster. These insights go beyond standard break-in advice.
Professional skaters manage boot stiffness as a critical part of their equipment routine. Their approaches balance performance needs with foot health.
Techniques from Skate Technicians
Skate techs see hundreds of boots and understand material behavior. They recommend a multi-faceted approach for tough boots.
- Combination Heat & Wear: “After a professional heat mold, wear the warm boots while doing off-ice jumps or deep knee bends. This actively molds the boot to your skating posture,” advises one senior tech.
- Strategic Punching Order: Always address the most severe pressure point first. Solving one major issue can often relieve secondary discomfort.
- Patience with Synthetics: “Thermoformable synthetics need a specific temperature window. Too little heat does nothing; too much ruins them. Trust a pro with the oven,” they caution.
How Elite Skaters Break In New Boots
Elite athletes have a disciplined, accelerated process. They must break in extremely stiff boots quickly for competition.
A common pro skater routine involves:
- Professional Fitting & Molding: Start with a perfect fit and immediate heat molding at the shop.
- Graduated On-Ice Sessions: Day 1: 20 minutes of edges. Day 2: 30 minutes adding simple jumps. Increase time and intensity daily over 7-10 days.
- Off-Ice Conditioning: Wear the boots at home while simulating skating positions and doing ankle mobility exercises.
When to Stop and Reassess
A key piece of expert advice is knowing when your efforts are futile. If you have followed a thorough break-in process for 15-20 hours of skating and pain persists, the boot is likely wrong.
Continuing to “power through” can cause stress fractures, tendonitis, or permanent calluses. An expert fitter can often identify a mismatched brand or size within minutes, saving you months of discomfort.
Best Products for Softening Figure Skate Boots
Having the right tools makes the break-in process safer and more effective. These three products are highly recommended by skaters and technicians for addressing different aspects of boot stiffness. Each serves a specific purpose in achieving a custom, comfortable fit.
Vereclue Shoe Stretcher Spray – Best Overall Tool
This comprehensive kit solves targeted tight spots. The 3-way adjustable wooden stretcher targets bunions, little toes, and width. The included conditioning spray softens leather for easier stretching without cracking. It’s the ideal all-in-one solution for precise, controlled stretching at home.
- 【Comfortable Fit, Relieves Tightness】: If your shoes feel tight, cause…
- 【Deep Softening, Restores Flexibility】: Our leather softener uses a…
- 【Color-Safe Formula】: Our leather shoe stretcher spray features a…
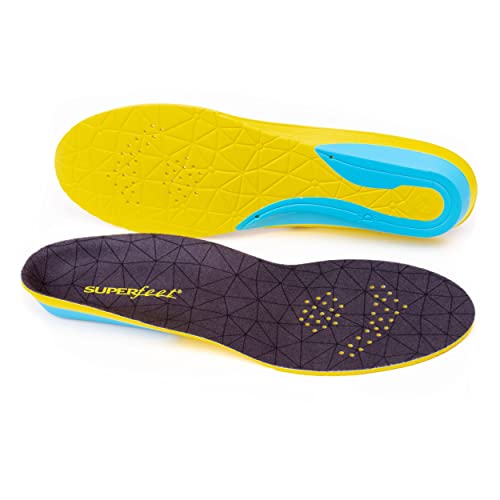
Superfeet FlexThin Insoles – Best for Pressure Redistribution
These ultra-thin, supportive insoles can change how your foot interacts with a stiff boot. They provide a customizable arch support that improves alignment, potentially relieving pressure on ankles and instep. By filling dead space, they can also improve heel lock and reduce slippage that causes blisters.
- Orthotic Shoe Insoles: Helps stabilize and support foot; reduces stress on…
- Ventilated Forefoot: These insoles help keep feet cool and comfortable in…
- Durable Orthotic Shoe Insoles: For reliable support and comfort for up to…
Bunga Pads Ankle Sleeves – Best for Pain Relief
When you need immediate relief from ankle bone pressure, these gel sleeves are essential. They provide a protective cushioning layer between your skin and the stiff boot collar. This allows you to continue breaking in the boot comfortably while protecting against blisters and bruises.

- One in each box.
- Used to cushion and protect the entire ankle
- This is also part of the Skater’s Kit
Conclusion: Achieving Perfectly Fitted Figure Skates
Softening stiff figure skate boots is a manageable process with the right knowledge. You can transform uncomfortable skates into a perfect extension of your foot. Use safe methods like gradual break-in and targeted stretching.
The key takeaway is to prioritize patience over shortcuts. Listen to your feet and address specific pressure points methodically. This preserves the boot’s crucial support while eliminating pain.
Start with the natural break-in process outlined in this guide. If pain persists, consult a professional skate technician for an assessment. They can provide solutions you cannot achieve at home.
With consistent care and proper technique, you will enjoy comfortable, responsive skates that enhance your performance on the ice.
Frequently Asked Questions About Softening Figure Skate Boots
How long does it take to break in new figure skates?
Breaking in new figure skates typically takes 10-20 hours of on-ice time. The process should be gradual over 2-3 weeks of regular skating. More advanced, stiffer boots will require a longer break-in period compared to beginner models.
Never try to break them in during a single long session. Short, frequent wears allow the materials to adjust slowly to your foot’s shape without causing excessive damage or pain.
Can I use a hairdryer to soften my skate boots?
Yes, a hairdryer can be used cautiously for targeted softening. Use a medium heat setting and keep it moving 6-8 inches from the boot. Focus on specific stiff areas like the ankle collar for 1-2 minutes at a time.
Immediately after warming, put the skate on and flex your ankle to mold the material. Never overheat one spot, as this can damage glues and synthetic layers, compromising support.
What is the difference between breaking in and breaking down boots?
Breaking in molds the boot to your foot while maintaining structural integrity. You’ll see gentle creasing at the ankle flex point. Breaking down means the boot loses its supportive properties, often with deep, sharp creases or a “sloppy” feel.
A broken-down boot no longer provides safe support for jumps. If the heel pocket widens or you feel unstable, the boot is breaking down and may need replacement.
Is it safe to use water or alcohol to soften skates?
No, using water or rubbing alcohol is not safe for most skate boots. Water can warp leather, rust internal components, and delaminate layers as it dries. Alcohol can dry out and crack leather and degrade certain synthetic materials.
These methods offer no control and often lead to permanent damage. Stick to controlled heat, mechanical stretching, and professional services for safe softening.
Why are my skates still stiff after months of use?
Persistent stiffness often indicates a poor initial fit or a boot with a stiffness rating too high for your skill level. If the boot is the wrong shape for your foot, it will never conform properly, no matter how long you wear it.
Consider consulting a professional fitter. You may be in a boot that is too narrow, has the wrong arch placement, or is simply meant for a skater performing more advanced elements.
What is boot punching and when is it necessary?
Boot punching is a professional service where a technician uses a hydraulic press to create a permanent, precise bulge in the boot’s shell. This is necessary for relieving pressure from specific bone protrusions like bunions, tailor’s bunions, or ankle bones.
It is a targeted solution for isolated pain points. It should only be performed by a skilled technician, as improper punching can weaken the boot’s structure.
How can I tell if my boots are too stiff for my skill level?
If you cannot achieve a deep knee bend without significant resistance or pain, the boots may be too stiff. Other signs include an inability to feel the ice through your blades properly and excessive fatigue in your shins from fighting the boot.
Compare your boot’s stiffness rating to your current jumping level. If you are only doing single jumps but are in a boot rated for triples, you are likely overbooted.
Are there any shortcuts to break in skates faster?
The only safe “shortcut” is professional heat molding, which uses specialized ovens to soften the entire boot for a custom mold. This should be done by an expert. Other methods marketed as shortcuts, like freezing or soaking, are destructive.
The most effective DIY acceleration is combining short on-ice sessions with wearing the boots at home while flexing. Consistency, not intensity, speeds up the process safely.