Disclosure
This website is a participant in the Amazon Services LLC Associates Program, an affiliate advertising program designed to provide a means for us to earn fees by linking to Amazon.com and affiliated sites.
Yes, your figure skates feel different after sharpening because the blade’s profile has been reset. This change is completely normal but can be disorienting.
This temporary sensation affects your edges, balance, and glide. Our guide provides proven methods to adapt quickly and skate with confidence.
The Science Behind That “Off” Feeling on Fresh Blades
That strange, almost slippery sensation after a sharpening has a precise cause. Your skate technician has removed metal to create a brand-new hollow along the blade’s length.
This resets the rocker profile and edge sharpness completely. Your muscles are accustomed to the worn, familiar edges, not these pristine, aggressive new ones.
The result is a temporary loss of “feel” for the ice. You may feel like you’re sliding out, catching edges unexpectedly, or struggling to find your balance point.
Your On-Ice Adjustment Toolkit
The fastest way to adapt is a dedicated break-in session. Start with simple glides and two-foot turns on a quiet patch of ice.
Focus on re-establishing your center of balance over the new blade. Gradually progress to edges, crossovers, and basic turns.
For many skaters, using a professional blade guard during off-ice warm-ups helps accelerate muscle memory. It protects your fresh edges while you practice shifting your weight.
NANAOUS Skate Guard: Durable, slip-resistant guards that protect your sharpening investment from arena floors.
- Soft leather top prevents blade damage.
- Thick rubber sole absorbs impact.
- Essential for safe walking and building confidence in your edges off the ice.

- Adaptation Type: Hockey Skates : Fits size 10.5 & under, Does NOT fit size…
- 【Adjustable Buckle】The hockey skate guards size are 34.5 cm/13.6 in….
- 【Easy to Use】Our skate guards are easy to adjust in length, just move…
Check current price on Amazon →
When the Problem is Bigger Than the Sharpening
If the uncomfortable feeling persists beyond a few sessions, the issue may be foundational. Skates that are improperly fitted or broken down will amplify any post-sharpening adjustment period.
Persistent pain or a complete lack of control signals it’s time to assess your equipment. You may be skating in boots that lack the necessary support for your skill level.
Consider if your current skates are truly the best match for your blades and technique. For a deep dive into high-quality options, read our detailed review of the 5th Element Grace skates.
How to Break In Newly Sharpened Figure Skates: A Step-by-Step Guide
Adjusting to a fresh sharpening requires a deliberate on-ice routine. This process helps your body relearn the blade’s contact points safely. Follow these steps to regain confidence quickly.
The Essential First 20 Minutes on Ice
Begin your session with basic maneuvers on a clean patch of ice. Avoid complex jumps or spins immediately. This phase is for neuromuscular re-education.
- Flat Glides: Push off and glide on two feet. Focus on feeling the full length of the blade making contact.
- Swizzles & Sculling: These exercises gently engage your inside and outside edges without deep pressure.
- Simple Turns: Perform two-foot turns and basic forward-to-backward transitions. Notice how the new edges grip.
Advanced Edge Re-Establishment Drills
Once comfortable, progress to drills that target specific edge control. This builds precision and trust in your sharpening.
- Outside Edge Spirals: Hold a spiral on a clean outside edge. This tests the blade’s stability and your balance.
- Figure Eights: Skate large, slow circles on one foot. Concentrate on maintaining a consistent, shallow edge.
- Crossovers in Both Directions: Execute controlled crossovers. Feel the underpush and the new edge’s hold during the transfer.
Common Sharpening Sensations and What They Mean
Different feelings indicate specific aspects of the sharpening. Understanding them helps you adjust your technique.
| Sensation | Likely Cause | Adjustment Tip |
|---|---|---|
| Feeling “stuck” or catching edges | Edges are too sharp/deep hollow | Use shallower edges; avoid digging in. |
| Feeling “slippery” or sliding out | Flatter hollow or lost rocker | Focus weight over sweet spot; check blade profile. |
| Uneven feel between feet | Inconsistent sharpening between blades | Re-sharpen both skates together for uniformity. |
Choosing the Right Sharpening for Your Skating Style
The hollow grind your technician uses is not one-size-fits-all. This critical choice directly impacts how your skates feel after sharpening. Selecting the correct radius of hollow (ROH) is key to a smooth adjustment.
Radius of Hollow (ROH) Options
The ROH refers to the depth of the groove ground into your blade. A smaller number means a deeper, sharper hollow. A larger number creates a flatter, shallower groove.
- Deep Hollow (1/2″ or 5/8″): Provides maximum bite and grip. Ideal for powerful jumpers and heavy skaters.
- Standard Hollow (3/4″): A versatile middle ground offering good control with decent glide. Great for most recreational and freestyle skaters.
- Shallow Hollow (1″ or 1 1/2″): Maximizes glide speed and reduces fatigue. Preferred by ice dancers, synchro skaters, and advanced edge specialists.
Matching Your Hollow to Your Discipline
Your primary skating discipline should guide your ROH selection. The right match minimizes the post-sharpening adjustment period.
| Skating Style | Recommended ROH Range | Primary Benefit |
|---|---|---|
| Freestyle/Jump Focused | 5/8″ to 3/4″ | Secure take-off and landing grip. |
| Ice Dance & Edge Work | 7/8″ to 1 1/2″ | Superior glide and flow across the ice. |
| Recreational & Learn-to-Skate | 3/4″ to 7/8″ | Forgiving control that builds confidence. |
| Synchro Skating | 1″ to 1 1/2″ | Easier crossovers and less leg fatigue. |
Communicating with Your Skate Technician
Clear communication ensures you get the sharpening you need. Don’t just ask for a “regular sharpening.” Provide specific feedback.
- Describe Your Last Sharpening: Was it too grabby or too slippery? This history is invaluable.
- State Your Discipline & Level: “I’m a freestyle skater working on doubles” gives perfect context.
- Request a Specific ROH: Based on the guide above, ask to try a particular measurement.
Maintaining Your Sharpening and Knowing When to Re-Sharpen
Proper care extends the life of your sharpening and keeps the feel consistent. Neglect can make every post-sharpening session feel like a harsh reset. Follow these maintenance habits.
Daily Blade Care to Preserve Edges
Your actions off the ice are as important as your technique on it. Simple routines prevent premature dulling and damage.
- Dry Thoroughly: Always wipe blades completely with a soft, absorbent cloth after skating. This prevents rust, which degrades edges.
- Use Proper Guards: Wear hard soakers for absorption in your bag and rigid guards for walking. Never store blades in wet guards.
- Store Correctly: Keep skates in a breathable bag, not a sealed plastic bag. Ensure the area is dry and at room temperature.
Recognizing the Signs of Dull Blades
Don’t wait until you lose all control. Learn to identify the subtle signals that it’s time for a new sharpening.
You’ll notice a gradual decline in performance, not a sudden change. Compare this to the distinct “new” feeling after a fresh sharpening.
| Sign | What You’ll Feel | Action Required |
|---|---|---|
| Loss of Grip on Push-Off | Feeling like you’re slipping when trying to accelerate. | Sharpen soon. |
| Difficulty Holding an Edge | Skates slide out during turns or spirals. | Schedule a sharpening. |
| Increased Effort & Fatigue | Legs tire quickly because you’re fighting for grip. | Sharpen immediately. |
| Visible Rust or Nicks | Physical damage on the blade’s surface. | Sharpen and assess for deeper repair. |
Establishing Your Optimal Sharpening Schedule
Frequency depends on ice time, skating style, and personal preference. Track your sessions to find your ideal rhythm.
- Log Your Ice Time: Note the date of your sharpening and subsequent hours skated.
- Note Performance Drop: Record when you first feel the edges becoming less responsive.
- Create a Pattern: Use this data to predict and schedule your next sharpening proactively.
Troubleshooting Persistent Problems After Sharpening
Sometimes, the “off” feeling doesn’t fade with a normal break-in period. Persistent issues often point to deeper problems with the sharpening job or your equipment itself. Here’s how to diagnose and fix them.
When Your Blades Feel Uneven or Unbalanced
A feeling of leaning to one side or having one skate that grips differently is a major red flag. This indicates an inconsistent sharpening between your two blades or even on a single blade.
- Check the Sharpener: Inconsistent pressure during the grinding process can create a uneven hollow. Ask your technician to check both blades with a radius gauge.
- Inspect the Blade Mount: A loose or shifted blade mounting can cause severe imbalance. Ensure all screws are tight and the blade is centered on the boot sole.
- Test on a Flat Surface: Place your skates on a known flat surface, like a glass table. See if both blades rock evenly or if one sits unevenly.
Dealing with Excessive “Bite” or “Catchiness”
If your edges feel dangerously sharp and you’re catching toes or picking, the hollow is likely too deep for your weight or skill level.
For a permanent solution, request a shallower Radius of Hollow (ROH) at your next sharpening. Moving from a 1/2″ to a 5/8″ or 3/4″ can make a world of difference.
Identifying a Poor Quality Sharpening Job
Not all sharpenings are created equal. Signs of a bad job require a re-do from a more reputable technician.
| Problem | Visual/Physical Clue | Solution |
|---|---|---|
| Burred or “Wire” Edges | Run your fingernail lightly across the edge (not down the length). It should feel smooth, not catch or flake. | Demand the burr be removed with a honing stone. |
| Lost Rocker Profile | The blade feels flat, like you’re skating on a straight bar. You lose your natural pivot point. | The blade needs reprofiling, not just a routine sharpening. |
| Deep Grinding Marks | Visible, uneven grooves or scratches running along the blade instead of across it. | Find a new technician with a well-maintained grinding wheel. |
Expert Tips for a Seamless Post-Sharpening Transition
Mastering the adjustment period separates frustrated skaters from confident ones. These pro strategies minimize downtime and maximize performance. Implement them to make every sharpening feel like an upgrade.
Pre-Sharpening Preparation for Better Results
What you do before dropping off your skates sets the stage for success. Clear communication with your technician is the first critical step.
- Clean Your Blades: Wipe off all dirt and ice melt. This allows the technician to see the true blade condition and ensures a clean grind.
- Note Your Current Feel: Is your current hollow too slippery or too grabby? Give this specific feedback to guide the next sharpening.
- State Your Goals: Say, “I’m working on deeper edges,” or “I need more glide for my dance pattern.” This helps them choose the optimal ROH.
Mental and Physical Adjustment Strategies
Your mindset and warm-up routine are powerful tools. Acknowledge the change and prepare your body for it systematically.
- Embrace the Process: Expect the first 15 minutes to feel different. This mental acceptance reduces frustration and prevents forcing your old technique.
- Off-Ice Balance Drills: Before stepping on the ice, practice one-foot balances in your guards. Reconnect with your center of gravity over the new blade.
- Focus on Pressure, Not Lean: With fresh edges, you often need less body lean. Focus on applying pressure directly down through the blade’s sweet spot.
When to Seek Professional Help vs. Self-Adjustment
Knowing when to troubleshoot yourself and when to return to the shop is crucial. It saves time, money, and prevents equipment damage.
| Situation | Try Self-Adjustment | Seek a Professional |
|---|---|---|
| Edges feel too sharp/catchy | Lightly de-tune toe pick; shorten first session. | If problem persists after 2+ hours, request a shallower ROH. |
| Feeling of imbalance | Check for loose mounting screws. | If screws are tight, the sharpening is likely uneven. Return immediately. |
| Persistent “slipping out” sensation | Focus on center-of-balance drills. | If drills don’t help, the rocker may be flat. Needs reprofiling. |
Essential Gear to Support Your Sharpening Adjustment
The right accessories can dramatically ease the transition to freshly sharpened blades. They protect your investment and enhance your on-ice adaptation. Investing in a few key items pays off in performance and safety.
Must-Have Protective Equipment for New Edges
Walking on hard surfaces instantly dulls pristine edges. Proper protection is non-negotiable from the moment you leave the sharpener.
- Hard Plastic Skate Guards: Use these exclusively for walking on concrete or rubber flooring. They provide a solid, protective sole.
- Soft Absorbent Soakers: Immediately after skating, dry your blades and put on terrycloth soakers. They prevent rust during transport and storage.
- Blade Covers: For long-term storage or travel in a skate bag, use padded blade covers. They protect edges from nicking other gear.
Training Aids to Accelerate Muscle Memory
Specific tools can help you regain your “feel” for the ice faster. They provide feedback and build confidence during the break-in period.
Other useful aids include off-ice balance boards and spinner mats. These tools improve ankle strength and proprioception, which translates directly to better edge control on fresh steel.
Building Your Post-Sharpening Toolkit
Assemble a small kit to keep in your skate bag. This ensures you’re always prepared to care for your blades properly.
| Item | Primary Purpose | Why It Helps Adjustment |
|---|---|---|
| Microfiber Drying Cloth | Quick, thorough blade drying | Prevents rust that alters edge feel prematurely. |
| Ceramic Honing Stone | Remove minor burrs & de-tune | Allows fine-tuning of edge “bite” for personal comfort. |
| Small Screwdriver Set | Tighten blade mounting screws | Ensures blades are secure, eliminating a source of instability. |
| Sharpening Journal & Pen | Record ROH & performance notes | Creates a history to perfect your future sharpening specs. |
Long-Term Blade Health and Performance Optimization
Consistent post-sharpening feel is a hallmark of well-maintained equipment. Long-term care prevents drastic changes and extends blade life. This proactive approach saves money and ensures reliable performance.
The Impact of Blade Material on Sharpening Feel
Not all skate blades are created equal. The steel quality influences how a sharpening feels and how long it lasts.
- Carbon Steel Blades: Softer steel sharpens easily but dulls faster. You may feel a more dramatic change from sharp to dull.
- Stainless Steel Blades: Harder steel holds an edge much longer. The post-sharpening feel remains consistent for more sessions.
- High-Grade Stainless: Premium blades use specialized alloys. They offer superior edge retention and a noticeably smoother, more predictable feel after sharpening.
Investing in quality stainless steel blades is one of the best ways to stabilize your post-sharpening experience.
Establishing a Relationship with a Trusted Technician
Consistency is key. Using the same skilled professional ensures repeatable results and personalized service.
- Find a Specialist: Seek out a technician who primarily works with figure skates, not hockey skates. The requirements are different.
- Communicate Openly: Provide detailed feedback after each sharpening. A good technician will note your preferences.
- Build a History: Your technician will learn your skating style, weight, and preferences, allowing them to perfect your custom hollow over time.
Planning Your Annual Sharpening and Maintenance Schedule
Align your sharpening needs with your skating calendar to avoid poor performance during key times.
| Skating Phase | Sharpening Strategy | Goal |
|---|---|---|
| Off-Season / Break | Get a fresh sharpening 1-2 weeks before returning to ice. | Adjust on relaxed practice ice, not under pressure. |
| Competition Season | Schedule sharpenings 5-7 days before an event. | Allow time for full break-in and peak edge performance. |
| Heavy Training Block | Sharpen more frequently (e.g., every 10 ice hours). | Maintain optimal grip and prevent bad habits from dull edges. |
| Summer or Outdoor Ice | Use a slightly shallower ROH and inspect for nicks often. | Compensate for softer, rougher ice conditions. |
Best Tools for Figure Skate Blade Restoration and Care
Having the right tools makes blade maintenance safe, easy, and effective. These three highly-rated products address the core needs of polishing, protecting, and transporting your blades. Each serves a distinct purpose in a complete care routine.
UICE Skate Sharpener – Best for DIY Polishing
This dual-grit ceramic stone is the ideal tool for removing burrs and polishing out light surface scratches. Its fine and ultra-fine sides allow for progressive smoothing without altering your blade’s hollow. It’s safe for all stainless steel blades and extends time between professional sharpenings.
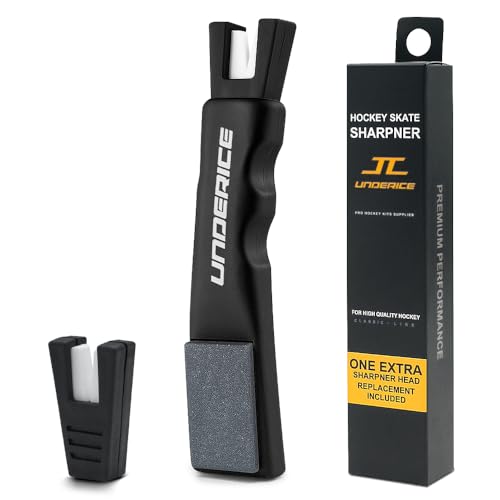
- Hockey-Specific Precision:Engineered to match the curve of hockey skate…
- Durable Ceramic Sharpening Stones:High-hardness ceramic material quickly…
- Ultra-Portable & Easy to Use:Lightweight (0.17 lbs) and 5.3 x 1.1 inches…
Elite Hockey Pro-Blader Soakers – Best for Drying & Protection
Made of super-absorbent terrycloth, these soakers wick moisture away instantly after skating. The elasticized top and reinforced toe cap ensure a secure fit. They are essential for preventing rust and come in various colors for easy identification. A must-have for every skater’s bag.
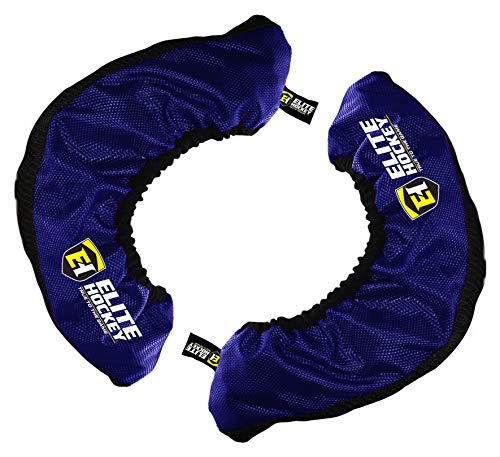
- Specially designed to easily slip over the sharp edges of your skate…
CRS Cross Thermal Ice Skate Boot Covers – Best for Safe Transport
These durable neoprene sleeves protect your blades from nicks and scratches inside your skate bag. They prevent metal-on-metal contact with other skates or gear. The stretchy material fits most figure skate blades snugly, and they are easy to clean. Perfect for keeping blades pristine on the go.

- Warmer feet makes for happier skaters and extends your time on the ice. The…
- CRS Cross utilizes cutting-edge neoprene lined with insulated fleece which…
- Unlike other skating boot covers, CRS Cross Thermal Boot Covers have an…
Conclusion: Mastering Your Figure Skate Sharpening Adjustment
Feeling different after a sharpening is a normal, manageable part of skating. By understanding the science and following a structured break-in routine, you can adapt quickly. The right hollow choice and proper blade care are essential.
The key takeaway is to embrace the process, not fight it. Use your first session to reconnect with your edges through simple drills. Communicate clearly with your technician to refine your preferences over time.
Implement the strategies in this guide during your next sharpening. Notice how your confidence and control improve faster. Keep a journal to track what works best for your unique style.
With this knowledge, you can transform a period of uncertainty into a predictable step toward peak performance on the ice.
Frequently Asked Questions About Figure Skate Sharpening
How long does it take to adjust to newly sharpened skates?
Most skaters need 20-30 minutes of deliberate on-ice practice to feel comfortable. This adjustment period involves re-establishing muscle memory for the new edges. Full confidence for complex elements may take 1-2 full skating sessions.
The time varies based on your skill level and the depth of the hollow. Consistent skaters adapt faster than occasional skaters. A structured break-in routine significantly shortens this adjustment window.
What is the best radius of hollow for beginner figure skaters?
Beginners should start with a standard 3/4″ or a slightly shallower 7/8″ hollow. These provide a good balance of control and glide without being too “grabby.” This reduces the risk of catching an edge and falling.
A shallower hollow is more forgiving and helps build confidence. As skills advance, you can experiment with deeper hollows for more grip on jumps and spins. Always discuss your level with your sharpener.
Why do my skates feel sticky after sharpening?
That sticky or “catchy” feeling means your edges are extremely sharp, likely from a deep hollow grind. Your blades are biting into the ice more aggressively than you’re used to. This is common with a 1/2″ or 5/8″ radius.
Focus on using less body lean and more direct downward pressure. If it persists, request a shallower hollow next time. You can also lightly de-tune the very front of the blade near the toe pick.
How often should I sharpen my figure skates?
Sharpen your skates every 15-20 hours of ice time for recreational skating. Competitive skaters may need sharpening every 5-10 hours. The frequency depends on ice conditions, your weight, and skating intensity.
Don’t wait until you completely lose control. Signs you need a sharpening include slipping on push-offs, difficulty holding edges, and increased leg fatigue. A sharpening journal helps track your ideal schedule.
What should I do if my skates feel unbalanced after sharpening?
First, check that your blade mounting screws are tight. Loose screws can cause a severe imbalance. If screws are secure, the sharpening itself may be uneven between blades or along one blade.
This requires a professional correction. Return to your technician and explain the imbalance. A reputable sharpener will check both blades with a radius gauge and re-sharpen them evenly at no extra cost.
Is it normal for one skate to feel different than the other post-sharpening?
No, both skates should feel symmetrical after a proper sharpening. A noticeable difference indicates an inconsistency in the sharpening job. This can happen if pressure wasn’t even on the grinding wheel.
Skate on them for a brief test session to confirm the feeling isn’t just in your head. If the imbalance remains, take them back immediately for correction. Consistent edges are crucial for safe skating.
What is the best way to break in sharpened skates for jumps?
Start with off-ice jumps in your guards to re-familiarize your take-off foot placement. On ice, begin with simple waltz jumps and single rotations. Focus on a clean, centered take-off from a controlled entry edge.
Avoid attempting your hardest jumps first. The new edges will react differently. Gradually progress to more difficult jumps as you rebuild trust in the blade’s grip and your balance point.
Can I sharpen my figure skates at home?
We do not recommend home sharpening for figure skates. It requires expensive, precise equipment and significant expertise. An improper grind can ruin your blade’s rocker profile and hollow, leading to costly reprofiling.
Invest in a relationship with a qualified professional sharpener. They have the proper machinery and experience to give you consistent, reliable results that match your skating style and discipline.