Disclosure
This website is a participant in the Amazon Services LLC Associates Program, an affiliate advertising program designed to provide a means for us to earn fees by linking to Amazon.com and affiliated sites.
Breaking in figure skates is the essential process of molding new, stiff boots to the unique shape of your feet. It transforms rigid, often painful footwear into a comfortable, responsive extension of your body. This crucial step prevents blisters and improves on-ice performance dramatically.
Without proper break-in, skaters face discomfort and hindered skill development. This guide explains the proven methods to achieve a perfect, custom fit. You’ll learn how to accelerate the process safely and avoid common mistakes that can damage your skates.
The Stiff Boot Struggle: Why New Skates Hurt
New figure skates are intentionally rigid to provide ankle support for jumps and spins. This stiffness creates a significant break-in period. The boots resist the natural contours of your feet, causing pressure points, blisters, and general discomfort.
This pain can distract from technique and slow skill progression. Many skaters mistake this initial discomfort for a poor fit. Understanding that it’s a normal, solvable phase is the first step toward achieving that perfect, glove-like feel.
Accelerate Comfort: The Right Gear Helps
While time on ice is the best method, specific products can protect your feet and speed up the process. Using a quality skate sock and protective gel pads can make those first hours much more manageable.
For a reliable and affordable option, many skaters use Dr. Scholl’s Moleskin Padding Roll. This product is a break-in staple for good reason.
- Creates a protective barrier between your skin and the boot’s stiff interior.
- Adhesive backing stays in place during wear, preventing friction.
- Can be cut to custom sizes to target specific hot spots like ankles or heels.

- Thin design conforms to the foot and fits in all shoes
- Designed to stay on all day
- Cuttable Moleskin can be shaped to any size
Check current price on Amazon →
When the Break-In Process Isn’t Enough
If intense pain persists beyond the normal break-in window, the issue may be the skate itself. A proper initial fit is non-negotiable. Skates that are too wide, narrow, or lack the correct arch support will never break in correctly.
This is where choosing the right model from the start is critical. Our guide to the most comfortable ice skates for beginners highlights boots designed with more forgiving materials. For persistent fit issues, consider models known for their adaptability, like those featured in our Riedell Soar ice skates review or the Jackson Ultima Softskate review, which are built to reduce break-in time.
The Science of the Skate Break-In Process
Breaking in skates is more than just wearing them. It’s a deliberate physical process of softening and reshaping the boot’s materials. This molding allows the skate to provide support where you need it and flexibility where you don’t.
The goal is to achieve a custom fit that balances stiffness for support with pliability for comfort. Understanding this science helps you break in your skates effectively without damaging them.
What Actually Changes in the Boot?
During break-in, specific parts of the skate undergo transformation. The focus is on areas that contact pressure points on your foot.
- Ankle Padding and Collar: This area softens to cup your ankle bones comfortably, eliminating painful rubbing and providing a secure, locked-in heel.
- Forefoot and Toe Box: The material expands slightly to accommodate the width and volume of your forefoot, preventing numbness and allowing for proper toe movement.
- Flex Point at the Ball of the Foot: The boot develops a consistent, smooth flex point that aligns perfectly with your foot’s natural bending motion for pushes and jumps.
How Long to Break In Figure Skates: A Realistic Timeline
The break-in period varies dramatically based on boot material and stiffness. Setting proper expectations prevents frustration and injury from rushing.
| Skate Type / Material | Estimated Break-In Time | Key Consideration |
|---|---|---|
| Beginner Synthetic Boots (softer flex) | 2-4 hours on ice | Molds quickly but offers less long-term support for advanced skills. |
| Intermediate Leather Boots | 8-15 hours on ice | Requires consistent, shorter sessions to gradually shape the denser material. |
| Advanced/Stiff Boots (for jumps) | 15-30+ hours on ice | Demands patience. Never try to accelerate by “baking” or overheating non-thermoformable boots. |
Remember, this is active skating time. Standing in them off-ice does little. The process is complete when the skates feel secure but no longer create sharp, focused pain.
Proven Methods: How to Break In Skates Correctly
Using the right techniques is crucial for a successful and safe break-in. Rushing or using improper methods can permanently damage your skates’ structure. Follow this step-by-step guide to mold your boots effectively.
The core principle is gradual pressure application. You want to slowly convince the material to conform, not force it to break. Patience here directly translates to better performance and longevity.
Step-by-Step Off-Ice and On-Ice Break-In Routine
Start gently off the ice before taking your first full session. This preps the boots and your feet for the main work ahead.
- Initial Wear at Home: Lace your skates up snugly (not tight) and wear them while sitting for 20-30 minutes. Flex your ankles forward repeatedly to start working the stiff tongue and forward flex point.
- First On-Ice Session: Limit your first skate to 15-20 minutes. Focus on basic edges, stroking, and simple footwork. Avoid jumps or intense pressure. The goal is gentle, consistent movement.
- Gradual Progression: Add 10-15 minutes to each subsequent session. Listen to your feet—if a sharp “hot spot” develops, stop and address it with moleskin before continuing.
Common Break-In Mistakes to Avoid
Many well-intentioned shortcuts can ruin new skates. Steer clear of these frequent errors.
- Soaking or Heating Non-Moldable Boots: Never use water, a hairdryer, or an oven unless the manufacturer explicitly states the boots are thermo-moldable. This can delaminate materials and destroy support.
- Over-Tightening the Laces: Cranking the laces cuts off circulation and creates new, unnatural pressure points. Lace firmly for support, but you should still be able to wiggle your toes.
- Using Someone Else’s Broken-In Skates: Skates mold to one person’s feet. A “broken-in” skate for someone else will have their pressure points, not yours, and can hinder your technique.
Advanced Techniques and Professional Skate Fitting
For serious skaters or those with difficult feet, basic break-in may not suffice. Advanced methods and professional help can make the difference between agony and perfect harmony. These solutions address specific, persistent fit issues.
Knowing when to seek a professional skate fitter is a sign of an informed skater. They have tools and expertise to modify boots in ways you safely cannot at home.
When to Consider Professional Punch-Outs and Stretches
A qualified skate technician can use specialized tools to permanently stretch or “punch out” specific areas of the boot. This targets isolated pressure points that won’t resolve with general wear.
- Bone Spurs or Bunions: A technician can create a small, precise bulge in the boot’s exterior to accommodate a bony protrusion without compromising overall support.
- Tailor’s Bunion (Fifth Metatarsal): The outer foot near the pinky toe is a common hotspot. A targeted punch-out here relieves rubbing and pain.
- High Instep or Collar Pressure: The ankle collar can be gently stretched or rolled to reduce pressure on the front of the ankle or a high instep.
Heat Molding and Thermoformable Boots
Many modern mid-to-high-level skates are thermoformable. This means they can be carefully heated in a specialized oven to become pliable, then worn to set a custom shape.
This is a controlled, accelerated break-in performed by a professional. It is not a DIY project.
| Process | DIY Break-In | Professional Heat Molding |
|---|---|---|
| Method | Gradual pressure from skating. | Controlled heat application followed by wearing. |
| Time to Custom Fit | Weeks of sessions. | Minutes (plus cooling time). |
| Precision | General molding of the entire boot. | Highly precise, can target specific zones. |
| Best For | All skaters, standard foot shapes. | Serious skaters, difficult fits, or to accelerate the process safely. |
If your skates are thermoformable, using this service is the single most effective step for a perfect fit. Consult our guide to the best women’s ice skates or Jackson Ultima 200/500 review for models that often feature this technology.
Signs Your Skates Are Properly Broken In
How do you know when the process is truly complete? A perfectly broken-in skate provides a distinct feel that balances security with comfort. It should feel like a supportive extension of your leg, not a separate piece of equipment.
Recognizing these signs prevents you from stopping too early or pushing through pain unnecessarily. The goal is a harmonious relationship between your foot and the boot.
The Feel of a Perfect Fit: Comfort Meets Control
A successfully broken-in skate meets specific criteria for performance and feel. Use this checklist to assess your progress.
- Secure Heel Lock: Your heel is held firmly in place with zero lift or slippage when you bend your knees. This is the non-negotiable foundation of good fit.
- Even Pressure Distribution: There are no sharp, pinpoint areas of pain. Any remaining sensation should be a dull, even pressure across the foot.
- Natural Flex Point Alignment: The boot bends easily and precisely at the ball of your foot. Your foot and the boot move as one unit without resistance or pinching.
- Toe Comfort: Your toes can lie flat and spread slightly without being cramped or jammed. You should be able to wiggle them freely.
How Broken-In Skates Improve Your Performance
The benefits extend far beyond mere comfort. A proper fit directly translates to better skating technique and confidence on the ice.
When your skates are an extension of you, your body can focus on movement, not distraction. This leads to tangible improvements in your skills.
| Skating Element | Impact of a Properly Broken-In Boot |
|---|---|
| Edges & Turns | You can feel the ice more precisely, allowing for deeper, more controlled edges and cleaner turns without boot resistance. |
| Jumps and Landings | Secure ankle support provides stability for take-off, and proper flex aids in absorbing the impact of landings, reducing strain. |
| Stroking and Power | Efficient energy transfer from leg to blade creates stronger pushes, as no power is lost to foot slippage or instability. |
| Overall Confidence | Eliminating the fear of pain allows you to commit fully to new elements and practice longer, more productive sessions. |
For skaters seeking this level of integrated performance, starting with a well-designed boot is key. Explore options in our Lake Placid Nitro review or guide to versatile indoor/outdoor skates to find a model built to support your growth.
Special Considerations for Different Skaters
The break-in process isn’t one-size-fits-all. Key factors like age, skill level, and foot type significantly influence the approach. Tailoring your strategy to your specific situation ensures a better outcome and prevents frustration.
Understanding these nuances helps you set realistic expectations. A child’s experience will differ vastly from an adult beginner’s or a returning competitive skater’s.
Breaking in Skates for Beginners vs. Advanced Skaters
The goals and challenges of breaking in skates shift dramatically with experience. The boot’s stiffness and the skater’s tolerance are the main variables.
| Factor | Beginner Skaters | Advanced Skaters |
|---|---|---|
| Boot Stiffness | Softer flex for basic skills. Breaks in faster but may break down sooner. | Very stiff for multi-revolution jumps. Requires a long, patient break-in to preserve support. |
| Primary Challenge | Building tolerance to the unfamiliar feeling of a rigid boot. Managing general discomfort. | Molding an extremely stiff boot without creating pressure points that affect complex technique. |
| Best Approach | Short, frequent sessions. Focus on comfort to build confidence on the ice. | Meticulous, gradual process. Often requires professional fitting/punch-outs from the start. |
Adapting the Process for Children and Adults
Age impacts both physiology and patience levels. A child’s growing feet and lower pain threshold require special attention.
- For Children: Prioritize comfort above all. Their feet are growing, and a painful experience can turn them off skating. Look for adjustable skates that accommodate growth, like those in our Lake Placid Summit youth skates review. Keep initial sessions very short (10-15 minutes) and fun.
- For Adult Beginners: Adults often have less ankle flexibility and may be more sensitive to pressure points. The break-in may take longer due to stiffer muscles and tendons. Emphasize off-ice ankle flexing exercises and use protective padding liberally.
- For Wide or Narrow Feet: Don’t rely on break-in to fix width issues. A boot that is fundamentally too narrow will not stretch enough safely. Choose brands known for your width profile from the start, a key factor covered in our guide to the best warm and comfortable ice skates.
Essential Gear and Accessories for the Break-In Period
The right accessories are not luxuries; they are tools for a successful break-in. They protect your feet, manage moisture, and can prevent minor issues from becoming major setbacks. Investing in a few key items makes the process more tolerable and efficient.
Think of these products as your personal break-in toolkit. They work alongside your patience and technique to achieve that perfect custom fit.
Must-Have Products for Protection and Comfort
These items address the most common sources of break-in pain. Having them on hand before your first skate is a proactive strategy.
- High-Quality Skate Socks: Use thin, moisture-wicking synthetic or wool blend socks (never thick cotton). They reduce friction and keep feet dry, preventing blisters. Consider socks with light padding in key areas.
- Gel or Foam Pads: Self-adhesive pads like Bunga Pads or gel sleeves provide cushioning exactly where you need it. They are ideal for protecting ankle bones, the Achilles tendon, and the top of the foot from lace bite.
- Moleskin or Blister Patches: As mentioned, Dr. Scholl’s Moleskin is a classic. Apply it to hot spots on your foot before a blister forms. Hydrocolloid blister bandages are excellent for treating blisters that do occur.
Maintenance Tips During and After Break-In
How you care for your skates during this critical period affects the final result and the boot’s lifespan. Proper maintenance ensures the materials shape correctly and dry effectively.
- Always Dry Your Boots: After each session, remove the liners (if possible) and use absorbent skate dryers or simply stuff the boots with newspaper. This pulls out sweat, prevents odor, and stops the packed-down padding from staying damp and abrasive.
- Loosen Laces Fully: When taking off your skates, unlace them completely down to the toe. This relieves tension on the eyelets and leather, allowing the boot to relax and air out fully between uses.
- Store Properly: Keep skates at room temperature in a breathable bag, never in a hot car or damp trunk. Extreme heat can warp the shape you’re working so hard to create.
Starting with a boot designed for comfort can reduce your reliance on accessories. For insights into models that prioritize a smoother break-in, see our detailed Lake Placid Cascade review for a popular beginner-friendly option.
Troubleshooting Common Break-In Problems
Even with the best preparation, issues can arise. Knowing how to diagnose and solve common problems will save you pain and preserve your skates. Quick, correct action prevents a minor annoyance from ending your skating session or damaging your gear.
This troubleshooting guide addresses the most frequent complaints skaters have during the break-in phase. Most have straightforward solutions.
Solving Persistent Pain Points and Blisters
Localized pain is a signal from your foot. Identify the type and location to apply the right fix.
| Type of Pain / Symptom | Likely Cause | Immediate Solution |
|---|---|---|
| Sharp, pinpoint pain on a bone (ankle, bunion) | Pressure point from stiff, un-molded material. | Apply a donut-shaped moleskin pad around (not on) the spot to offload pressure. Consider a professional punch-out. |
| Burning lace bite on front of ankle/top of foot | Laces too tight or tongue not positioned correctly. | Re-lace, skipping the eyelet over the painful area. Use a gel tongue pad or a curved skate tongue. |
| Rubbing/blister on heel or Achilles | Heel slippage or stiff collar. | Apply a heel gel sleeve or moleskin to the affected area on your foot. Ensure proper lacing technique to lock the heel. |
| Numbness or tingling in toes | Laces too tight over the instep, cutting circulation. | Immediately loosen laces across the mid-foot. Lace snugly at the ankle, but keep the forefoot comfortably secure. |
When to Stop and Seek Professional Help
Some problems indicate a fundamental fit issue that break-in cannot fix. Continuing to skate in these conditions can cause injury.
- Persistent Numbness or Shooting Pain: This indicates nerve compression. Stop using the skates immediately and consult a professional fitter. This is not normal break-in discomfort.
- Severe, Widespread Pain: If your entire foot is in agony, the boot may be the wrong size, width, or arch profile. Re-evaluate the fundamental fit with an expert.
- The Boot Doesn’t Change: If after 10-15 hours of skating, the boot feels exactly as stiff and painful as day one, the material may be too advanced for your skill level or simply incompatible with your foot shape.
Best Figure Skates for a Smoother Break-In – Detailed Comparison
Choosing the right skate from the start is the most effective way to minimize break-in discomfort. These three models are renowned for their balance of support, comfort, and moldability, making the initial process more manageable for their target skaters.
Jackson Ultima Mystique – Best for Beginner Adults
The Jackson Mystique (JS1490) features a soft-flexing PVC boot designed specifically for entry-level adults. Its slightly more forgiving structure requires less break-in time while still providing essential ankle support. The pre-shaped Ultima Mark I blade offers stability right out of the box.

- JS1490 for Women; JS1491 for Girls; JS1494 for Toddler (Girls); JS1592 for…
- Leather upper polyurethane coated and Stylized PVC outsole for easy care,…
- Softer topline for added comfort
Riedell 23 Stride – Best for Intermediate Comfort
Ideal for intermediate skaters, the Riedell 23 Stride uses a softer leather upper that molds quickly to the foot. Its padded Comfort Edge tongue and collar reduce pressure points dramatically. This boot offers a noticeable step up in quality and longevity without an excessively stiff break-in.
- Open Throat Design
- Flex Notch
- Hand Rolled Collar
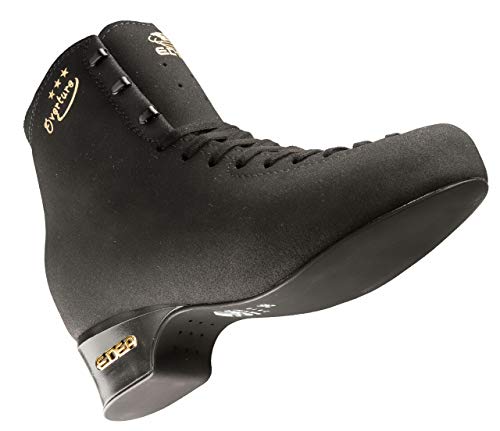
Edea Overture – Best for Advanced Moldability
The Edea Overture is a thermoformable boot with a unique lightweight, stiff-yet-moldable construction. Its “break-in” is often a single professional heat-molding session, providing a near-instant custom fit. This is the premier choice for serious skaters moving into single jumps who want to bypass traditional break-in pain.
- Our boots are designed with lightness in mind making them more responsive….
- The unique insole made by with fiberglass and nylon allows more power…
- Our hi-tech soles are made with ultra modern material making them both…
Conclusion: Mastering the Skate Break-In Process
Successfully breaking in your figure skates transforms them from stiff equipment into a performance-enhancing extension of your body. This process prevents pain, boosts confidence, and unlocks your true skating potential. Patience and proper technique are your most valuable tools.
The key takeaway is to progress gradually and listen to your feet. Use protective accessories and seek professional help for persistent issues. A perfect fit is worth the investment of time and care.
Ready to find skates designed for a smoother break-in? Explore our detailed guides and reviews to make an informed choice. Your journey to effortless gliding starts with the right foundation.
Now lace up with confidence, step onto the ice, and let your perfectly molded skates support every move you make.
Frequently Asked Questions about Breaking In Figure Skates
What is the fastest way to break in new figure skates safely?
The safest, fastest method combines gradual on-ice sessions with proper off-ice preparation. Wear your skates at home for short periods to start flexing the ankle. On ice, begin with 15-20 minute sessions focusing on basic edges.
Increase time slowly each session. Use protective gel pads on pressure points and ensure your skates are properly laced. Never use unauthorized heat methods, as this can damage boot integrity permanently.
How do you know when your skates are fully broken in?
Your skates are fully broken in when they feel secure but pain-free. Key signs include a locked-in heel with no slippage, even pressure distribution without hot spots, and a smooth flex at the ball of your foot.
The boot should feel like a supportive extension of your leg. You’ll notice improved control and confidence on edges, and your focus shifts from foot discomfort to executing skating elements.
Can you break in skates without skating in them?
You can begin the process off-ice, but complete break-in requires actual skating. Sitting or walking in skates at home helps soften the ankle collar and initial stiffness. It starts the molding process.
However, the dynamic pressure, flexing, and edge work of skating are essential to fully shape the boot’s support structure. Off-ice methods alone will not achieve a performance-ready custom fit.
What should you do if your skates are still hurting after breaking them in?
Persistent pain indicates a fit issue. First, identify if the pain is a sharp pressure point or widespread discomfort. For pressure points, use targeted padding and consider professional punch-outs from a skate technician.
If pain is widespread or includes numbness, the skates may be the wrong size or width. Consult a professional fitter immediately, as skating through nerve pain can cause long-term damage.
Is it better to buy tight or loose skates for breaking in?
Always buy skates that fit snugly but not painfully tight when new. Your heel should be locked firmly with toes lightly brushing the front. Skates should not feel “loose” anywhere.
A proper fit allows for about 1/4 inch of space in the toe after the foot settles. Skates that are too large will never break in correctly, as your foot will slide, creating blisters and eliminating control.
How does breaking in advanced skates differ from beginner skates?
Advanced skates have significantly stiffer boots to support jumps, requiring a much longer, more patient break-in period (15-30+ hours). The process is slower to preserve the crucial support structure.
Beginner skates use softer materials that mold faster (2-8 hours) but break down sooner. Advanced skaters often require professional fitting services like heat molding or punch-outs to customize the extremely rigid boot safely.
What are the most common mistakes people make when breaking in skates?
The top mistakes are over-tightening laces, trying to accelerate the process with unauthorized heat, and skating through severe pain. Over-tightening cuts off circulation and creates new pressure points.
Using heat on non-thermoformable boots can delaminate materials. Ignoring sharp or nerve pain can lead to injury. Another error is not drying boots properly between sessions, which slows the molding process.
Can a skate shop help break in my new figure skates?
Yes, a professional skate shop provides invaluable services. For thermoformable boots, they perform heat molding for an instant custom fit. They can also perform precise “punch-outs” to stretch specific areas causing pressure.
A good fitter will assess your initial fit, recommend the right model for your foot, and offer modifications. This professional help is highly recommended for serious skaters or anyone with difficult fit issues.