Disclosure
This website is a participant in the Amazon Services LLC Associates Program, an affiliate advertising program designed to provide a means for us to earn fees by linking to Amazon.com and affiliated sites.
Breaking in new figure skates without pain is absolutely possible with the right techniques. The process is crucial for comfort and performance on the ice.
Painful, stiff skates can ruin your skating experience and lead to blisters. This guide provides proven methods to soften your boots safely and effectively.
Why New Figure Skates Are So Painful to Break In
New figure skates are stiff by design. This stiffness provides essential ankle support for jumps and spins. However, it also creates pressure points that cause blisters and pain.
The break-in process molds the boot’s interior padding to your unique foot shape. Skipping this step leads to discomfort and can even cause injuries. Understanding this problem is the first step to solving it.
Quick Fix: Use a Professional-Grade Boot Stretcher
For targeted relief on specific pressure points, a boot stretcher is invaluable. It applies gentle, consistent pressure to widen tight areas without damaging the skate’s structure.
We recommend the JJDPARTS Shoes Stretcher. This tool is a game-changer for speeding up the break-in process safely at home.
- Adjustable Bumps: Targets precise pain points like bunions or the pinky toe.
- Gentle Expansion: Slowly widens the boot without cracking or damaging the material.
- Universal Fit: Works on both leather and synthetic figure skate boots.
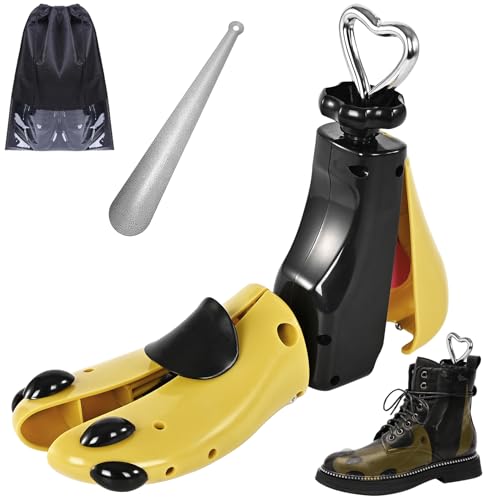
- 【NOT SUITABLE FOR TALL BOOTS !】Yellow(1 Pack L for Women Size 11-14,…
- 【HIGH QUALITY MATERIALS】- Men’s and women’s boots shoe stays are made…
- 【MULTI-WAY ADJUSTABLE DESIGN】- The adjustable shoe last stretcher…
Check current price on Amazon →
When Stretching Alone Isn’t Enough
Sometimes, pain isn’t just about stiffness—it’s about fit. If you experience constant numbness or sharp pain, the skate’s size or shape may be wrong.
In this case, reviewing your initial purchase is crucial. Our guide on selecting the most comfortable ice skates for beginners and pros can help you diagnose a poor fit.
For specific models known for a smoother break-in, read our in-depth reviews of the Jackson Ultima Classic series and the Rollerblade Ice Diva skates. Choosing the right skate from the start is the ultimate pain-prevention strategy.
Step-by-Step Guide to Breaking In Your Skates Safely
Breaking in figure skates is a gradual process. Rushing it leads to blisters and damaged boots. Follow this proven, step-by-step method for a pain-free experience.
This guide focuses on off-ice conditioning and gradual ice exposure. Patience here will reward you with perfectly molded skates.
Phase 1: The Initial Off-Ice Conditioning
Start by wearing your skates at home. This allows the padding to warm and soften from your body heat without the stress of skating.
- Wear Proper Socks: Use thin, moisture-wicking skating socks or tights. Never wear thick cotton socks, as they change the fit and cause more friction.
- Lace Correctly: Lace your skates snugly, but not painfully tight. Stand up and flex your knees in a skating posture for 15-20 minutes at a time.
- Use a Hairdryer (Carefully): For stubborn, stiff areas, apply low heat from a hairdryer for 30-60 seconds while wearing the skate. Flex your foot during heating to help mold the material.
Phase 2: Gradual On-Ice Sessions
Once the skates feel more comfortable off-ice, introduce short skating sessions. The goal is incremental progress.
- First Session (15-20 mins): Focus on simple gliding and edges. Avoid jumps or intense footwork. Listen to your feet and stop if you feel a “hot spot.”
- Subsequent Sessions: Gradually increase ice time by 10-15 minutes per session. Begin to incorporate more advanced moves as comfort allows.
- Post-Skate Check: After each session, inspect your feet for red pressure points. These areas may need targeted stretching with a boot punch tool or extra off-ice molding.
| Week | Focus | Recommended Activity |
|---|---|---|
| Week 1 | Off-Ice Molding | Daily 20-30 min wear at home, knee bends, ankle flexes. |
| Week 2 | Short Ice Exposure | 2-3 sessions of 20-30 mins, basic skating skills. |
| Week 3+ | Full Integration | Normal training duration, introduce jumps/spins as comfort allows. |
Essential Tools and Products for a Pain-Free Break-In
The right tools can transform a painful break-in into a smooth process. These products protect your feet and help mold the skate efficiently. Investing in a few key items saves time and prevents injury.
From blister prevention to targeted stretching, this toolkit is essential for every skater. You don’t need everything, but each serves a specific purpose.
Blister Prevention and Foot Protection
Friction is the main cause of break-in pain. Creating a barrier between your skin and the boot is non-negotiable.
- Gel Pads and Moleskin: Apply these directly to “hot spots” on your feet (heels, ankles, bunions) or to the skate’s interior lining. They provide immediate cushioning and reduce rubbing.
- Technical Skating Socks: Thin, seamless socks made from synthetic blends (like nylon or CoolMax) wick moisture and minimize bulk. Avoid cotton, which retains sweat and increases friction.
- Anti-Friction Balm: Products like Body Glide create an invisible protective layer on the skin. They are excellent for preventing blisters on the back of the heel and the top of the foot.
Tools for Modifying and Stretching the Boot
When protective gear isn’t enough, these tools help alter the skate itself. They solve specific fit issues safely.
| Tool | Best For | Method |
|---|---|---|
| Boot Stretcher | Widening the forefoot or toe box uniformly. | Insert and expand gradually over several hours/days. |
| Boot Punch (Bunion Press) | Creating a single, targeted bulge for a bunion or bone spur. | Used by a professional or with a specialized tool to stretch one spot. |
| Rubbing Alcohol | Softening and molding specific stiff areas of synthetic leather. | Apply lightly with a cloth to the boot’s exterior, then wear to mold. |
Remember, heat molding by a professional skate technician is the most effective method for complex fit issues. For more on skates designed for comfort from day one, see our review of the 5th Element Grace skates.
Common Break-In Mistakes and How to Avoid Them
Many skaters unknowingly sabotage their own comfort with well-intentioned but harmful methods. Avoiding these common errors is as important as following the right steps. They can damage your skates and prolong your pain.
This section highlights critical pitfalls in the skate breaking-in process. Learn what not to do to save yourself time, money, and discomfort.
Rushing the Process and Ignoring Pain Signals
The most frequent mistake is trying to break in skates too quickly. Pain is a signal, not a challenge to overcome.
- Marathon First Sessions: Skating for hours on day one creates severe blisters and deep bruising. It also breaks down the boot’s support prematurely. Stick to short, incremental sessions.
- “Toughing It Out”: Ignoring sharp pain or numbness can lead to nerve damage or persistent injuries. If pain is sharp or localized, stop and address the specific pressure point.
- Skipping Off-Ice Wear: Neglecting to wear your skates at home forfeits a crucial, low-impact molding opportunity. Off-ke conditioning prepares the boot for the stresses of the ice.
Incorrect Lacing and Fit Assumptions
How you lace your skates and your expectations about fit dramatically impact break-in pain.
| Common Mistake | Why It Hurts | Better Solution |
|---|---|---|
| Lacing too tight over the instep | Restricts blood flow, causes foot numbness and cramping. | Lace snugly but comfortably over the arch; tighten most at the ankle. |
| Leaving the top hooks loose | Fails to secure the heel, causing slippage and heel blisters. | Always hook the top two or three eyelets to lock your heel firmly in place. |
| Assuming “they’ll stretch a lot” | Leads to buying skates that are too small, which rarely stretch lengthwise. | Buy for width comfort; expect only minor stretching (1/4 size in width). |
If you suspect a fundamental fit issue, our guide on choosing the best beginner figure skates covers proper sizing fundamentals. For adjustable options that grow with a young skater, our Lake Placid Summit review is an excellent resource.
Advanced Tips for Professional-Level Break-In Results
Once you’ve mastered the basics, these advanced techniques can elevate your break-in process. They are used by competitive skaters and coaches to achieve a truly custom fit. These methods require more precision but offer superior results.
Implement these tips after the initial off-ice and short-session phases. They fine-tune the fit for optimal performance and comfort.
Professional Heat Molding and Custom Punching
For high-end skates with thermal-moldable components, professional help is invaluable. A qualified skate technician has the tools and expertise.
- Oven Heat Molding: Many pro shops have specialized ovens that evenly heat the entire boot. The skater then immediately puts them on, allowing the inner foam to set perfectly to their foot contours.
- Targeted Punch-Outs: Using a hydraulic press, a technician can stretch specific areas (like for bunions, tailor’s bunions, or ankle bones) without affecting the boot’s overall structure. This solves isolated pain points permanently.
- Heel Lock Adjustment: A pro can “crush” the heel counter slightly for a more secure, custom heel pocket. This prevents slippage that causes blisters.
Strategic Lacing Patterns for Targeted Relief
Beyond simple tightness, how you thread the lace can alleviate pressure. Experiment with these patterns after the boot has begun to soften.
| Problem Area | Lacing Pattern | How It Helps |
|---|---|---|
| High Instep / Top-of-Foot Pain | Skip Lacing: Skip the eyelet directly over the pain point. | Relieves direct pressure on the sensitive area while maintaining tightness above and below. |
| Narrow Heel / Heel Slippage | Lock Lacing: Create a loop with adjacent eyelets before crossing over. | Creates a dynamic lock that secures the heel more effectively as you move. |
| Wide Forefoot | Parallel Lacing: Lace straight up the sides without crossing until the ankle. | Provides more volume in the toe box by eliminating cross-lace pressure. |
Remember, the ultimate foundation for an easy break-in is starting with the right skate. For models renowned for their performance and fit, explore our review of top skates with stainless steel blades.
When to Seek Professional Help for Your Skates
Despite your best efforts, some break-in challenges require expert intervention. Knowing when to visit a professional skate technician can save your skates and your skating season. They have specialized tools and knowledge for complex adjustments.
Persistent pain or specific fit issues are clear signals. A pro can often make modifications you cannot safely do at home.
Signs You Need a Skate Technician
Recognize these red flags that indicate a need for professional fitting services. Ignoring them can lead to injury or ruined equipment.
- Persistent “Hot Spots”: A specific area that remains painful and red every time you skate, despite using gel pads and off-ice molding. This often requires a targeted boot punch.
- Numbness or Tingling: Loss of sensation in your toes or foot indicates nerve compression. This is often due to a too-narrow width or a high instep that needs volume added.
- Excessive Heel Lift: If your heel moves more than 1/8 inch vertically when you walk or bend your knees, the heel pocket is too large. A technician can pad or adjust it.
- Asymmetrical Pain: Significant discomfort in only one foot often means your feet are differently shaped. Custom adjustments for each skate are needed.
What a Professional Can Do That You Can’t
A certified fitter offers solutions beyond basic stretching. Their services provide permanent, structural changes.
| Service | DIY Alternative | Professional Advantage |
|---|---|---|
| Hydraulic Boot Punching | Using a handheld stretcher or alcohol. | Precise, controlled expansion in a single spot without weakening surrounding areas. |
| Heel Pocket Reshaping | Adding foam pads. | Can physically alter the rigid heel counter for a truly custom lock. |
| Insole & Orthotic Customization | Using off-the-shelf insoles. | Can grind down footbeds or create custom orthotics to address biomechanical issues causing pain. |
For skaters who want a high-quality, adjustable option that minimizes fit issues from the start, our review of the Lake Placid Nitro skates details an excellent design that accommodates growth and varying foot volumes.
Maintaining Comfort and Fit After the Break-In
Successfully breaking in your skates is only half the battle. Maintaining that perfect fit ensures long-term comfort and performance. Proper care prevents the boots from breaking down prematurely or losing their shape.
This final phase focuses on preservation and minor adjustments. A well-maintained skate will feel comfortable for its entire lifespan.
Daily and Weekly Skate Care Routine
Incorporate these simple habits into your skating regimen. They protect your investment and your feet.
- Wipe Down Blades & Boots: After each session, thoroughly dry your stainless steel or carbon steel blades with a soft cloth to prevent rust. Wipe any snow or moisture from the boot’s exterior.
- Use Boot Trees: Insert cedar or form-fitting boot trees after skating. This absorbs interior moisture and helps the boot retain its proper shape as it dries, preventing creases and collapse.
- Rotate Your Guards: If you use soakers or hard guards, ensure the boot is dry before putting them on. Never store skates long-term in hard guards, as they trap moisture.
- Check for Wear: Regularly inspect your laces, hooks, and the boot’s interior lining for signs of wear. Replace worn laces immediately to maintain consistent tightness.
Addressing Fit Changes Over Time
Your feet and skates can change. Recognizing and adapting to these changes keeps your skates feeling like new.
| Change | Likely Cause | Simple Solution |
|---|---|---|
| Boot feels slightly looser | Padding has fully compressed and molded. | Use a slightly thicker sock or a thin, full-length shock absorber insole. |
| New pressure point emerges | Foot shape change, or boot breakdown in one area. | Apply a targeted gel pad to the foot or the boot’s interior lining. |
| Loss of ankle support | Boot material has broken down and softened over months/years. | Consider external ankle support straps or, ultimately, new skates. Support cannot be fully restored. |
For skaters who need versatile footwear for different conditions, which can affect break-in and care, our guide on the best skates for indoor and outdoor use provides crucial maintenance context for different ice types.
Frequently Asked Questions About Breaking In Skates
Skaters often have specific, pressing questions during the break-in process. This section answers the most common queries with clear, actionable advice. Getting these answers can provide immediate relief and confidence.
These FAQs address concerns about timing, pain thresholds, and equipment. Use them to troubleshoot your personal experience.
Timeline and Pain Management Questions
Understanding what’s normal helps you manage expectations and avoid unnecessary worry.
- “How long should it really take to break in new figure skates?” For most recreational skaters, 10-15 hours of combined off-ice and on-ice wear is sufficient. Competitive skaters in stiff boots may need 20+ hours. The key is consistency, not marathon sessions.
- “Is it normal for my feet to go numb?” No, numbness is not normal. It signals that your skates are laced too tightly over your instep or are too narrow, compressing nerves. Re-lace more loosely over the arch or consult a professional for width adjustment.
- “Can I speed up the process without damaging my skates?” Yes, safely. Combine methods: use a boot stretcher for targeted areas, wear skates with thick socks while applying low heat from a hairdryer, and ensure you’re using proper protective gel pads on the ice.
Product and Technique Queries
Choosing the right aids and methods is crucial for success.
| Question | Short Answer | Detailed Guidance |
|---|---|---|
| Are silicone heel pads worth it? | Yes, for heel slip. | They are excellent for filling space in a slightly large heel pocket. For major heel lift, professional adjustment is better. |
| Can I use rubbing alcohol to stretch my skates? | Use with caution. | It can soften synthetic materials. Apply sparingly to the exterior of a tight spot, then wear the skate to mold it. Test in an inconspicuous area first. |
| Should I get my skates heat-molded at the shop? | Highly recommended for mid/high-level skates. | If your skates have thermal-moldable components, professional heat molding is the single most effective step for a custom fit and faster break-in. |
For more detailed analysis on specific skate models and their break-in characteristics, our in-depth reviews like the Jackson Ultima Classic review often discuss the out-of-box feel and molding process.
Best Products for Breaking In Figure Skates – Detailed Comparison
Having the right tools makes the break-in process faster and more comfortable. These three products are highly recommended by skaters and technicians for their effectiveness and reliability. Each serves a distinct purpose in your toolkit.
FLEETING SPORTS Professional Skate Boot Stretcher – Best for Targeted Widening
This tool is ideal for solving specific pressure points like bunions or a narrow toe box. Its adjustable aluminum knobs allow precise control over the stretch location and intensity. It provides a safe, gradual expansion without damaging the boot’s structural integrity, making it superior to risky DIY methods.
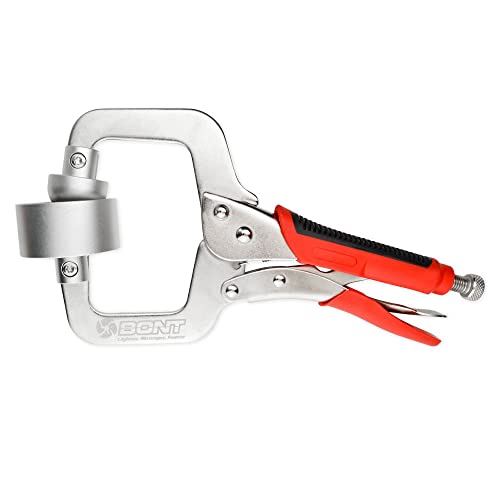
- Removing hot spots from the heel of carbon inline skates, ice speed skates,…
- The Bont Rip Jaws is a hot spot removal tool Bont invented this tool in…
- A hot spot is an area of discomfort in your boot. The Bont Rip Jaws hot…
Body Glide Original Anti-Chafe Balm – Best for Blister Prevention
Applied directly to the skin, this balm creates an invisible, long-lasting barrier against friction. It is non-greasy, waterproof, and won’t stain socks or boot liners. Ideal for preventing blisters on the heels, ankles, and the top of the foot during those critical first on-ice sessions.

- Dry and Non-Greasy: No more wet or greasy feel
- Preferred over Messy Creams and Gels: The top choice for those who dislike…
- Long-Lasting Protection: Enjoy all-day chafing prevention
Superfeet FlexThin Customizable Insoles – Best for Arch Support and Fit Refinement
These thin, supportive insoles can improve comfort and fill volume if your skates become slightly roomy post-break-in. The adaptive foam layer allows you to trim them for a perfect fit. They provide superior arch support, which can alleviate foot fatigue and cramping during long practices.
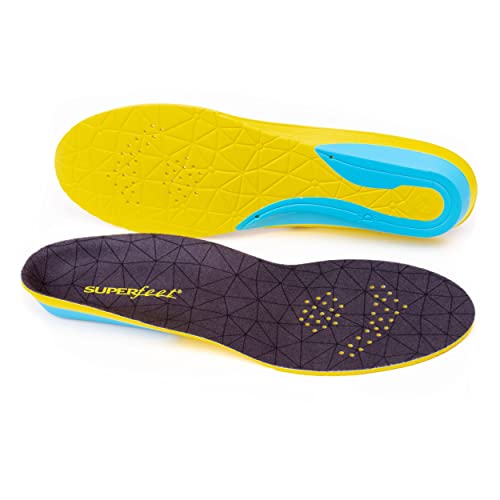
- Orthotic Shoe Insoles: Helps stabilize and support foot; reduces stress on…
- Ventilated Forefoot: These insoles help keep feet cool and comfortable in…
- Durable Orthotic Shoe Insoles: For reliable support and comfort for up to…
Conclusion: Mastering the Art of a Pain-Free Skate Break-In
Breaking in new figure skates without pain is a systematic process. By following the phased approach and using the right tools, you can achieve a perfect, custom fit. This transforms stiff boots into comfortable extensions of your feet.
The key takeaway is patience and consistency. Avoid rushing and listen to your body’s signals. Invest in protective products and professional help when needed.
Start your break-in journey today with our step-by-step guide. Share your success stories or questions in the comments below.
With the right knowledge, your path to comfortable, high-performance skating is clear. Enjoy the glide!
Frequently Asked Questions about Breaking In Figure Skates
What is the fastest way to break in figure skates without damaging them?
The fastest safe method combines off-ice wear with targeted tools. Wear your skates at home with thick socks for short periods daily. Use a professional boot stretcher on specific pressure points and consider professional heat molding if your skates support it.
Always avoid extreme methods like soaking or using a conventional oven. Consistency over several days is faster and safer than one painful marathon session that causes injury.
How tight should new figure skates be when you first buy them?
New skates should feel snug but not painfully tight. Your toes should just brush the front when standing straight, with no pinching or numbness. There should be minimal heel lift when you bend your knees.
Remember, skates will stretch slightly in width but not in length. If they are excruciatingly tight in the store, they are likely too small. A proper initial fit is crucial for a successful break-in.
Can you break in figure skates by just wearing them at home?
Yes, off-ice wear is a fundamental and highly effective part of the process. Wearing your skates while watching TV or doing light chores allows the interior padding to soften and mold to your foot shape from body heat alone.
This reduces the initial stiffness before you ever step on the ice, making your first skating sessions significantly more comfortable and reducing blister risk.
What should I do if I get a blister while breaking in my skates?
Stop skating immediately to prevent the blister from worsening. Cover the blister with a specialized hydrocolloid bandage or moleskin before your next session. Ensure your skating socks are seamless and moisture-wicking.
Identify the friction point inside your skate. Apply a gel pad or moleskin to the boot’s interior lining over that spot to create a buffer between your skin and the hard material.
Is it better to get figure skates heat molded by a professional?
For mid-range and high-performance skates with thermal components, professional heat molding is highly recommended. A shop oven heats the boot evenly, allowing the inner foam to perfectly conform to your foot’s unique contours.
This service can drastically reduce the overall break-in time and discomfort. It is a worthwhile investment for achieving a truly custom fit that is difficult to replicate at home.
Why do my feet go numb in new figure skates, and how do I fix it?
Numbness is caused by restricted blood flow, usually from laces tied too tightly over the instep or a boot that is too narrow. It is a warning sign you should not ignore.
To fix it, re-lace your skates, keeping them snug at the ankle but noticeably looser over the arch of your foot. If the problem persists, the boot width may need professional stretching.
How long does it take for figure skates to feel completely broken in?
Most skaters need 10 to 20 hours of total wear time, spread over 2 to 4 weeks. Recreational skates in softer boots may feel good sooner, while stiff competition boots take longer. The “completely broken in” feeling is when the skates feel secure but no longer create hot spots or pain.
The break-in is complete when you can focus on your skating technique instead of your feet.
What is the difference between breaking in leather vs. synthetic figure skates?
Leather boots generally mold more gradually to the foot and can be stretched more effectively by a professional. Synthetic boots (like those with thermoplastic quarters) often require precise heat molding for major changes but may break in faster initially.
The break-in principles are similar, but the techniques may vary. Always check the manufacturer’s guidelines for care and molding specific to your skate’s material.