Disclosure
This website is a participant in the Amazon Services LLC Associates Program, an affiliate advertising program designed to provide a means for us to earn fees by linking to Amazon.com and affiliated sites.
If your hoverboard suddenly won’t balance, keeps pulling to one side, or vibrates like crazy, it’s time to recalibrate it.
It’s frustrating when your self-balancing scooter turns into a wobbly mess—especially when you spent good money on it. One day it works perfectly, and the next, it’s throwing you off or shaking uncontrollably. Before you panic or assume it’s broken, there’s a surprisingly easy fix: calibration.
Calibrating your hoverboard resets its internal gyroscope, which is responsible for detecting tilt and orientation. When this system becomes misaligned—even slightly—it can send incorrect signals to the motors, causing balance issues.
Best Hoverboards for Smooth Performance After Calibration
Calibrating your current hoverboard can breathe new life into it, but sometimes persistent issues are a sign it’s time for an upgrade. If you’ve had enough of misfires, bad gyroscopes, or shaky rides, here are three top-rated hoverboards known for smoother performance, durable builds, and better calibration compatibility.
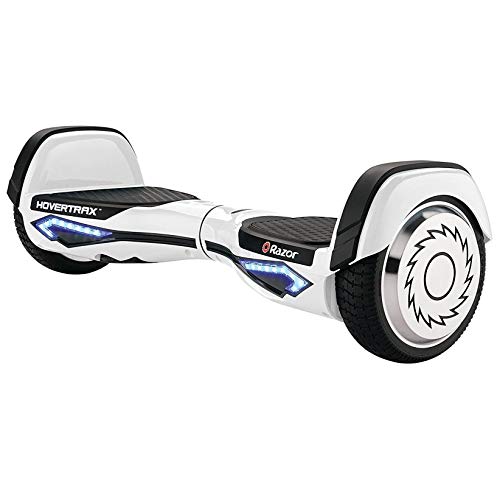
1. Razor Hovertrax 2.0
Why we picked it: Razor Hovertrax 2.0 is UL 2272 certified, offers EverBalance technology for easy calibration, and delivers a stable, self-correcting ride—perfect for beginners or those tired of wobbly boards.
- The world’s smartest self-balancing electric scooter, made by Razor, the…
- UL 2272 certified, ensuring that the patented Razor Hovertrax 2.0 meets the…
- Cruising speed of 8+ mph with silent 350-watt motors and a run-time of up…
2. EMAXUSA Hoverboard with Bluetooth Speaker and LED Lights
Why we picked it: This EMAXUSA model features self-balancing tech, a reliable gyroscope system, and smart app compatibility, making recalibration easier and safer for users with Bluetooth-enabled boards.

- 【Eye-Catching Spider Design】The Emaxusa hoverboard stands out with its…
- 【UL2272 Certified for Safety】Our Emaxusa hoverboard is UL2272…
- 【Easy to Learn and Ride】The Emaxusa hoverboard features advanced…
3. Swagtron T6 Off-Road Hoverboard
Why we picked it: Ideal for heavier riders and rougher terrain, the Swagtron T6 has powerful gyroscopes, 10″ rugged tires, and a responsive logic board that recalibrates well after each reset.
No products found.
Why Hoverboards Lose Balance
A hoverboard that suddenly pulls to one side, vibrates uncontrollably, or tosses you off when you step on it is downright frustrating. But before assuming it’s broken, it’s important to understand what’s actually going on inside.
It All Starts With the Gyroscopes
At the heart of every self-balancing scooter are gyroscopes—tiny electronic sensors that detect how your board tilts. They send that data to the logic board, which processes it and instructs the motors how to react. When calibrated properly, this system allows your hoverboard to stay upright and respond accurately to your body movements.
But when the gyroscopes are even slightly misaligned or overwhelmed with incorrect input—say, from hitting a curb or riding over an uneven surface—they start feeding bad data to the logic board. That’s when the board starts acting up:
- Pulling left or right when it shouldn’t
- Shaking excessively during startup
- Failing to stay upright or level
Tilt Sensors and Logic Board Miscommunication
The tilt sensors, typically located in the wheels, are constantly talking to the logic board through the gyroscopes. When calibration drifts, this communication becomes inaccurate. The logic board begins making faulty decisions, leading to erratic performance.
This miscommunication is why your hoverboard seems possessed—it’s not responding to your movements properly because it doesn’t understand them anymore.
Calibration Is the Reset Button
Fortunately, recalibrating your hoverboard realigns the gyroscopes, helping the tilt sensors and logic board sync up again. It’s a simple but powerful solution that can often save you from costly repairs or replacements.
Step-by-Step Guide to Calibrating a Non-Bluetooth Hoverboard
If your hoverboard is pulling to one side, vibrating too much, or refusing to stay upright—and it doesn’t have Bluetooth—chances are it just needs a quick calibration. Here’s how to reset it in 5 easy steps.
Step 1: Turn Off the Hoverboard Manually
Don’t use the remote. It’s tempting, but powering off via the remote doesn’t fully shut down the internal circuits. Press and hold the power button on the board until it’s completely off.
Step 2: Place It on a Level Surface
Find a flat, even surface, like a tile or concrete floor. Make sure both sides of the hoverboard are perfectly level. This ensures the gyroscopes align properly when reset.
Step 3: Long-Press the Power Button
Press and hold the power button for about 5 seconds until you hear a beep and see the lights flashing. This tells you the board is entering calibration mode.
Step 4: Wait 30 Seconds (Hands Off!)
Leave the hoverboard completely untouched for at least 30 seconds. Moving it during this time can mess up the calibration. Don’t press any buttons, and keep it perfectly still.
Step 5: Lock in the Calibration
After 30 seconds, press the power button again to turn the hoverboard back on. It should now be properly calibrated. Step on gently to test balance and steering.
Tip: Make this part of your regular hoverboard maintenance. Anytime the board acts weird, start here before replacing anything.
How to Calibrate a Bluetooth-Enabled Hoverboard
Calibrating a Bluetooth-enabled hoverboard is trickier than a standard one. That’s because resetting it manually can damage the Bluetooth chip, making it unusable. Fortunately, many modern hoverboards with Bluetooth come with a dedicated smartphone app that lets you calibrate it safely.
Here’s how to do it:
Step 1: Download the Correct Mobile App
Check your hoverboard’s manual or manufacturer’s website to find the recommended app (common ones include TaoTao, Gyroor, or Hoverboard App). Download it from the App Store or Google Play and install it.
Step 2: Pair Your Hoverboard with the App
Turn on your hoverboard and pair it via Bluetooth with your phone using the app. You may need to enter a PIN code, often “000000” or “123456,” to sync the device.
Step 3: Place the Hoverboard on a Level Surface
As with non-Bluetooth models, place it on a flat, even surface. Make sure both sides are level. This step is crucial for accurate sensor alignment.
Step 4: Navigate to the Calibration Section
Most apps have a “Calibrate the Unit” or “Settings” option. Tap it. The app will guide you through the calibration steps. Follow each prompt carefully. Do not rush.
Step 5: Complete and Confirm Calibration
Once the process completes, restart your hoverboard via the app or manually. Step on it gently and test for smoothness, balance, and proper turning.
Warning: Even when following directions, calibrating Bluetooth-enabled hoverboards can sometimes damage the chip. Proceed only if you’re comfortable with the risks or consult the brand’s customer support.
How to Test Your Hoverboard After Calibration
After calibrating your hoverboard—whether manually or via app—the next step is to make sure it’s working properly. Testing your hoverboard is not just about hopping on and riding away; it’s about paying close attention to how the board responds under real conditions.
Here’s how to test it effectively:
Step 1: Visual Check for Warning Lights
Power on your hoverboard. Are there any blinking red lights? A red or blinking light can signal a continued calibration issue or deeper hardware problems like a faulty gyroscope. If the lights remain green or stable, you’re good to proceed.
Step 2: Step On and Assess Balance
Carefully step onto your hoverboard with one foot first, then the other.
- Does the hoverboard remain level and stable?
- Does it respond immediately to your forward or backward lean?
If it feels shaky, uneven, or jerky, you may need to recalibrate again or check for hardware issues.
Step 3: Perform Movement Tests
Take it for a short ride and try the following:
- Move forward and backward. Is the speed consistent and predictable?
- Turn left and right. Do both sides respond evenly?
- Climb a small incline. Does the board maintain power and balance?
- Stop mid-ride. Does the hoverboard come to a smooth halt?
All these actions should feel natural and balanced. If you feel a pull to one side, or inconsistent speed, the sensors might still be misaligned.
Bonus Tip: Test on Different Surfaces
Try your hoverboard on various smooth surfaces like tile, laminate, or pavement. This helps ensure your calibration works under multiple conditions.
What to Do If Calibration Doesn’t Work
Sometimes, even after following every calibration step to the letter, your hoverboard might still act up—vibrating, tilting unevenly, or refusing to balance. Don’t panic. Here’s what to do when calibration fails:
Step 1: Double-Check the Basics
Before assuming something’s broken:
- Recalibrate again. Make sure the hoverboard is 100% level during the process.
- Use the correct method. Bluetooth models require app-based calibration; doing it manually could damage the chip.
- Fully charge the battery. A low battery can affect sensor performance.
Step 2: Diagnose with Caution Lights
Is a red light flashing on one side of the board?
This often points to sensor errors—usually the gyroscope or logic board. Look up your hoverboard’s error codes (often in the manual or online) to confirm what the signals mean.
Step 3: Replace the Gyroscopes
If calibration isn’t fixing the issue, your gyroscopes may be faulty. These components interpret balance and movement. You can:
- Order gyroscope replacement kits (ensure compatibility with your model).
- Follow a YouTube tutorial to replace them if you’re confident with tech.
- Or hire a repair technician for safe, professional installation.
Step 4: Contact the Manufacturer or Service Center
Still stuck? Reach out to the hoverboard brand’s customer support. Many offer warranty-covered repairs, or can recommend authorized service centers.
Remember, a miscalibrated hoverboard isn’t a lost cause. In many cases, it just needs a reset—or at worst, a quick part replacement.
Conclusion
A misbehaving hoverboard can feel like an expensive brick, but most of the time, it just needs a simple recalibration. Whether your device pulls to one side, vibrates wildly, or refuses to stay level, resetting the gyroscopes often solves the problem in minutes—no tools needed.
If your model doesn’t respond to recalibration, it might be time to look deeper—possibly at faulty gyroscopes or battery issues. When in doubt, always consult your user manual or manufacturer’s website for device-specific instructions.
Hoverboards are sensitive machines, and proper calibration ensures a smoother, safer ride. Make it part of your regular maintenance routine and your board will thank you with consistent, balanced fun.
Frequently Asked Questions About How to Calibrate a Hoverboard
How do I know if my hoverboard needs recalibration?
Your hoverboard may need recalibration if it starts pulling to one side, vibrating excessively, or refusing to stay upright when you step on it. If the hoverboard seems unstable or behaves erratically, recalibration is often the quickest solution.
How long does the calibration process take?
Calibrating your hoverboard typically takes about 1 to 2 minutes. The most time-consuming part is waiting for the system to reset and lock in the new settings. Don’t rush; give it a few moments to complete the process.
Can I calibrate a Bluetooth hoverboard with an app?
Yes, Bluetooth-enabled hoverboards can be calibrated using a specific mobile app provided by the manufacturer. This process usually involves pairing the hoverboard with the app and following the on-screen instructions to reset the device.
Why does my hoverboard still not work after recalibration?
If recalibrating doesn’t fix the issue, it’s possible that the gyroscope or tilt sensors are damaged or malfunctioning. In such cases, replacing the gyroscope or consulting a professional technician might be necessary. Always refer to your hoverboard’s manual for troubleshooting tips.
Can I perform the calibration myself, or do I need professional help?
You can easily calibrate most hoverboards yourself by following the steps outlined in your manual or our guide. However, if you’re unsure or uncomfortable with tech repairs, you might prefer seeking help from a professional technician, especially if internal components like gyroscopes need to be replaced.
Can I calibrate my hoverboard on any surface?
It’s crucial to calibrate your hoverboard on a flat, level surface to ensure proper alignment. A hard, flat floor (like a tile or concrete surface) works best. Avoid soft surfaces like carpets, as they can affect the calibration process.