Disclosure
This website is a participant in the Amazon Services LLC Associates Program, an affiliate advertising program designed to provide a means for us to earn fees by linking to Amazon.com and affiliated sites.
Preventing ankle injuries in figure skates requires proper boot fit, targeted strengthening, and correct technique. This is a critical concern for skaters of all levels, from beginners to elite competitors. Ankle sprains and strains can sideline you for weeks.
This guide provides the proven methods to protect your joints and skate with confidence. You’ll learn how to address the root causes of instability and pain. Implementing these strategies is key to a long, healthy skating career.
Why Your Ankles Hurt in Figure Skates: The Root Causes
Ankle pain and instability in skates often stem from a few key issues. The most common culprit is improper boot fit, either too loose or too stiff. Weak supporting muscles and incorrect lacing technique are also major contributors.
This combination forces your ankles to overcompensate. It leads to rolling, strain, and chronic discomfort. Understanding this is the first step toward effective prevention and a more enjoyable skate.
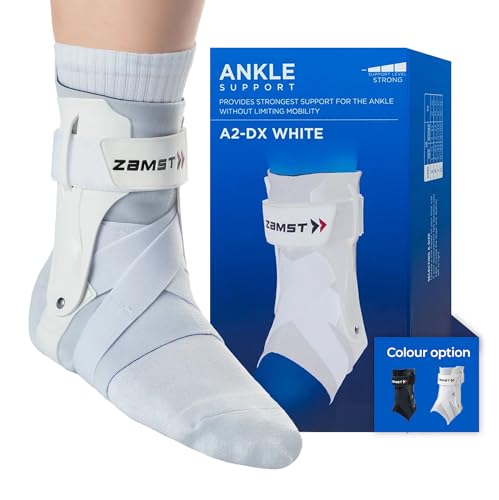
Quick Support Fix: Ankle Braces for Immediate Stability
For immediate relief and added stability, a quality ankle brace can be a game-changer. It provides external support while your muscles strengthen. This is especially useful when breaking in new skates or recovering from a minor tweak.
We recommend the Zamst A2-DX Ankle Support. It’s a favorite among skaters for its blend of support and flexibility.
- Features a unique 3D molded design that cradles the ankle bones.
- Provides strong lateral support to prevent rolling, without restricting necessary flexion.
- Lightweight and low-profile, so it fits comfortably inside your skate boot.
- ANKLE SUPPORT BRACE WITH STABILIZING GUARDS: Support for high ankle sprains…
- INCREASED SUPPORT LEVEL: The A2-DX ankle support brace features a connected…
- BREATHABLE DESIGN: The use of thin, low-profile materials with excellent…
Check current price on Amazon →
When a Brace Isn’t Enough: The Long-Term Solution
While a brace helps, it’s a temporary aid, not a cure. The permanent solution involves properly fitted skates and targeted off-ice conditioning. Your boots are the foundation of your safety.
Start by ensuring you have the right pair. Our guide on the best figure skates for beginners explains fit fundamentals. For specific models, read our in-depth Jackson Ultima Classic Softskate 380 review, known for its supportive yet forgiving fit.
Finally, complement your gear with knowledge. Learn about skates with superior blades for better edge control and stability on the ice.
Choosing the Right Figure Skates for Ankle Support
Your skate boots are the most critical piece of injury prevention equipment. A proper fit provides the foundation for stability and control. Selecting the wrong type can lead to immediate discomfort and long-term issues.
This section breaks down the key features that protect your ankles. We’ll cover boot stiffness, fit points, and blade considerations. Understanding these will help you make an informed, safe purchase.
Boot Stiffness and Support Levels
Boot stiffness is rated to match a skater’s weight, skill, and jump level. A boot that is too stiff will restrict ankle flexion and cause pain. A boot that is too soft will fail to support your ankle during landings.
- Beginner/Recreational: Softer boots allow for natural ankle bend and are ideal for learning edges and basic skills.
- Intermediate/Single Jumps: Medium-stiffness boots offer a balance of support for jumps like axels while allowing knee bend.
- Advanced/Double Jumps: Stiff boots are essential to withstand the extreme forces of multi-rotation jumps and protect the ankle from rolling.
The Four-Point Fit Check for Ankle Safety
A perfect fit secures your foot without pressure points. Perform this check when trying on new skates before purchasing.
- Heel Lock: Your heel must be snug and immobile, with no lift when you bend your knees.
- Ankle Bone Clearance: The boot’s padding should cradle, not press on, your prominent ankle bones.
- Toe Space: Your toes should lightly brush the front when standing straight, with a bit of room when in a knee-bent stance.
- Width & Instep: The boot should hold your foot securely without pinching. You should not be able to slide your foot side-to-side.
| Skater Level | Recommended Boot Stiffness | Primary Ankle Protection Benefit |
|---|---|---|
| Beginner | Soft to Moderate | Allows natural flexion, prevents restriction pain |
| Intermediate | Moderate to Stiff | Provides stability for single jumps, prevents roll |
| Advanced | Very Stiff | Withstands high-impact landings, maximizes energy transfer |
Proper Lacing Techniques to Lock Your Ankle In Place
Even the best-fitting skates can fail you if laced incorrectly. Proper lacing creates a custom, secure shell around your foot and ankle. This technique prevents heel lift and minimizes harmful lateral movement.
Mastering a few simple lacing methods can dramatically improve your stability on the ice. It’s a zero-cost adjustment with a massive impact on safety. Let’s break down the step-by-step process.
The Heel-Lock Lacing Method for Maximum Security
This technique is essential for preventing your heel from sliding up and down. It creates an anchor point that secures the rear of the boot.
- Criss-Cross to the Top Hooks: Lace normally in a criss-cross pattern until you reach the second-to-last set of hooks.
- Create the Lock Loop: Instead of crossing to the next hook, thread the lace directly up through the same-side top hook, creating a small loop.
- Cross and Thread: Take the opposite lace, cross it over, and thread it through the loop you just created. Pull both ends tight to lock the heel down.
- Finish at the Top Hook: Finally, thread each lace through its own top hook and tie your bow securely.
Strategic Tightness: Where to Pull Tight vs. Leave Snug
Your skate should not be uniformly tight from toe to top. Strategic tension accommodates foot anatomy and promotes better blood flow.
- Toe Box & Forefoot: Keep this area snug but comfortable. Overtightening here can cause numbness and restrict toe movement.
- Midfoot & Arch: This is where you pull very tight. It secures your foot to the sole of the boot, preventing slippage and energy loss.
- Ankle Area: Firmly tight to secure the ankle bones, but avoid cutting off circulation. The boot should cradle, not crush.
- Top Two Hooks: These can be slightly looser than the ankle hooks. This allows for necessary forward knee bend and ankle flexion.
Re-lace your skates every session. Consistent practice makes this quick routine second nature. Your ankles will thank you for the stable, custom-fit foundation.
Essential Off-Ice Exercises to Strengthen Your Ankles
Strong ankles are your body’s natural defense against injury. Off-ice conditioning builds the muscles that support your joints in skates. This training improves stability, balance, and your ability to absorb landing impact.
Incorporate these exercises into your routine 2-3 times per week. They require minimal equipment and focus on proprioception and strength. Consistent practice will translate directly to safer, more powerful skating.
Balance and Proprioception Drills
Proprioception is your body’s sense of its position in space. Training it improves your ankle’s reflexive stability to prevent rolls.
- Single-Leg Stands: Balance on one foot for 30-60 seconds. Progress by closing your eyes or standing on a folded towel or balance pad.
- Alphabet Tracing: While balancing on one leg, use your other foot to “write” the alphabet in the air. This engages the stabilizing muscles dynamically.
- Balance Board Rolls: Use a wobble board or balance disc. Slowly roll the edges in a circular motion, maintaining control for 1-2 minutes.
Targeted Strength-Building Exercises
These moves directly strengthen the often-neglected muscles around the ankle and lower leg.
- Heel Raises: Rise onto your toes, hold for 2 seconds, and lower slowly. Do 3 sets of 15-20. For added challenge, perform on a step to increase the range of motion.
- Resistance Band Work: Sit with a loop band around the ball of your foot. Perform 3 sets of 15 for each direction: pointing your toes (plantarflexion), pulling your toes toward you (dorsiflexion), and turning your foot in and out (inversion/eversion).
- Single-Leg Squats (Pistol Squat Progressions): Start by sitting back into a chair on one leg. Progress to deeper squats as strength improves. This builds crucial stability for landing jumps.
Pair this strength work with regular calf and Achilles stretching. Tight calves can limit ankle range of motion and increase injury risk. A comprehensive approach builds resilient, skater-ready ankles.
On-Ice Habits and Techniques for Ankle Safety
Your behavior on the ice is the final layer of ankle injury prevention. Proper technique reduces the unnatural stress placed on your joints. Developing smart habits ensures your equipment and strength work pays off.
This involves mindful warm-ups, focused skill execution, and listening to your body. Small adjustments in your routine can have a profound impact. Let’s explore the key practices for every session.
The Pre-Skate Warm-Up and Post-Skate Cool-Down
Never step onto the ice with cold muscles and stiff joints. A dynamic warm-up prepares your ankles for movement.
- Dynamic Warm-Up (5-10 mins): Include ankle circles, leg swings, walking lunges, and light jogging. This increases blood flow and range of motion.
- On-Ice Warm-Up: Start with simple edges, crossovers, and swizzles. Gradually increase intensity over the first 10 minutes of your session.
- Post-Skate Cool-Down: Spend 5 minutes doing gentle skating or marching in place. Follow with static stretches for your calves, hamstrings, and hip flexors while muscles are warm.
Mastering Proper Jump Landing Mechanics
Landings are the most common moment for ankle injury. Correct form distributes force safely through your legs.
- Knee Bend is Key: Always land with a deep flexion in your knees and ankles. A stiff, straight leg sends the shock directly to your joints.
- Align Your Body: Your landing knee should be directly over the middle of your skating foot. Avoid letting your knee cave inward (valgus), which torques the ankle.
- Use Your Toe Pick Judiciously: On toe-assisted jumps, use the pick for take-off, not as a braking tool on landing. Land smoothly on a clean back outside edge to roll away the momentum.
Recognizing and Responding to Warning Signs
Your body sends signals before a major injury occurs. Learning to heed them is crucial.
Persistent pain, a feeling of “giving way,” or sharp twinges are red flags. Stop immediately if you feel a sudden, acute pain. Continuing to skate on a compromised ankle dramatically worsens the injury.
For minor aches, apply the R.I.C.E. method (Rest, Ice, Compression, Elevation) after your session. Consult a sports medicine professional for any pain that doesn’t resolve within a few days.
Maintenance and Warning Signs: When to Replace Your Skates
Figure skates are not lifetime equipment; they break down with use. Worn-out skates lose their supportive structure, becoming a direct cause of ankle instability. Recognizing this wear and knowing when to replace them is a critical safety skill.
Regular inspection can prevent a catastrophic failure mid-jump. Look for both obvious and subtle signs of breakdown. Proactive replacement is always cheaper and safer than an injury.
How to Check Your Skates for Critical Wear
Perform this simple check every month. It focuses on the boot’s structural integrity and the blade’s condition.
- The “Squeeze” Test: With the skate off, try to squeeze the sides of the boot’s upper together near the ankle. If there is significant, easy movement, the supportive material has broken down.
- Check for Creasing: Deep, horizontal creases across the ankle or above the heel indicate the boot is flexing in the wrong places. This is a major red flag for lost support.
- Inspect the Blade & Mounting: Ensure blades are securely mounted with no loose screws. Check for deep nicks in the edges and significant hollow wear, which affect control.
Common Signs Your Skates Are Compromising Your Ankles
Your body often provides the first warning signals that your gear is failing.
- Increased Soreness: You experience new or worsening ankle and foot pain after skating, even with proper lacing.
- Feeling of “Floating”: Your foot feels like it’s moving around inside the boot more than before, indicating the interior padding has compacted.
- Struggle to Hold Edges: You find it harder to maintain deep outside or inside edges, feeling like your ankle is rolling inward or outward.
- Visible Breakdown: The boot is visibly leaning or collapsing to one side when placed on a flat surface, unable to stand upright.
Ignoring these signs forces your muscles and ligaments to overwork. This drastically increases your risk of sprains and stress fractures. Investing in new, properly fitted skates is an investment in your continued safety on the ice.
What to Do If You Experience an Ankle Injury
Despite all precautions, injuries can still occur. Immediate and correct action is crucial to minimize damage and speed up recovery. Knowing the proper first aid steps can prevent a minor sprain from becoming a chronic issue.
This section outlines the immediate response protocol and guides you on seeking professional care. Do not try to “skate through” significant pain. Listening to your body and acting wisely is part of being a smart athlete.
Immediate First Aid: The P.O.L.I.C.E. Principle
For acute soft-tissue injuries like sprains, follow the updated P.O.L.I.C.E. protocol immediately.
- Protect: Stop skating immediately. Remove your skate carefully to prevent further strain. Avoid any weight-bearing on the injured ankle.
- Optimal Loading: After the initial 24-48 hours, begin gentle, pain-free movement (like ankle circles). Complete rest can delay healing; controlled motion promotes blood flow.
- Ice: Apply an ice pack wrapped in a thin towel for 15-20 minutes every 2-3 hours for the first 48 hours to reduce swelling and pain.
- Compression: Use a snug (not tight) elastic bandage to help control swelling. Remove if you feel numbness, tingling, or increased pain.
- Elevation: Prop the injured ankle above the level of your heart as much as possible, especially for the first 48 hours.
When to See a Doctor and What to Expect
Self-care is not always enough. Professional evaluation ensures a correct diagnosis and treatment plan.
- Seek Medical Help If: Pain is severe, swelling is rapid and significant, you cannot walk four steps, or there is obvious deformity.
- Types of Professionals: See a sports medicine physician, orthopedic doctor, or a physical therapist with experience in skating injuries.
- Rehabilitation is Key: Medical treatment often includes guided physical therapy. This rebuilds strength, flexibility, and proprioception before you return to the ice.
A full return to skating should be gradual and guided by a professional. Rushing back increases re-injury risk. Use this recovery time to focus on upper-body strength, flexibility, and mental training.
Advanced Gear and Professional Fitting Considerations
For serious skaters, standard off-the-rack skates may not provide perfect support. Advanced customization ensures your boots work in harmony with your unique anatomy. This is a critical step for preventing overuse injuries and maximizing performance.
Investing in professional services can seem costly upfront. However, it is often more economical than dealing with chronic pain or repeated injuries. Let’s explore the options that take ankle protection to the next level.
The Benefits of Heat Molding and Custom Insoles
These services personalize the interior of your skate for a precise, supportive fit.
- Heat Molding: A professional uses a specialized oven to gently warm the boot’s interior materials. You then put the skates on, allowing them to cool and form to the exact contours of your feet and ankles. This can alleviate pressure points and improve heel lock.
- Custom Orthotics/Insoles: Over-the-counter insoles are generic. A podiatrist or certified fitter can create custom orthotics that correct biomechanical imbalances, provide arch support, and ensure even weight distribution, reducing ankle strain.
- Punch-Outs and Stretches: A fitter can use tools to strategically stretch or “punch out” specific areas of the boot that cause pain, such as over a prominent ankle bone.
Working with a Professional Skate Fitter
A certified master fitter is your greatest ally in injury prevention. They provide expertise you cannot get online or in a general sporting goods store.
- Comprehensive Assessment: A good fitter will measure both feet, analyze your arch type, watch you walk, and discuss your skating level and goals. They consider your entire biomechanics.
- Expert Brand & Model Selection: They know which brands run narrow, wide, high-arched, or shallow. They can match your foot’s morphology to the boot’s last (shape) for a foundational correct fit.
- Post-Purchase Support: They will handle the initial heat molding and be available for follow-up adjustments after you’ve skated in the boots a few times, ensuring ongoing comfort and support.
Think of a professional fitting as part of your essential skating equipment. The right boots, expertly fitted, are the single most effective piece of gear for long-term ankle health and injury prevention.
Best Figure Skates for Ankle Support – Detailed Comparison
Choosing skates with inherent ankle support is foundational to injury prevention. These three models are highly regarded for their stability and construction. Each caters to a different skill level and support need.
Jackson Ultima Classic 500 – Best for Intermediate Skaters
The Jackson Classic 500 features a moderately stiff PVC-reinforced boot ideal for single jumps. Its padded ankle collar and tongue provide excellent comfort and lateral support. This model is a top choice for skaters advancing beyond basic skills who need reliable stability.

- Bundle with Skate Guards
- REFER TO SIZING CHART IN IMAGES.
- Reinforced vinyl coated uppers gives strength, support and durability….
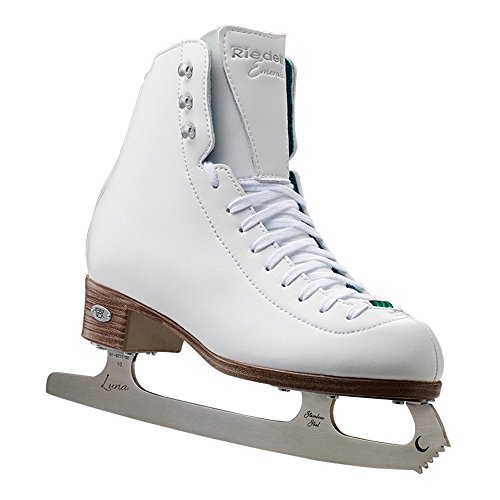
Riedell 119 Soar – Best for Beginners & Recreational Use
Designed for entry-level skaters, the Riedell Soar offers a supportive yet flexible fit to encourage proper knee bend. The reinforced ankle and heel construction prevent excessive rolling. It’s an excellent, durable option for learning fundamentals without compromising on initial support.
Edea Chorus – Best for Advanced Single & Double Jumps
The Edea Chorus uses a revolutionary lightweight, stiff synthetic material that offers maximum support without breaking down quickly. Its design promotes a forward flex for deep knee bends while locking the heel and ankle securely. Ideal for demanding freestyle programs.

- Type of Skating: Mid Level for ICE FreeStyle
- Training Level: Double Jumps (Even a good option for lower level Skaters,…
- Training Hours: 10 to 12 Plus Hours per week
Conclusion: Building a Strong Foundation for Ankle Safety
Preventing ankle injuries in figure skates is a multi-layered process. It combines the right equipment, proper technique, and dedicated conditioning. Each element works together to create a secure and stable skating experience.
The most important takeaway is to never ignore pain or ill-fitting gear. Your skates should feel like a supportive extension of your body. Address issues proactively before they lead to a serious injury.
Start by assessing your current skates and lacing technique today. Then, incorporate the strengthening exercises into your weekly routine. Consistent, small actions build unshakable ankle resilience over time.
With this knowledge, you can skate with greater confidence and freedom. Protect your ankles to enjoy the ice for years to come.
Frequently Asked Questions about Ankle Injuries in Figure Skates
How do I know if my figure skates fit properly?
A proper fit means your heel is locked with no lift, toes gently brush the front, and the boot supports your ankle bones without pressure. You should not be able to slide your foot side-to-side. The fit should be snug but not painfully tight anywhere.
Always try skates on with the socks you intend to wear. Stand in a skating posture with knees bent to check for proper space. A professional fitting at a specialty skate shop is the most reliable method.
What is the best way to lace figure skates for ankle support?
The best method is the heel-lock lacing technique. This involves creating loops at the top hooks to anchor your heel down securely. It prevents slippage that leads to instability and blisters.
Remember to pull the laces tightest over your midfoot and arch, with slightly less tension on the top two hooks. This allows for necessary forward knee bend while keeping your ankle stable.
Can a beginner wear stiff figure skates?
No, beginners should avoid overly stiff boots. Stiff skates restrict the ankle flexion needed to learn proper knee bend and edge control. This can lead to poor technique and actually increase fall risk.
Beginner skates should have flexible support that allows for natural movement. As your skills and jump height advance, you can transition to a stiffer boot for the necessary support.
What are the most effective off-ice exercises for skaters’ ankles?
The most effective exercises focus on balance and strength. Single-leg stands, heel raises, and resistance band work for all ankle directions are essential. These build the proprioception and muscle strength that boots cannot provide.
Incorporate these exercises 2-3 times per week. Consistency is key to developing the resilient ankles needed to withstand the forces of jumping and landing on ice.
How often should I replace my figure skates to prevent injury?
There’s no set timeline; it depends on use. Replace skates when they lose supportive stiffness, shown by deep creasing or easy collapse when squeezed. Increased ankle soreness or a feeling of “floating” inside the boot are also clear signs.
A competitive jumper may need new boots every 6-12 months, while a recreational skater might use them for years. Regular monthly inspections will tell you when they’re breaking down.
What should I do immediately after an ankle sprain from skating?
Follow the P.O.L.I.C.E. principle: Protect, Optimal Load, Ice, Compression, Elevation. Stop skating, carefully remove your boot, and apply ice wrapped in a cloth. Avoid putting weight on it and seek medical evaluation for severe pain or swelling.
Do not apply heat in the first 48 hours. Gentle, pain-free movement after the initial rest period is better than complete immobilization for most sprains.
Are custom orthotics worth it for figure skaters?
Yes, for skaters with specific biomechanical issues or recurring pain. Custom orthotics correct imbalances, provide perfect arch support, and ensure even weight distribution. This can alleviate strain on ankles, knees, and hips.
They are particularly valuable if you have flat feet, high arches, or pronation. Consult a podiatrist or a certified skate fitter who specializes in making orthotics for skates.
Why do my ankles hurt even though my skates are the right size?
Pain can stem from weak stabilizing muscles, improper lacing, or boots that are broken down and no longer supportive. It could also indicate a technique issue, like landing jumps with stiff legs or incorrect edge alignment.
Assess your off-ice strength, re-evaluate your lacing method, and check your boots for wear. If pain persists, a coach can analyze your on-ice technique for flaws.