Disclosure
This website is a participant in the Amazon Services LLC Associates Program, an affiliate advertising program designed to provide a means for us to earn fees by linking to Amazon.com and affiliated sites.
Replacing figure skate blades is a precise process that involves removing the old blades and securely mounting new ones. Doing it correctly is crucial for your safety and performance on the ice.
A proper blade replacement ensures optimal edge alignment, balance, and skating control. This guide provides the proven methods used by professional technicians.
Signs Your Figure Skate Blades Need Replacement
Knowing when to replace your blades is the first critical step. Worn-down blades compromise your safety and limit your skating progress. Ignoring key warning signs can lead to poor performance or even injury.
Common problems include a complete loss of sharpness, visible nicks or rust, and a hollow that is too shallow to hold an edge. You might also feel unstable or struggle with basic maneuvers you once mastered.
If your boots are still in great shape, a blade replacement is a cost-effective solution. It extends the life of your favorite skates and restores high-level performance without a full new purchase.
A Must-Have Tool for Blade Maintenance
Before replacing blades, you need the right tools. A reliable skate screwdriver is non-negotiable for safe removal and installation. Using the wrong tool can strip screw heads, creating a huge headache.
We recommend the SONIC Pro Inline Skate Tool. It’s designed specifically for skate screws with a magnetic tip and comfortable grip.
- Precision-fit tip prevents damage to screw heads.
- Magnetic tip holds screws securely during installation.
- Durable construction for long-term use in your skate bag.
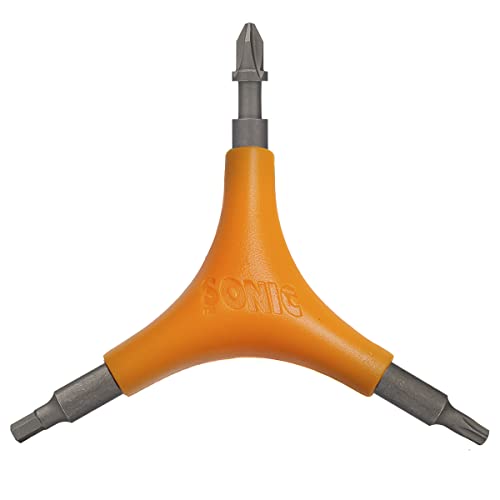
- ESSENTIAL: A must-have for changing wheels, removing bearings and more
- 9 TOOLS: 4 mm Hex, T25 Torx, 2 Bearing Pushers, Bearing Extractor, Bearing…
- ERGONOMIC: Comfortable handle for grip and leverage
Check current price on Amazon →
When a Simple Blade Swap Isn’t the Answer
Sometimes, the issue goes beyond just the blades. If your boots are broken down, cracked, or no longer provide proper support, new blades won’t help. Mounting new blades to compromised boots is a waste of money.
In this case, a full skate upgrade is the smarter investment. For guidance, explore our detailed guide on the best figure skates for beginners and beyond.
If you’re seeking high-performance blades specifically, our review of the top stainless steel figure skate blades is an essential read. For those needing maximum comfort, consider our picks for the most comfortable ice skates on the market.
Essential Tools and Materials for Blade Replacement
Gathering the right equipment before you start is crucial for a successful blade swap. Using improper tools can damage your skates or result in an unsafe mount. This preparation ensures a smooth, professional-quality installation process.
You don’t need a full workshop, but a few specialized items are non-negotiable. Having everything within reach will make the step-by-step procedure much easier to follow.
Must-Have Hardware and Tools
Your toolkit should include items for removal, installation, and alignment. Do not substitute with general household tools, as they often don’t fit correctly.
- Figure Skate Screwdriver: A magnetic-tip driver designed for skate screws prevents stripping.
- Replacement Blades: Ensure they are the correct size and profile for your boots and skill level.
- New Mounting Screws: Always use new screws; old ones can be worn and may not hold securely.
- Rubbing Alcohol & Cotton Swabs: For cleaning the sole and heel of any old adhesive or debris.
Helpful Accessories for Precision
These additional items aren’t always mandatory but are highly recommended. They help achieve a perfect, long-lasting mount and protect your investment.
- Masking Tape: Used to mark the original blade position for perfect alignment.
- Small Hammer or Mallet: Gently taps the blade into final position if needed.
- Toe Pick Protectors: Small rubber caps that prevent damage to the new blades’ picks during installation.
Choosing the Correct Replacement Blades
Selecting the right blade is as important as installing it correctly. The wrong blade will negatively affect your balance and technique.
Consider your skating discipline, skill level, and boot model. A blade’s rock profile and toe pick configuration are critical for performance.
| Blade Type | Best For | Key Feature |
|---|---|---|
| Beginner/Recreational | Basic skills, public skating | Flatter rocker for stability |
| Freestyle/Intermediate | Single jumps, spins | Moderate rocker for maneuverability |
| Advanced/Elite | Double/triple jumps, complex footwork | Pronounced rocker for quick turns |
Step-by-Step Guide to Removing Old Blades
Proper removal is the foundation for a successful blade installation. Rushing this process can damage the boot’s sole or heel plate. Follow these steps carefully to prepare a clean surface for your new blades.
Work on a clean, well-lit table with a soft cloth to protect your skate’s finish. Organize your tools and a small container to hold the screws as you remove them.
Preparing Your Skates and Marking Alignment
Before unscrewing anything, you must record the exact position of the old blades. This is the most critical step for maintaining your proper skating alignment.
- Clean the Area: Wipe the boot sole and blade mounting plate with rubbing alcohol.
- Apply Masking Tape: Place long strips of tape along both sides of the blade on the boot sole.
- Trace the Outline: Use a fine-tip pen to trace the exact outline of the blade plate onto the tape. This is your alignment guide.
Safe Screw Removal Technique
Skate screws can be tight, especially if threadlocker was used. Applying the correct technique prevents stripped screw heads and frustration.
- Use the Right Driver: Insert your figure skate screwdriver firmly and apply steady, downward pressure as you turn.
- Sequence Matters: Loosen all screws slightly first, then fully remove them. Do not take one out completely before starting the others.
- Inspect the Boot: Once the blade is off, check the boot’s sole and heel for cracks, rot, or water damage. Address any issues before proceeding.
Cleaning and Prepping the Mounting Surface
A clean, debris-free surface ensures your new blades mount flush and securely. Any old glue or grit can cause misalignment.
Use a cotton swab dipped in rubbing alcohol to scrub the screw holes and the entire mounting area. Remove all old tape, adhesive, and dirt.
Let the boot dry completely for a few minutes. This is also the time to gently clean the threads inside the screw holes with a toothpick.
How to Mount and Align New Figure Skate Blades
This is the most precise part of the blade replacement process. Correct mounting directly affects your balance, edges, and overall safety on the ice. Patience and attention to detail here are non-negotiable.
Refer to the alignment marks you made on the masking tape during removal. These guides are your blueprint for positioning the new blades correctly on the boot.
Positioning and Securing the Blade Plates
Initial placement is crucial. Do not tighten the screws fully until perfect alignment is confirmed. The blade should be able to shift slightly for micro-adjustments.
- Align the Blade: Place the new blade onto the boot, carefully lining it up inside the traced outline on your tape.
- Insert Screws: Hand-start all new mounting screws to ensure they are threading correctly. Do not force them.
- Finger Tighten: Snug each screw just enough to hold the blade in place, but leave it loose for final alignment checks.
Checking for Perfect Blade Alignment
Proper blade alignment ensures your weight is centered over the edges. Misalignment causes skating on the inside or outside edge unintentionally.
Place the skate upright on a perfectly flat, level surface like a table. Look directly from the heel and the toe.
- Heel View: The two blade edges should be vertical and parallel to each other.
- Toe View: The blade should appear centered under the boot from front to back.
- Sight Down the Blade: Look from the toe pick toward the heel; the blade should run straight, not twisted.
Final Tightening and Torque Sequence
Once alignment is perfect, it’s time to permanently secure the blades. Use a cross-pattern tightening sequence for even pressure, similar to changing a car tire.
Firmly tighten the screws in multiple passes using your screwdriver. A final, gentle check of alignment after tightening is a good practice.
Avoid over-tightening, which can strip the threads or crack the boot’s heel. The blade should feel absolutely solid with no wobble.
Post-Installation Checks and Common Mistakes
Your work isn’t done once the screws are tight. Final verification ensures a safe, high-performance result. Skipping these checks is a common error that leads to problems on the ice.
This phase involves testing security, preparing the blades for use, and knowing what pitfalls to avoid. A few minutes of careful review can prevent injury and frustration.
Verifying Security and Initial Sharpening
Before you skate, you must confirm the mount is solid and the edges are ready. New blades are typically not sharpened from the factory for safety during shipping.
- Security Check: Firmly try to wiggle the blade with your hands. There should be absolutely zero movement or play.
- Inspect Screws: Ensure all screw heads are flush with the blade plate and none are protruding.
- Professional Sharpening: Always get new blades professionally sharpened before first use. They require a specific hollow based on your weight and discipline.
Most Frequent Blade Replacement Errors
Being aware of common mistakes helps you avoid them. These errors compromise safety and can ruin expensive blades or boots.
| Mistake | Consequence | How to Avoid |
|---|---|---|
| Reusing Old Screws | Stripped threads, loose blades | Always use the new screws provided. |
| Poor Alignment | Skating on wrong edges, instability | Use the tape tracing method meticulously. |
| Overtightening | Cracked boot heel, stripped holes | Tighten firmly but with control; don’t force it. |
| Skating on Unsharpened Blades | No edge control, dangerous slipping | Visit a pro shop for the initial sharpening. |
When to Seek Professional Help
DIY is great, but some situations require an expert. Knowing your limits protects your equipment and your safety on the ice.
Seek a certified skate technician if you encounter persistent misalignment, damaged screw holes, or if you feel unsure at any point.
If your boots are high-level or custom-fitted, professional mounting is often a wise investment. The cost is minor compared to the value of the skates.
Maintaining Your New Blades for Longevity
Proper care after installation maximizes your investment and performance. New blades require a break-in period and consistent maintenance. This routine prevents rust, preserves sharpness, and ensures consistent feel on the ice.
Establishing simple habits will extend the life of your blades significantly. Focus on drying, protecting, and monitoring edge wear over time.
The Critical Break-In Period
Your first few skating sessions on new blades are a crucial adjustment phase. The feel will be different, and your muscles need to adapt to the fresh edges and profile.
- Start Slowly: Begin with basic edges and crossovers to get accustomed to the new balance point.
- Avoid Deep Cuts: Refrain from hard stops or deep edge pulls for the first 1-2 hours of ice time.
- Listen to Your Skates: Pay attention to how the blades grip; the sharpness will feel more aggressive initially.
Essential Post-Skating Care Routine
What you do after skating is as important as the skating itself. Moisture is the primary enemy of steel blades.
- Dry Thoroughly: Immediately wipe down the entire blade with a soft, absorbent towel after stepping off the ice.
- Remove Guards: Take off soakers or hard guards to allow air circulation. Never store skates with wet guards on.
- Use Blade Covers: Once completely dry, place terry cloth soakers on the blades to absorb residual moisture and protect edges.
Monitoring Wear and Scheduling Sharpening
Blades don’t last forever, even with great care. Recognizing wear signs helps you plan maintenance before performance suffers.
Regularly inspect your edges for nicks, flat spots, and overall dullness. Run a fingernail gently across the edge; it should catch slightly.
Most recreational skaters need sharpening every 20-30 hours of ice time. Competitive skaters may need it more frequently. Keep a simple log to track usage.
Advanced Tips and Professional Insights
Mastering basic replacement opens the door to finer tuning. These advanced concepts can refine your performance and equipment knowledge. They bridge the gap between a functional mount and an optimized setup.
Understanding blade profiling, pitch, and customization allows for a truly personalized skating experience. Consider these factors as you advance in the sport.
Understanding Blade Profiling and Pitch
The factory rocker profile of a blade isn’t your only option. Skaters can customize this curve to suit their style, discipline, and physical attributes.
- Profile Radius: A shorter radius (e.g., 7ft) allows for quicker turns. A longer radius (e.g., 8ft) provides more stability for speed.
- Blade Pitch: This refers to the forward or backward tilt of the blade on the boot. It affects where your weight naturally rests.
- Custom Profiling: A professional can grind a custom profile, blending different radii along the blade for specific performance benefits.
Customizing for Discipline and Skill Level
Your skating discipline should heavily influence your blade choice and setup. A freestyle skater’s needs differ greatly from an ice dancer’s.
| Discipline | Blade Priority | Typical Feature |
|---|---|---|
| Freestyle | Stability for jumps, quick rocker for spins | Moderate toe pick, balanced rocker |
| Ice Dance | Maneuverability, close holds | Shorter blade length, less aggressive pick |
| Moves in the Field | Precise edge control, smooth flow | Consistent rocker, sharp edge definition |
When to Consult a Master Skate Technician
For elite skaters or complex issues, a master technician is invaluable. Their expertise goes far beyond basic mounting.
Seek their services for custom profiling, correcting chronic boot alignment issues, or mounting blades on high-end custom boots. They use laser alignment tools and have decades of experience.
This investment ensures your equipment is a precise tool, not a variable. It can resolve persistent technical problems that stem from equipment, not skill.
Frequently Asked Questions About Blade Replacement
Even with a detailed guide, specific questions often arise. This section addresses the most common concerns skaters have. Clear answers help you proceed with confidence and avoid uncertainty.
These FAQs consolidate expert advice on timing, costs, and troubleshooting. They serve as a quick reference for common post-installation scenarios.
Timing, Cost, and DIY Feasibility
Understanding the practical aspects of blade replacement helps with planning and budgeting. Here are the key considerations.
- How often should blades be replaced? It depends on use. For frequent skaters, every 1-2 years. Monitor for lost sharpness and visible wear.
- Is DIY blade replacement cost-effective? Yes, if your boots are in good condition. You save on labor, which can be $50-$100 at a pro shop.
- Can I switch to a different blade brand/model? Yes, but ensure the mounting plate matches your boot’s hole pattern. Some drilling may be required.
Troubleshooting Common Post-Installation Issues
Problems can appear after you think the job is done. Here’s how to diagnose and fix the most frequent issues.
| Problem | Likely Cause | Solution |
|---|---|---|
| Feeling “off-balance” or leaning | Blade misalignment | Re-check alignment marks; remount if necessary. |
| Vibration or buzzing feeling | Blade not seated flush, or loose screw | Check all screws for tightness; ensure no debris is under plate. |
| Boot feels different (e.g., more forward) | New blade has different pitch or stanchion height | Allow a break-in period; consult a tech if discomfort persists. |
Deciding Between Replacement and New Skates
This is a major decision for any skater. Consider these factors before choosing to replace blades on old boots.
Choose blade replacement if your boots are still structurally sound, supportive, and broken in comfortably. This is the most economical upgrade path.
Opt for new skates if the boots are broken down, lack support, or are the wrong size. New blades on compromised boots is a poor investment.
Best Replacement Blades for Figure Skates – Detailed Comparison
Choosing the right blade is critical for performance. The best model depends on your skill level and discipline. These three options represent top choices for recreational, intermediate, and advanced skaters.
MK Professional Figure Skating Blades – Best for Intermediate Skaters
The MK Professional is the industry standard for developing freestyle skaters. It features a balanced 7-foot rocker for solid jumps and controlled spins. The stainless steel construction offers excellent durability and edge retention at a mid-range price point.

- Rocker Radius: 7′ Radius
- Radius of Hollow (ROH): 7/16″
- Blade Style: Parallel Blade type
John Wilson Pattern 99 Blades – Best for Advanced Jumpers
Preferred by elite single and double jump specialists, the Pattern 99 offers a slightly flatter tail and pronounced pick. This design provides exceptional stability on landings and powerful take-offs. Its profile encourages a strong, centered skating posture.

- ROCKER 8FT
- RADIUS OF HOLLOW 7/16″
- Toe Rake Type: Straigh Cut
Edea Piano Figure Skate Blades – Best for Precision & Dance
Ideal for ice dancers and skaters focused on moves in the field, the Edea Piano blade has a unique parabolic cross-section. This design provides a larger sweet spot for deeper, more secure edges and exceptional control during intricate footwork sequences.
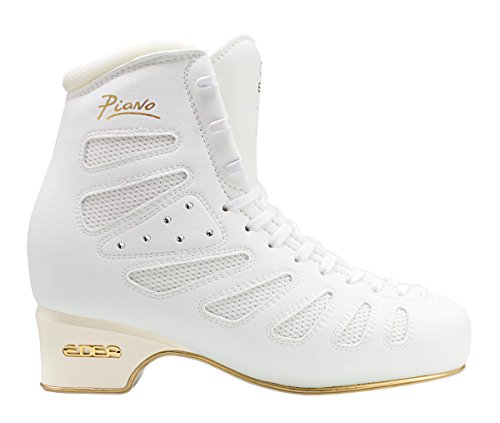
- Extra Strong Construction 95
- Type of Skating: Ice and Inline Roller Skating.
- Training Level: Double, Triple, and Quad Jumps.
Conclusion: Mastering Your Figure Skate Blade Replacement
Replacing your figure skate blades is a valuable skill that saves money and extends your equipment’s life. Following this step-by-step guide ensures a safe, precise mount that enhances your performance. Proper alignment and secure installation are non-negotiable for on-ice confidence.
The key takeaway is to never rush the alignment process. Careful marking and verification prevent instability and injury. Always use new screws and seek professional sharpening before your first skate.
Gather your tools, reference this guide, and take control of your skate maintenance. Your improved edges and renewed confidence will be worth the effort.
With practice, you can maintain your perfect setup season after season. Now, step onto the ice with trust in your equipment and your skills.
Frequently Asked Questions about Replacing Figure Skate Blades
What tools do I absolutely need to replace figure skate blades?
You need a figure skate-specific screwdriver with a magnetic tip, new mounting screws, and rubbing alcohol for cleaning. Masking tape for alignment marking is also essential. Avoid using standard household tools that can strip screw heads.
Having a small hammer for gentle tapping and toe pick protectors is recommended. These tools ensure a precise, damage-free installation process from start to finish.
How do I know if my blades are worn out and need replacing?
Look for visible signs like deep nicks, rust pitting, or a hollow that has become too shallow to hold an edge. Performance issues are also key indicators. If you constantly feel unstable or slip on edges you used to hold, replacement is likely needed.
Another test is the “fingernail catch.” Run your nail across the blade’s edge. If it doesn’t catch slightly, the edge is dull beyond a simple sharpening fix.
Can I put any brand of blade on my existing boots?
Not always. You must check the mounting hole pattern compatibility between the new blade plate and your boot’s sole. Many brands have standardized patterns, but some custom boots may require specific models or even professional drilling.
Consult the blade manufacturer’s specifications or a skate technician. Mounting a blade with mismatched holes can weaken the boot structure and create an unsafe mount.
Why is professional sharpening required for new blades?
New blades come from the factory with a protective coating and are not sharpened to a usable hollow. They are essentially flat. A professional sharpening grinds the specific radius of hollow (ROH) that matches your weight, discipline, and ice conditions.
Skating on unsharpened blades is dangerous and offers zero edge control. The initial sharpening also removes any minor imperfections from the manufacturing process.
What should I do if my new blades feel unstable after installation?
This almost always indicates a blade alignment issue. First, double-check that all mounting screws are fully tightened. If the problem persists, the blade is likely not centered properly on the boot’s sole.
You will need to remount it. Carefully re-use your alignment marks, ensuring the blade sits perfectly within the traced outline before re-tightening the screws in sequence.
How long does it take to break in new figure skate blades?
Most skaters need 1-2 hours of ice time to fully adapt to new blades. The break-in period involves adjusting your balance to the fresh profile and sharper edges. Start with basic edges and crossovers, avoiding aggressive jumps or spins initially.
Your muscles will adapt to the different pressure points. The feeling of “catching” on edges will lessen as you and the blades settle into a new normal.
Is it cheaper to replace blades or buy new skates?
Replacing blades is significantly cheaper if your boots are still supportive and in good condition. Blade costs vary, but you save on the labor of mounting and the cost of new boots. This is the most economical way to upgrade performance.
If your boots are broken down, cracked, or no longer fit properly, investing in new skates is the smarter, safer long-term decision. New blades cannot fix boot problems.
How often should I check the tightness of my blade screws?
Perform a quick check before every skating session for the first month after installation. Use your screwdriver to ensure no screws have loosened. Vibration from skating can occasionally work screws loose initially.
After the initial period, a weekly check is sufficient for most recreational skaters. Competitive skaters putting more stress on the mount should maintain a pre-session check as a standard safety habit.