Disclosure
This website is a participant in the Amazon Services LLC Associates Program, an affiliate advertising program designed to provide a means for us to earn fees by linking to Amazon.com and affiliated sites.
Dangerous blade wear is often subtle and easy to miss. Recognizing the signs before a tool fails is critical for preventing serious injury. This guide provides the expert knowledge you need to stay safe.
Ignoring wear signs can lead to catastrophic tool failure and life-altering accidents. Learning to identify early warning signs is your best defense. It protects both you and your workpiece from damage.
The Hidden Dangers of Worn Figure Skate Blades
For figure skaters, blade wear is a silent threat. It happens gradually with every glide, turn, and stop on the ice. You might not notice until your edges feel unreliable or your spins become unstable.
This slow degradation is dangerous. A blade that has lost its proper hollow or has nicked edges can catch unpredictably. This dramatically increases your risk of a nasty fall, especially during complex maneuvers.
Common signs include difficulty holding an edge, a feeling of “slipping out,” or excessive rust and pitting. Ignoring these signs doesn’t just hurt performance—it compromises your fundamental safety on the ice.
Quick Fix: The Essential Sharpening Kit
For minor maintenance between professional sharpenings, a quality honing stone is invaluable. It can smooth out small burrs and keep your edges feeling crisp. This extends the time between costly professional services.
A great option for home care is the Lansky Blademedic Knife Sharpener. While designed for knives, its fine ceramic rods are perfect for lightly touching up skate blade edges to remove micro-burns.
- Includes multiple ceramic rods for different edge conditions.
- Compact and portable for your skate bag.
- Helps maintain edge integrity between professional sharpening.
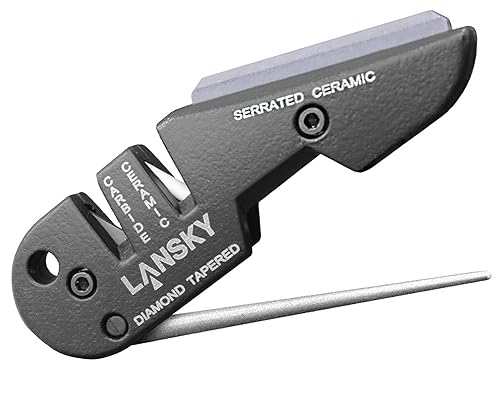
- 4-in-1: Knife sharpeners have one goal – to sharpen knives – and the…
- Simplicity: With the Blademedic, you can put a sharp edge back on any knife…
- Portable: You can take this Lansky sharpening system anywhere. At home and…
Check current price on Amazon →
When a Simple Sharpening Isn’t Enough
If your blades are deeply nicked, have lost their profile, or the steel is heavily worn, sharpening alone won’t restore safety. At this point, the blade may be beyond economical repair. Continuing to use severely compromised blades is an accident waiting to happen.
This is when investing in a new, high-quality pair becomes the only safe solution. For a durable upgrade, consider skates built with stainless steel blades that resist wear and corrosion. Our guide to the best figure skates with stainless steel blades is an excellent resource.
If you’re looking for a reliable new pair, read our in-depth Lake Placid Cascade Figure Ice Skates review. For younger skaters who outgrow skates quickly, our review of adjustable youth skates offers a practical and safe solution.
How to Identify Visual Signs of Blade Deterioration
Your first line of defense is a simple visual inspection. Many critical wear indicators are easy to spot with the naked eye. Conduct this check in good light before every use for maximum safety.
Look for these key visual red flags. Catching them early can prevent a blade from failing catastrophically during use. This routine takes less than a minute but is invaluable.
Inspecting for Edge Damage and Nicks
Run your finger lightly along the blade’s edge (be extremely careful!). Do not slide sideways. You are feeling for imperfections that disrupt a smooth line.
- Small Nicks: Tiny dents or rolls in the cutting edge. These cause vibration, poor cuts, and increase the risk of the blade catching and kicking back.
- Missing Teeth (Saw Blades): Check for any teeth that are chipped, broken, or completely gone. A blade with missing teeth cuts unevenly and is structurally compromised.
- Dull or Rounded Edge: The edge should look sharp and defined. If it appears rounded, shiny, or reflects light along its apex, it is dangerously dull.
Recognizing Corrosion and Heat Discoloration
Discoloration is a major warning sign. It often indicates improper use or storage, which weakens the steel.
Blue or Brown Tints: This is heat discoloration from excessive friction. It means the blade has been overheated, which ruins the steel’s temper and makes it soft and brittle.
Rust and Pitting: Surface rust can often be cleaned. However, deep pitting (small holes in the metal) creates weak points that can lead to sudden cracks and breaks.
| Sign | What It Means | Action Required |
|---|---|---|
| Small, shiny spots on edge | A dull, rounded cutting edge | Sharpen or replace immediately |
| Blue/Brown discoloration | Overheating; lost temper/hardness | Replace the blade |
| Deep nicks or chips | Impact damage; weak points | Replace the blade |
| Uniform rust | Poor storage; potential for pitting | Clean and inspect for pitting |
Performance Warning Signs of a Worn-Out Blade
Your tools will often tell you they’re failing before a visual inspection does. Paying attention to changes in performance is crucial for proactive safety. These signs indicate the blade is no longer cutting efficiently or safely.
Ignoring these warnings leads to forced cuts, increased kickback risk, and user fatigue. A blade that requires you to fight it is a blade that’s about to fail.
Increased Cutting Effort and Poor Results
A sharp blade cuts with minimal pressure. If you find yourself pushing harder, the blade is dull. This strains both you and your power tool’s motor.
- Burning Smells: Friction from a dull blade generates excessive heat. This can burn the material you’re cutting and produce a distinct smoky odor.
- Tearing & Splintering: Instead of clean cuts, the blade tears through fibers. This is especially evident in woodworking, where a sharp blade leaves a smooth surface.
- Wandering or Binding: The blade drifts off your cut line or gets stuck in the kerf. This indicates poor tooth geometry or set, increasing the chance of a dangerous kickback.
Abnormal Sounds and Vibration
A healthy blade operates with a consistent, smooth sound and feel. New, unusual noises and vibrations are critical auditory warnings.
High-Pitched Squealing or Whining: This often signals excessive friction due to a dull edge or improper blade alignment. It’s the sound of metal struggling against material.
Excessive Vibration in the Tool: While some vibration is normal, a significant increase is a red flag. It can be caused by a bent blade, uneven tooth wear, or missing teeth, all of which compromise control.
Step-by-Step: The Push Test for Dullness
This simple test helps confirm performance issues. Always ensure the tool is unplugged or the battery is removed first.
- Secure a piece of scrap softwood (like pine) firmly.
- With light pressure, try to push the blade’s teeth sideways across the wood grain.
- A sharp blade will bite and score the wood immediately. A dull blade will slide over the surface without catching.
Creating a Safe Blade Inspection and Maintenance Routine
Spotting wear is only half the battle. A consistent routine ensures you catch problems early every time. This habit is the cornerstone of long-term workshop safety and tool longevity.
Implementing a simple, repeatable process removes guesswork. It turns blade safety from a reaction into a reliable prevention strategy.
Pre-Use and Post-Use Inspection Checklist
Follow this quick checklist before you power on any tool and after you finish a job. It takes less than two minutes.
- Visual Scan: Look for nicks, cracks, rust, or discoloration. Ensure all teeth are present and intact on saw blades.
- Cleanliness Check: Remove any built-up pitch, resin, or material. A clean blade cuts cooler and reveals its true condition.
- Secure Mounting: Verify the blade is tightened correctly and the arbor washers are clean and flat. A loose blade is extremely dangerous.
- Performance Note: Mentally note how the blade performed. Was it harder to push? Did it burn the material? Log this for the next inspection.
Proper Blade Storage to Prevent Damage
Most blade wear happens during use, but improper storage causes unnecessary damage. Protect your investment between projects.
Use Blade Protectors: Always replace the original plastic guard or use a dedicated blade sleeve. This prevents edge contact with other tools.
Control Humidity: Store blades in a dry environment. Consider using silica gel packs in your toolbox to prevent corrosion and rust formation.
Hang or Lay Flat: Avoid stacking blades loosely in a drawer where they can knock against each other. Use a wall rack or individual slots.
When to Sharpen vs. When to Replace
Knowing this distinction saves money and prevents accidents. Not every worn blade can be salvaged.
| Condition | Recommended Action | Reason |
|---|---|---|
| Minor dullness, no nicks | Professional sharpening | Restores cutting performance economically. |
| Small, shallow nicks | Sharpen (if material allows) | A good sharpening service can often remove minor damage. |
| Multiple deep nicks, missing teeth, heat discoloration | Replace immediately | The blade’s structural integrity or heat treatment is compromised. |
| Visible crack or bend | Replace and discard safely | The blade is a fracture hazard and cannot be repaired. |
Special Considerations for Different Blade Types
While core safety principles are universal, different blades have unique failure points. Recognizing type-specific wear patterns is essential for accurate diagnosis.
A worn table saw blade behaves differently than a dull utility knife. Tailoring your inspection saves time and targets the right fixes.
Circular Saw and Table Saw Blades
These power tool blades face high stress and rotational forces. Their teeth are the primary wear components.
- Carbide Tip Loss: Check that the hard carbide tips on each tooth are fully intact. Chipped or missing carbide turns the blade into a inefficient, dangerous ripper.
- Gullet Clogging: The spaces (gullets) between teeth must be clear of packed sawdust and resin. Clogged gullets reduce chip clearance, causing overheating and binding.
- Plate Warping: Look at the blade sideways. A bent or warped blade plate will cause severe vibration and inaccurate cuts, signaling it must be replaced.
Hand Tool Blades: Knives, Chisels, and Planes
These blades rely on a single, continuous edge. Wear is often more subtle but just as critical for control and safety.
The “Wire Edge” or Burr: After sharpening, a tiny, fragile burr can form on the edge. If not properly removed, it can fold over during use, creating a false sense of sharpness that suddenly fails.
Edge Rolling: Using a hand tool on hard material or at a wrong angle can cause the fine edge to roll over. This is visible as a shiny line along the edge when light hits it.
Band Saw and Jig Saw Blades
These long, flexible blades are prone to fatigue and fracture. Their entire length must be inspected.
| Blade Type | Critical Checkpoint | Failure Risk |
|---|---|---|
| Band Saw Blade | Check for hairline cracks near the weld joint. | Catastrophic breakage under tension. |
| Band Saw Blade | Look for uneven tooth set (sideways bend). | Wandering cuts and increased blade stress. |
| Jig Saw Blade | Inspect for bending or twisting near the shank. | Blade snapping or breaking mid-cut. |
| Both Types | Examine for multiple consecutive dull teeth. | Inefficient cutting, overheating, and breakage. |
Proactive Habits to Extend Blade Life and Safety
Prevention is always better than reaction. Adopting smart usage habits drastically reduces wear before it starts. This protects both your tools and your well-being.
These practices minimize the forces that degrade blades. They are the hallmark of a skilled and safety-conscious craftsperson.
Choosing the Right Blade for the Material
Forcing a blade to cut material it wasn’t designed for is a primary cause of rapid dulling and damage. Match the blade to the task.
- Tooth Count Matters: Use a blade with fewer teeth (e.g., 24-tooth) for fast, aggressive ripping of wood. Use a high-tooth-count blade (80+ tooth) for smooth, clean crosscuts and veneers.
- Specialty Blades: Never use a wood blade on metal, masonry, or plastic. The wrong tooth geometry and heat treatment will cause immediate failure.
- Sharpness Over Economy: A sharp, appropriate blade requires less force. This reduces kickback risk and user fatigue, making it safer even if the blade costs more upfront.
Optimal Cutting Techniques to Reduce Wear
Your technique directly impacts blade stress. Smooth, controlled motions preserve the edge.
Let the Blade Do the Work: Apply steady, moderate feed pressure. Pushing too hard generates heat, flexes the blade, and dulls teeth prematurely.
Maintain a Consistent Speed: Avoid stopping and starting the cut within the material. This creates friction points that overheat and damage the blade’s edge.
Use Support and Guides: Ensure workpieces are firmly supported. Cutting unsupported material can cause pinching, which binds and damages the blade.
Essential Maintenance Between Projects
A few minutes of care after use prepares your blade for next time. This routine prevents corrosion and keeps edges clean.
- Clean Immediately: Remove sap, pitch, and resin with a dedicated blade cleaner or mild solvent. Built-up residue increases cutting resistance and heat.
- Dry Thoroughly: After cleaning or cutting wet material, dry the blade completely with a clean cloth to prevent flash rust.
- Apply a Protective Coating: A light spray of a corrosion inhibitor or even a thin wipe of machine oil on the steel plate protects it during storage.
- Store Properly: Return the blade to its protector or a dedicated storage rack, away from moisture and other tools.
Essential Safety Gear When Inspecting and Handling Blades
Inspecting a dangerous blade requires handling a dangerous blade. Protecting yourself during the maintenance process is non-negotiable. The right gear prevents accidental cuts and injuries.
Never assume a dull blade is a safe blade. A worn edge can be jagged and unpredictable, posing a serious laceration risk even during inspection.
Must-Have Personal Protective Equipment (PPE)
This basic kit should be within reach whenever you work with or on your tools. Do not compromise on quality here.
- Cut-Resistant Gloves (ANSI Level 3+): These are essential for handling blades. They protect against accidental slips and the sharp edges you’re inspecting. Never use bulky gloves near powered equipment.
- Safety Glasses or Goggles: Protect your eyes from metal fragments, cleaning solvents, and dislodged debris during inspection and cleaning.
- Stable Work Surface: Always place the blade on a clean, flat, non-slip surface like a rubber mat or bench block during inspection. This prevents it from rolling or sliding.
Safe Handling Procedures for Inspection
How you hold and move the blade is critical. Develop safe habits to minimize risk.
- Unplug/Take Out Battery First: Ensure the power tool is completely disconnected and cannot be activated accidentally.
- Handle by the Plate: Always grip the body or center plate of the blade, never by the teeth or cutting edge.
- Use a Brush for Cleaning: Use a stiff nylon or brass brush to clean teeth and gullets. Keep your fingers away from the edges.
- Store While Protected: Once inspected, immediately place the blade back into its guard or a blade sleeve before storing it.
When to Call a Professional
Some maintenance tasks exceed the safe scope for a DIYer. Knowing your limits is a safety skill.
| Task | Can I Do It? | Why/Why Not |
|---|---|---|
| Visual inspection & cleaning | Yes | Low risk with proper PPE and handling. |
| Minor burr removal with a hone | Yes, with caution | Requires a steady hand and proper technique. |
| Sharpening circular/table saw blades | No (for most) | Requires specialized, expensive equipment and expertise to maintain precise angles. |
| Repairing cracks or welding | Absolutely Not | Compromises structural integrity. The blade must be replaced. |
Common Mistakes That Accelerate Blade Wear
Often, blade damage is caused by simple, avoidable errors. Recognizing these pitfalls helps you prevent premature wear. This saves money and enhances safety.
Many of these mistakes stem from rushing or using improper techniques. A moment of carelessness can ruin a blade instantly.
Improper Tool Setup and Forced Cuts
An incorrectly set up tool forces the blade to work against itself. This creates excessive heat and stress.
- Misaligned Fences and Guides: If the workpiece pinches the blade during a cut, it can overheat, warp, or shatter teeth. Always ensure guides are parallel to the blade.
- Incorrect Blade Height (Circular/Table Saws): Setting the blade too high exposes more teeth, increasing the chance of kickback and bending. For most cuts, only 1/4 inch of tooth should show above the material.
- Feeding Too Fast: Pushing material aggressively overheats the blade and can cause carbide tips to fracture. Listen to the motor and feed at a steady, controlled pace.
Neglecting Basic Cleaning and Lubrication
Resin, pitch, and sap are not just dirty—they’re abrasive. They build up heat and increase cutting resistance.
Never Cleaning Blades: Built-up residue acts like glue, holding heat against the steel. This accelerates wear and can cause warping. Clean blades after every major project.
Ignoring Tool Maintenance: A saw with worn bearings or a wobbly arbor will cause the blade to run off-axis. This leads to uneven wear, poor cuts, and potential failure.
Using Dull or Damaged Blades “Just a Little Longer”
This is one of the most dangerous and costly habits. A dull blade doesn’t just perform poorly—it actively degrades.
| Initial Problem | Secondary Damage | Final Result |
|---|---|---|
| Using a dull blade | Increased friction and heat | Softens steel, ruining heat treatment |
| Softened, hot steel | Teeth deform and wear rapidly | Blade becomes irreparably damaged |
| User pushes harder | Increased risk of kickback and binding | High probability of user injury |
| Strained motor | Overheats and burns out tool | Costly tool repair or replacement |
Best Tools for Blade Inspection and Maintenance
Having the right tools makes blade inspection safer and more effective. These recommended products help you identify wear, perform basic upkeep, and store blades properly. Investing in quality gear supports a long-term safety routine.
Klein Tools 63200 Electrical Tester and Inspection Mirror
This versatile tool is ideal for inspecting hard-to-see areas like gullets and the backside of blades. The bright LED light and 2-inch swivel mirror let you spot cracks, resin buildup, and tooth damage without unsafe hand positioning. It’s essential for a thorough visual check.

- ACCURATE CIRCUIT BREAKER IDENTIFICATION: Quickly locate the correct breaker…
- CLEAR INDICATIONS: The Receiver provides visual and audible cues when the…
- BUILT-IN GFCI TESTER: The Transmitter includes a GFCI outlet tester,…
DEWALT DPG572 PU A3 Cut-Resistant Gloves, Large
Safety first. These ANSI Level A4 cut-resistant gloves provide crucial protection when handling sharp blades during inspection and cleaning. The nitrile-coated palms offer a secure grip, preventing accidental slips. They are ambidextrous, machine washable, and a fundamental part of your PPE kit.

- A3 CUT RESISTANCE: Certified to ANSI/ISEA 105-2016 standards, the DEWALT…
- GRIP AND ABRASION RESISTANCE: The polyurethane palm coating enhances grip…
- BREATHABLE FLEXIBILITY: Designed with a 13-gauge polyester shell, this…
CRXCRC Garage Tool Organizer
Proper storage prevents damage between uses. This wall-mountable rack securely holds up to 10 circular saw blades by their arbors, keeping them separated and organized. The protective polymer coating guards against nicks and rust, extending blade life and making your workshop safer and tidier.
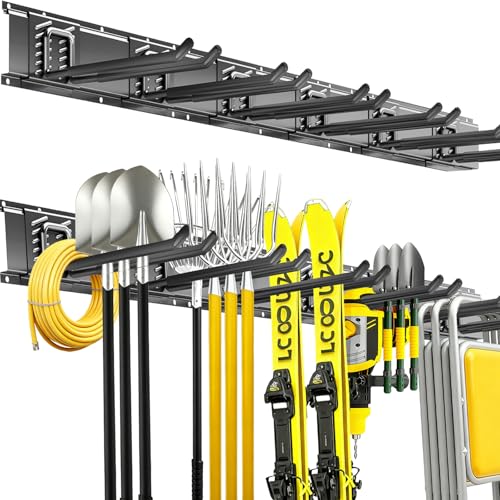
- OPTIMIZE YOUR SPACE: garden tool organizer compact design helps you…
- ADJUSTABLE & VERSATILE STORAGE: tool organizers and storage features 3…
- HEAVY-DUTY 480 LBS CAPACITY: garage organizers and storage Constructed from…
Conclusion: Mastering Blade Safety Through Proactive Inspection
Learning to spot dangerous blade wear is a critical safety skill. It prevents accidents before they happen. This protects you, your tools, and your projects from harm.
Make visual and performance checks a non-negotiable part of your routine. Consistency is your best defense against unexpected tool failure. A sharp, well-maintained blade is also a safer, more efficient blade.
Start implementing the inspection checklist from this guide today. Review your most-used blades using the signs and methods outlined. Share this knowledge with others in your workshop to elevate everyone’s safety.
With vigilance and the right habits, you can confidently use your tools, knowing you’ve eliminated a major hidden risk.
Frequently Asked Questions about Blade Wear and Safety
What are the most dangerous signs of blade wear?
The most critical signs are visible cracks in the blade body, missing or chipped teeth, and significant heat discoloration (blue/brown tints). These indicate structural compromise and immediate replacement is required. Deep nicks, excessive vibration, and a blade that bends or wobbles are also high-risk warnings that demand urgent attention.
How often should I inspect my saw blades for wear?
Perform a quick visual and performance check before every major use. A more thorough inspection should follow any project where the blade was forced, made burning smells, or cut hard materials. For frequent users, a formal weekly inspection of all blades in rotation is a proven best practice for safety.
Can a dull blade really cause kickback?
Yes, absolutely. A dull blade requires more force to push through material, increasing the chance of the workpiece binding. It also cuts less efficiently, causing it to climb and catch on the material. This combination of factors dramatically raises the risk of a violent, unpredictable kickback incident.
What is the best way to clean a saw blade safely?
First, ensure the tool is unplugged. Wear cut-resistant gloves and safety glasses. Use a dedicated blade cleaner or a solution of mild detergent and warm water with a nylon or brass brush. Avoid harsh abrasives. Dry the blade immediately and thoroughly after cleaning to prevent rust formation on the clean steel.
Is it worth sharpening a blade or should I just replace it?
Sharpening is cost-effective for quality blades with minor dullness and no structural damage. However, replace the blade if it has missing carbide teeth, deep nicks, heat damage, or cracks. For inexpensive blades, replacement is often more economical than professional sharpening services.
Why does my new blade vibrate excessively?
Excessive vibration in a new blade often points to installation error or tool issues. Ensure the blade is mounted correctly, the arbor washers are clean and flat, and the blade is appropriate for your saw’s RPM. If problems persist, the blade itself may be defective or your saw’s arbor or bearings could be worn.
What is blade “runout” and why is it dangerous?
Runout is when a blade wobbles or doesn’t spin in a true plane. It’s often caused by a bent blade, dirty arbor, or worn tool bearings. This is dangerous because it creates uneven cutting forces, poor cut quality, and significantly increases the risk of binding and kickback. It also accelerates uneven wear.
How can I safely dispose of a damaged blade?
Never throw a sharp blade loosely in the trash. Wrap it securely in several layers of heavy cardboard or bubble wrap, then tape it closed. Mark the package “SHARP – CAUTION.” Many recycling centers accept metal blades. Alternatively, some hardware stores have blade disposal programs.