Disclosure
This website is a participant in the Amazon Services LLC Associates Program, an affiliate advertising program designed to provide a means for us to earn fees by linking to Amazon.com and affiliated sites.
Figure skate blades come loose primarily due to vibration, impact, and normal wear. This common issue can compromise your safety and performance on the ice. Our complete guide explains the causes and provides expert tightening methods.
A loose blade creates instability, hindering spins, jumps, and basic edges. Learning to fix it yourself is an essential skill for any skater. It ensures consistent performance and prevents dangerous accidents.
Diagnosing a Loose Figure Skate Blade
Identifying a loose blade is the first critical step. The problem often starts subtly before becoming a major hazard. Listen and feel for specific warning signs during your skate sessions.
Common symptoms include a faint rattling sound on the ice or a slight “wiggle” when you press the blade sideways. You may also feel unstable on edges or hear a clicking noise with each push. These signs indicate the mounting screws have lost their secure hold.
This loosening is typically caused by the intense vibration from jumps and landings. Regular sharpening can also gradually wear down the screw threads over time. Understanding the cause helps you prevent the issue from recurring after a fix.
Your Essential Tool for a Quick Fix
To tighten your blades, you need the right tool. Using an improper screwdriver can strip the screw heads, causing permanent damage. A dedicated skate tool is a small investment that protects your expensive equipment.
We recommend the SONIC Pro Inline Skate Tool. It’s designed specifically for ice skates and is a must-have for any skater’s bag.
- Includes the correct hex key sizes for most blade and sole screws.
- Features a durable, rust-resistant construction.
- Compact design that fits easily in a skate bag for on-the-go adjustments.

- ESSENTIAL: A must-have for changing wheels, removing bearings and more
- 6 TOOLS: 4 mm Hex, Phillips #2, flat head, bearing pusher, bearing press,…
- VERSATILE: 2 screwdriver tips for adjusting hockey helmets
Check current price on Amazon →
When Tightening Isn’t the Solution
Sometimes, screws come loose because the boot itself is compromised or the blade is worn out. If screws won’t hold tight, the threaded inserts in the sole may be stripped. This requires professional repair at a skate shop.
Persistent loosening can also signal that it’s time for an equipment upgrade. Older skates lose their structural integrity. For superior stability, consider investing in high-quality figure skates with stainless steel blades.
If you’re experiencing general discomfort that compounds stability issues, the right boot is key. Explore our guide to the most comfortable ice skates for better support. For younger skaters who are outgrowing gear quickly, adjustable youth ice skates offer a perfect fit for developing skills safely.
How to Tighten Figure Skate Blades: A Step-by-Step Guide
Properly securing your blades is a straightforward process with the right technique. Following these steps ensures a safe, stable fix that lasts. Always work in a well-lit, clean area to avoid losing small screws.
Gathering Your Tools and Preparing Your Skates
You will need a few specific items before you begin. The correct tools prevent damage and make the job easy. Preparation is key to a successful blade tightening.
- Correct Screwdriver or Hex Key: Match the tool exactly to your screw type (usually a hex/Allen key). Using the wrong size will strip the screw head.
- Clean Cloth: Wipe away ice melt, dirt, and debris from the blade mounting area and screws.
- Good Lighting: Ensure you can clearly see the screw heads and the blade’s alignment on the sole.
Place your skate on a stable surface with the sole facing up. Clean all screws and holes thoroughly. This allows for a proper inspection and a clean connection.
The Tightening Process and Blade Alignment Check
This sequence ensures even pressure and maintains crucial blade alignment. Rushing or tightening screws in the wrong order can misalign the blade. Patience here improves your skate’s performance.
- Finger-Tighten First: Start by threading all screws in by hand to avoid cross-threading.
- Follow a Criss-Cross Pattern: Just like a car tire, tighten screws diagonally (e.g., front left, then rear right). This applies even pressure.
- Apply Final Torque: Using your tool, give each screw a final, firm quarter-turn in the same criss-cross pattern. Stop when you feel solid resistance.
After tightening, perform a visual alignment check. Look down the length of the blade from the toe. It should be perfectly centered along the midline of the boot’s sole.
Preventing Your Skate Blades from Coming Loose
Proactive maintenance is the best defense against loose blades. Consistent care reduces wear on screws and mounting points. This saves you from mid-session adjustments and potential safety issues.
Establishing a simple pre-skate and post-skate routine is highly effective. This habit takes only a minute but dramatically extends your equipment’s life. Prevention focuses on minimizing vibration impact and thread wear.
Essential Pre-Skate and Post-Skate Checks
Make blade security a part of your regular skate preparation. A quick visual and physical check can catch a problem before you step on the ice. This simple habit is a cornerstone of good skate maintenance.
- The Wiggle Test: Before each use, hold the boot and gently try to wiggle the blade sideways. There should be absolutely no movement or play.
- Visual Screw Inspection: Look for screws that appear raised or different from the others. Ensure all are flush with the sole or blade plate.
- Post-Skate Wipe-Down: After skating, always dry your blades and soles thoroughly. This prevents rust on screws and in the threaded holes, which weakens them.
Advanced Maintenance: When to Use Threadlocker
For skaters who frequently experience loosening, a thread-locking compound can be a game-changer. Threadlocker is a liquid applied to screw threads that hardens to prevent vibration from backing them out. Use only the blue, removable (medium-strength) type, never the permanent red.
Consider your sharpening schedule as part of prevention. Frequent sharpening removes metal, which can slightly change the blade’s mounting pressure. Inform your sharpener if you have persistent loosening issues; they can check for related problems.
Common Tightening Mistakes and How to Avoid Them
Even with good intentions, skaters can make errors that worsen the problem. These mistakes often lead to damaged equipment or unsafe skating conditions. Knowing what to avoid is as important as knowing the correct procedure.
Most errors stem from using the wrong tools or applying excessive force. Rushing the process is another major culprit. Avoiding these pitfalls protects your investment and your safety on the ice.
Using Improper Tools and Overtightening
The wrong tool is the fastest way to ruin your skate’s mounting system. A screwdriver that doesn’t fit perfectly will cam out, stripping the screw head. This makes future adjustments or professional repairs extremely difficult.
- Avoid Universal Tools: Don’t use a multi-bit screwdriver unless the bit fits the screw perfectly with zero play.
- Never Use Pliers: Gripping the screw head with pliers will almost certainly strip it. Always use the correct driver.
- Respect the “Snug”: Screws should be firm, not forced. If you’re straining your wrist, you’re overtightening. This can crack the sole or strip the internal insert.
Ignoring Alignment and Failing to Re-Check
Tightening a blade that has shifted out of alignment locks in a performance problem. You might fix the looseness but create poor edge control. Always verify the blade is centered before final tightening.
Another critical mistake is not re-checking your work. A blade can feel tight off the ice but loosen under the stress of skating.
| Mistake | Consequence | Prevention Tip |
|---|---|---|
| Tightening screws in a circle | Misaligned blade, uneven pressure | Always use a criss-cross pattern (diagonal sequence). |
| Not checking after first skate | Unexpected loosening during a session | Perform the “wiggle test” again after 15-20 minutes of skating. |
| Ignoring rust on screws | Weakened threads, seized screws | Replace rusty screws immediately and keep the area dry. |
When to Seek Professional Skate Repair Help
While DIY tightening is a vital skill, some situations require an expert. Recognizing these signs prevents you from causing irreversible damage to your skates. A professional skate technician has the tools and experience for complex fixes.
Persistent problems often indicate a deeper issue with the boot or blade mounting system. Attempting further repairs yourself can turn a small problem into a costly one. Knowing when to stop and seek help is a mark of a smart skater.
Signs You Need a Skate Shop Technician
Certain symptoms point directly to damage that goes beyond simple screw tightening. If you encounter any of the following, it’s time to visit a reputable pro shop. They can properly diagnose and resolve the underlying cause.
- Stripped Screw Heads or Threads: If the tool spins without gripping, or a screw won’t tighten or loosen, the threads are likely damaged.
- Visible Damage to the Sole: Look for cracks in the heel or sole material around the mounting plates. This compromises structural integrity.
- Blade Will Not Hold Alignment: If the blade consistently shifts off-center no matter how you tighten it, the mounting plates may be bent or worn.
- Screws Bottom Out: The screws tighten but the blade still moves. This indicates the threaded inserts in the sole are pulled out or stripped.
What to Expect from a Professional Repair
A good technician will assess the entire boot and blade system. They can perform repairs that are not feasible at home, ensuring your safety is restored. This service is an investment in your equipment’s longevity.
Common professional solutions include heli-coil inserts for stripped threads, sole replacement, or re-mounting the blade with new hardware. For frequent, serious issues, they may honestly advise that new skates are the most cost-effective and safe solution.
Choosing Skates to Minimize Blade Loosening Issues
Your equipment’s quality plays a fundamental role in blade stability. Higher-grade skates are engineered to withstand the forces that cause loosening. Investing in well-constructed skates is a proactive long-term solution.
Key features in the boot and blade design directly impact mounting security. Understanding these features helps you make an informed purchase. This reduces future maintenance headaches and improves on-ice confidence.
Key Features for Enhanced Blade Stability
When selecting new figure skates, prioritize construction elements that promote a secure mount. These features are often found in intermediate and advanced models. They provide a more robust foundation for the blades.
- Stainless Steel Blades: These are harder and more durable than carbon steel. They resist flexing and hold a mounting position better under stress.
- Reinforced Sole and Heel: Look for skates with a durable, layered leather or composite sole. A sturdy heel cup also prevents cracking around mounting screws.
- Quality Mounting Hardware: Higher-end skates often use superior screws and threaded inserts that are less prone to stripping.
- Proper Fit: A correctly fitted boot flexes as intended. An ill-fitting boot creates abnormal stress points that can loosen hardware.
Skate Types and Their Typical Performance
Different skate categories are built for different levels of stress. Understanding this helps set realistic expectations for maintenance.
| Skate Type | Typical Construction | Blade Stability Expectation |
|---|---|---|
| Recreational/Beginner | Softer boot, lighter blade, standard hardware | May require more frequent checks; suited for light use. |
| Intermediate | Stiffer boot, better blades, improved mounting | Good stability for learning jumps; regular maintenance advised. |
| Advanced/Professional | Stiffest boot, high-grade blades & hardware | Designed for high-impact landings; offers the most secure mount. |
For skaters ready to upgrade, exploring models built for performance is key. Consider our detailed review of the 5th Element Grace ice skates for an example of advanced construction. For those seeking top-tier components, our guide to the best stainless steel blade skates is an essential resource.
Essential Maintenance Kit for Every Skater
Being prepared is the best way to handle blade issues quickly and correctly. A simple, personalized maintenance kit ensures you’re never caught off guard. This proactive approach saves time and protects your equipment from makeshift fixes.
Your kit doesn’t need to be large or expensive. It should contain a few key items tailored to your specific skates. Keep it in your skate bag for easy access at the rink or at home.
Must-Have Items for Your Skate Bag
These tools address the most common blade and boot maintenance needs. With these items, you can perform 95% of minor adjustments and emergency fixes. This empowers you to maintain optimal performance.
- Dedicated Skate Tool/Correct Screwdriver: The single most important item. Ensure it fits your blade and sole screws perfectly.
- Microfiber Cloth: For drying blades and wiping away debris before any adjustment. Prevents rust and grit from damaging threads.
- Blue (Removable) Threadlocker: A small bottle for persistent loosening problems. Remember, a single drop per screw is sufficient.
- Spare Screws: Obtain a few extra screws that match your skate’s hardware from your pro shop or manufacturer.
- Small Container: A pill case or tiny zippered bag to hold spare screws and the threadlocker, preventing loss in your bag.
Building a Routine Around Your Kit
Your tools are only effective if you use them consistently. Integrate kit checks into your regular skate care schedule. This habit turns reactive panic into calm, routine maintenance.
- Post-Skate: Use cloth to dry blades and soles thoroughly.
- Pre-Skate: Perform visual inspection and “wiggle test.”
- Weekly (off-ice): Use tool to verify screw tightness. Check kit for missing items.
Periodically inspect your tools themselves. Ensure your screwdriver tips are not worn and your cloth is clean. A well-maintained kit is the hallmark of a serious and safe skater.
Best Tools for Tightening Figure Skate Blades
Having the right tool is non-negotiable for safe and effective blade maintenance. These three options cover different needs, from the essential basic tool to a comprehensive kit. Each prevents damage and ensures a secure, professional-quality tighten.
SONIC Pro Inline Skate Tool – Best Overall Choice
The SONIC Pro is the ideal all-in-one solution for most skaters. It features four precisely sized hex keys that fit the vast majority of blade and sole screws. The durable, rust-resistant aluminum body is compact for your skate bag. This tool eliminates guesswork and prevents stripped screws.
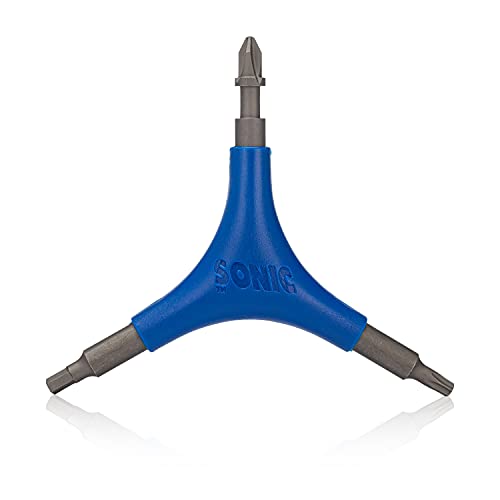
- ESSENTIAL: A must-have for changing wheels, removing bearings and more
- 9 TOOLS: 4 mm Hex, T25 Torx, 2 Bearing Pushers, Bearing Extractor, Bearing…
- ERGONOMIC: Comfortable handle for grip and leverage
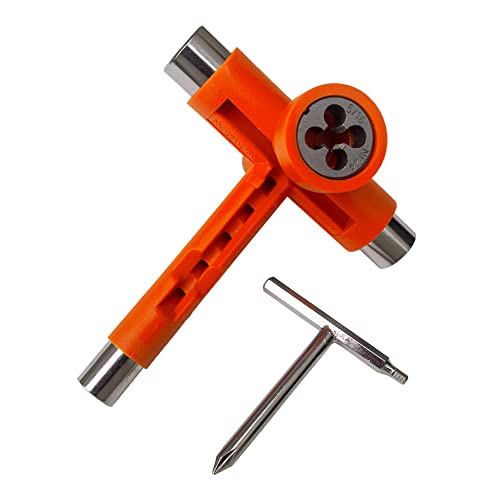
Zeato All-in-One Skate Tools – Best Basic Tool
For a simple, reliable, and affordable single-purpose tool, the Zeato All-in-One Skate Tools is excellent. It offers the correct 4mm hex head for most Jackson and Ultima blades. The comfortable, knurled handle provides good grip for applying even pressure. It’s a perfect, no-fuss starter tool for recreational and beginner skaters.
![Zeato [Upgrade Version] All-In-One Skate Tools Multi-function Portable...](https://m.media-amazon.com/images/I/41JyWjOQ4GL.jpg)
- [Multi-functional Tool]: A multi functional skateboard T tool that allows…
- [All-in-One Design]: The all in one skate tool has everything you need to…
- [Innovative Structure]: The skateboard T tool includes 3 different sizes of…
Reflex Skate Tool – Best for Advanced Maintenance
The Reflex Skate Tool is for skaters who perform more complex adjustments. It includes hex keys, a socket for toe stop nuts, and a blade bolt wrench. This versatility handles blade mounting, plate adjustments, and toe stop changes. It’s the best option for dancers, serious figure skaters, and roller derby players who need multi-purpose functionality.
- BEST TOOL FOR SKATEBOARDS: Change wheels, adjust axle nuts, insert or…
- ROLLERSKATES TOO!: Must-have roller skate tool for men and women skaters…
- PATENTED DESIGN: Includes everything you need to repair your stripped axles…
Conclusion: Mastering Skate Blade Maintenance for Safety and Performance
Keeping your figure skate blades securely fastened is fundamental. It ensures your safety and unlocks consistent on-ice performance. This guide provides the complete process from diagnosis to prevention.
The key takeaway is to establish a simple, regular check routine. Combine this with the correct tools and proper tightening technique. This proactive approach prevents most problems before they start.
Invest in a dedicated skate tool and build your maintenance kit today. Your confidence on the ice begins with trust in your equipment. Now you have the knowledge to maintain that trust securely.
Frequently Asked Questions About Loose Figure Skate Blades
What is the main cause of figure skate blades coming loose?
The primary cause is vibration from jumps and landings. This constant impact gradually works screws loose over time. Regular sharpening can also contribute by slightly altering the blade’s contact points.
Environmental factors like moisture causing rust on threads, and using incorrect tools that strip screws, are other common culprits. A proper tightening technique and routine checks directly combat these causes.
How tight should figure skate blade screws be?
Screws should be firmly snug, but never overtightened. Use a criss-cross pattern and stop when you feel solid resistance. Overtightening can strip the threads in the sole or even crack the boot material.
A good rule is to use moderate pressure with the correct tool. If you are straining your wrist, you are applying too much force. The blade should have zero side-to-side movement when you try to wiggle it.
Can I use Loctite on my skate blades?
Yes, but you must use only the blue, removable (medium-strength) Loctite 243. Never use the red permanent threadlocker. Apply a single small drop to the screw thread, not the head, and tighten immediately.
This is recommended for skaters with persistent loosening issues despite proper tightening. It secures the screws against vibration but still allows for future removal with standard tools for sharpening or blade changes.
What should I do if my blade screw is stripped?
Stop trying to tighten or remove it immediately. Forcing a stripped screw will cause further damage. This is a clear sign you need professional help from a skate shop technician.
A technician can often extract the stripped screw and install a helicoil insert to repair the threads. Continuing to skate with a stripped screw compromises the entire mounting system’s integrity.
How often do professional skaters check their blades?
Professional and competitive skaters check blade security very frequently, often before every on-ice session. Due to the high-impact nature of advanced jumps, they might perform a quick tool check several times a week.
They incorporate this into their pre-skate ritual alongside other equipment checks. This proactive habit is a key part of their training routine and injury prevention strategy.
Is it safe to temporarily fix a loose blade at the rink?
Yes, if you have the correct tool with you. Carry a dedicated skate multi-tool in your bag. Find a quiet area, dry the screws and sole, and tighten them properly using the criss-cross method.
It is only safe if you can achieve a secure fix. Never skate on a blade that still has play. If you cannot tighten it properly, it is safer to end your session and seek professional repair.
Do new skates have a break-in period for blade tightness?
Yes, new skates can require more frequent checks during the initial break-in period. As the stiff new boot flexes and molds to your foot, subtle shifts can occur that may affect the mounting.
Check the screws after the first few hours of skating on new boots. It’s also wise to have a professional re-check the mounting after the initial break-in to ensure everything has settled correctly.
What’s the difference between a loose blade and a broken blade mount?
A loose blade involves screws that have lost tension but the mounting plates are intact. Tightening the screws fixes it. A broken mount involves physical damage to the sole, heel, or the metal plates themselves.
Signs of a broken mount include cracks in the boot sole, screws that spin freely without tightening, or a blade that rocks even when screws are tight. This always requires immediate professional assessment and repair.
How Often Should I Check My Blade Screws?
Establishing a consistent check schedule prevents surprises. The frequency depends directly on how often and how hard you skate. More intense activity requires more vigilant monitoring.
- Recreational Skaters (1-2 times per week): Perform a visual and wiggle check before every skating session.
- Intermediate/Active Skaters (3+ times per week): Check before each session. Use your tool to verify tightness once a week.
- Competitive Skaters/Jumpers: Check before every session. A quick tool check 2-3 times per week is prudent due to high-impact landings.
Any time you hear a new rattle or feel instability, stop and check immediately. It’s better to pause for a one-minute check than risk a fall.
Can I Skate with a Slightly Loose Blade?
A “slightly” loose blade will quickly become very loose under the forces of skating. It also indicates the screws are not seated properly, which can damage the sole threads. Always tighten the blade securely before stepping onto the ice.
Why Do Only Certain Screws Keep Coming Loose?
This pattern usually points to uneven pressure or a minor alignment issue. The screws under the greatest stress from your specific skating style or weight distribution will loosen first. It could also indicate that the sole or blade plate is not perfectly flat in that area.
First, ensure you are tightening in the correct criss-cross pattern. If the problem persists on the same screws, inspect the holes and screws for wear or debris. A professional can assess if the mounting plate needs adjustment or shimming.